photo blogbuttonhome_zpsbfee85f8.png  photo blogbuttonhome_zpsbfee85f8.png  photo blogbuttonhome_zpsbfee85f8.png  photo blogbuttonhome_zpsbfee85f8.png  photo blogbuttonhome_zps0b2ad4ae.png  photo blogbuttonhome_zpsbfee85f8.png  photo blogbuttonhome_zps0b2ad4ae.png  photo blogbuttonhome_zpsbfee85f8.png  photo blogbuttonhome_zpsbfee85f8.png

Wednesday, March 26, 2014

Diamond in the Rough - Week 3


Hi! Hi! Hi!!

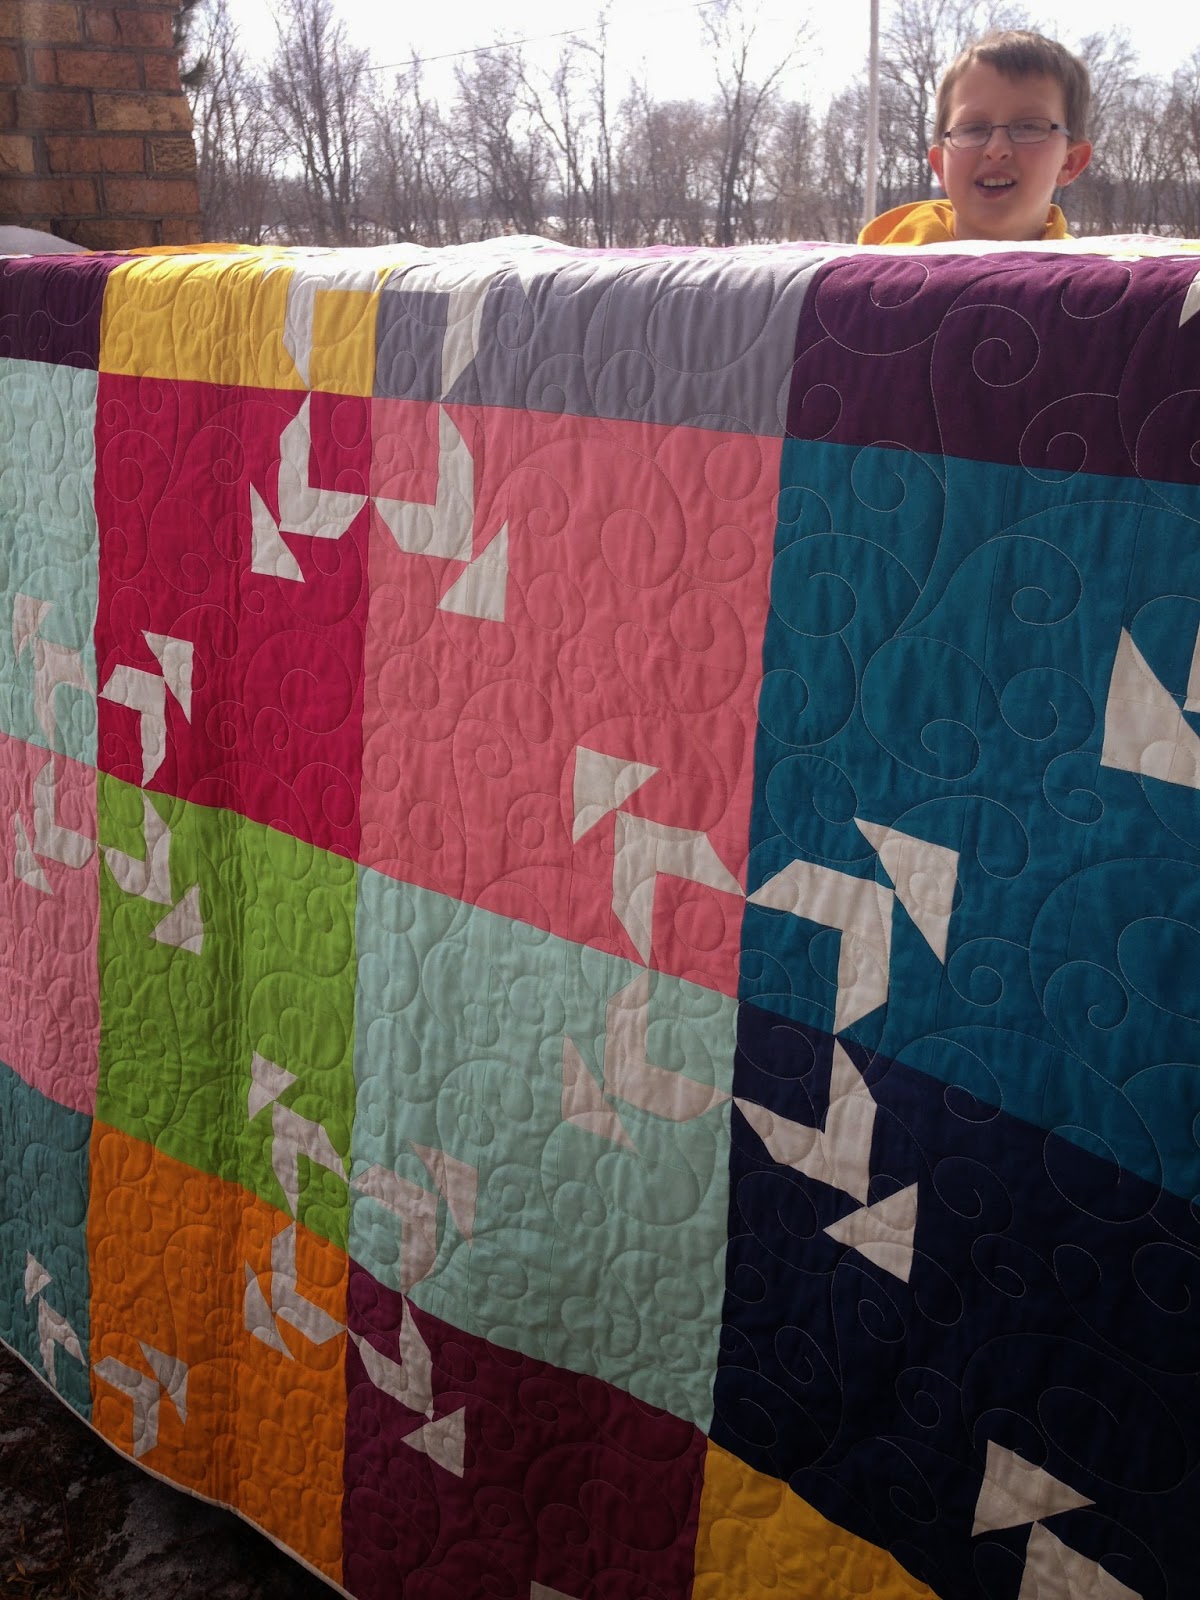
Once again we meet to do the next step in the Diamond in the Rough QAL! 

Just a few reminders....

1 - You can join at anytime! There are no sign ups and no actual deadlines! 
2 - Work at your own pace.  I have dates listed, but its ok if you get behind or maybe you are on vacation.  It's ok.  Just pick back up when you can.  The instructions will ALWAYS be here on my blog! 
3 - I created a FLICKR group for you to post any picture related to this QAL.  Add photos of your fabrics, progress photos, and of course completed projects! I can't wait to see what everyone is doing! Click HERE to go to the Flickr Group :) 

If you are just joining us, I've linked weeks 1 and 2 below.  Feel free to join us if you haven't already!! 


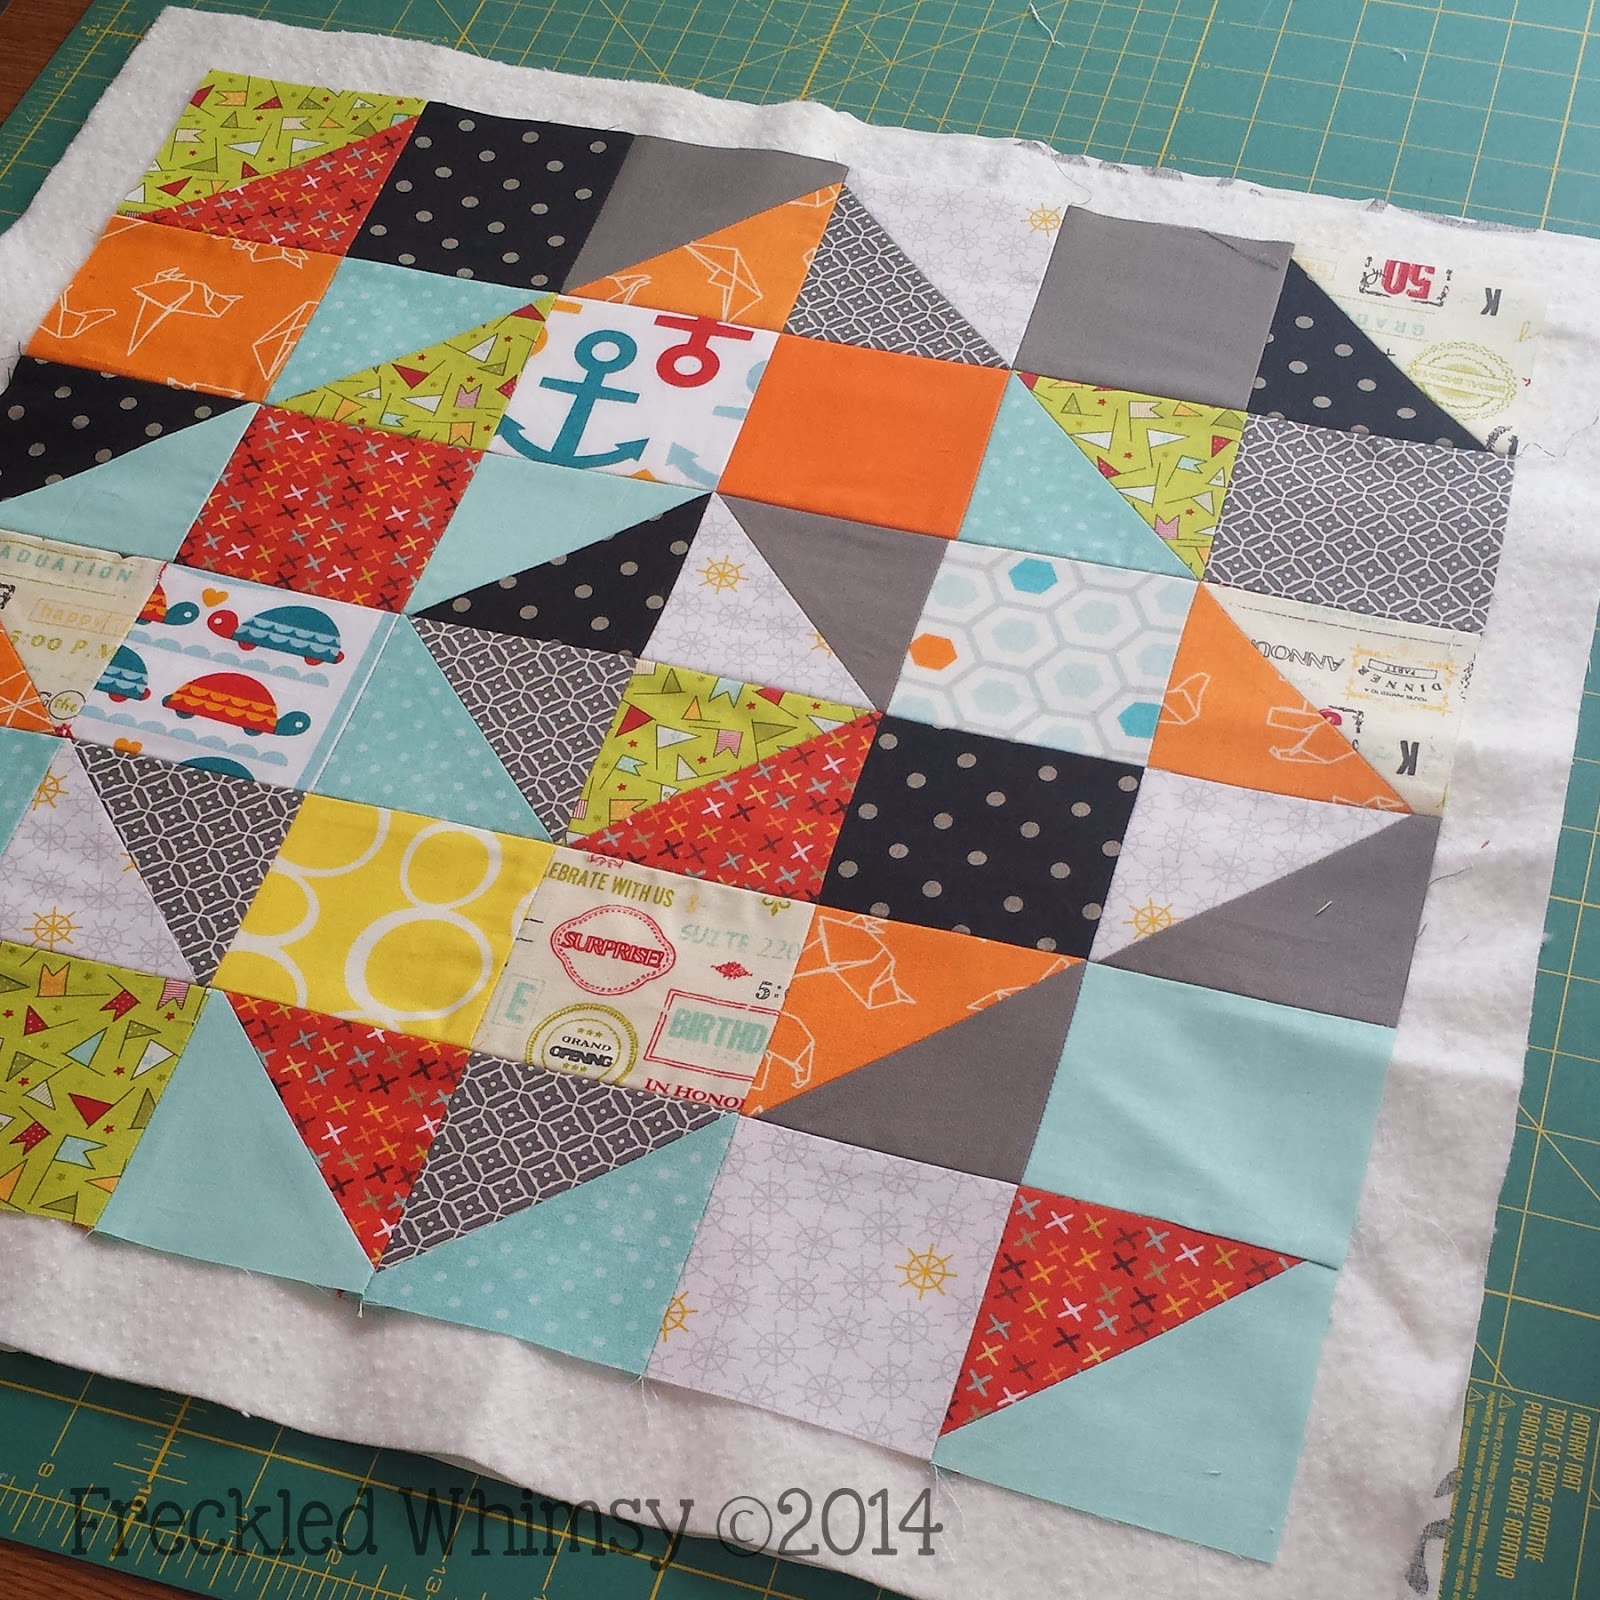
Begin Piecing Blocks is the next step in this wonderful process.  Most of the blocks are just squares but there are some Half Square Triangles too! From here on out I will be referring to Half Square Triangles as HST's. 

NOTE:: These directions will vary a touch depending on if you chose to cut your squares at 3 7/8" or 4".  If you cut them at 3 7/8" then you should have perfect 3 1/2" squares and will not need to complete steps 6 - 8.  If you cut your squares at 4", please complete all steps. 

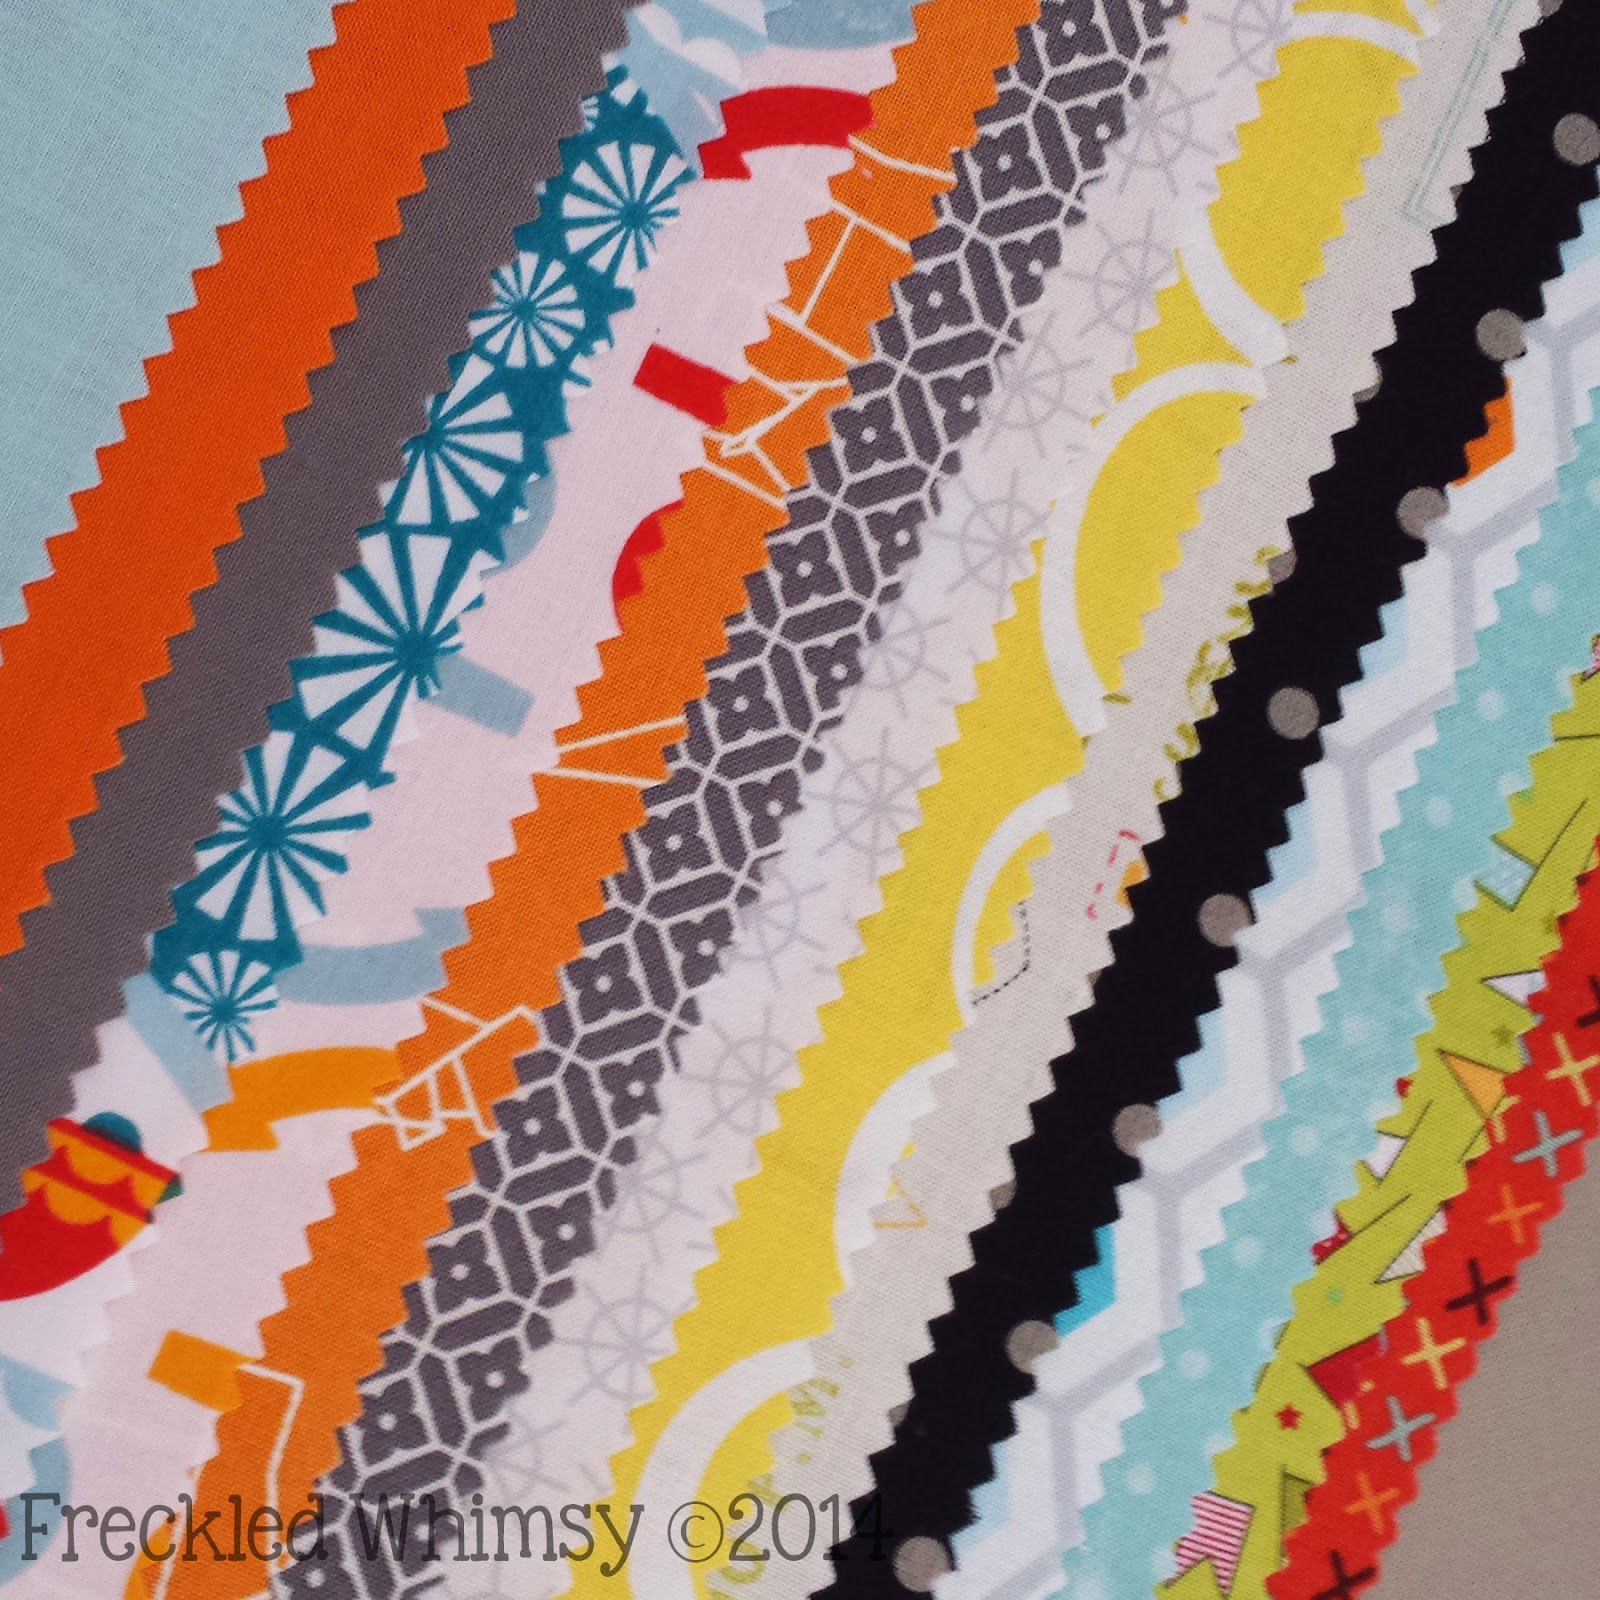
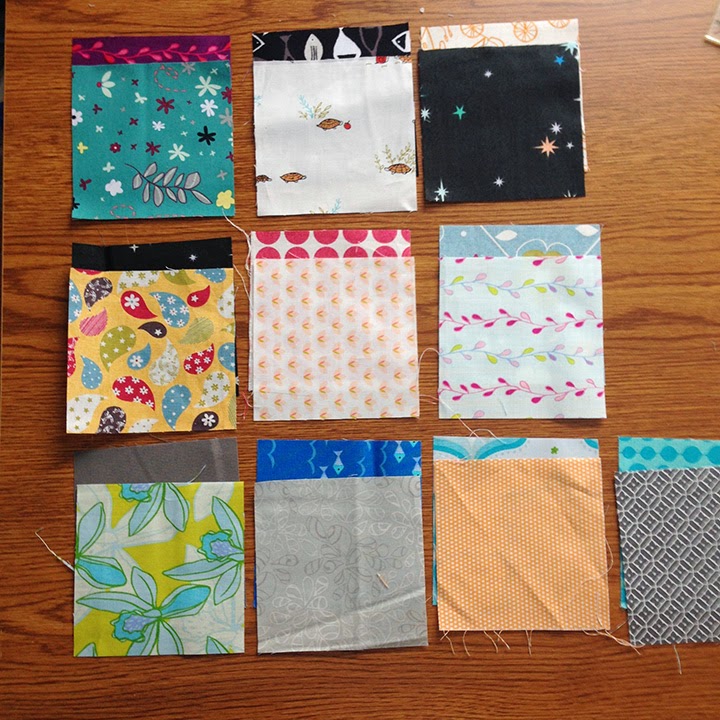
Step 1 : Take 20 of your squares (3 7/8" or 4", depending on what you chose).  Match them up to your liking.  I didn't worry too much about how I matched them up. Just make sure you have a little variety. 

You should have 10 pairs. 


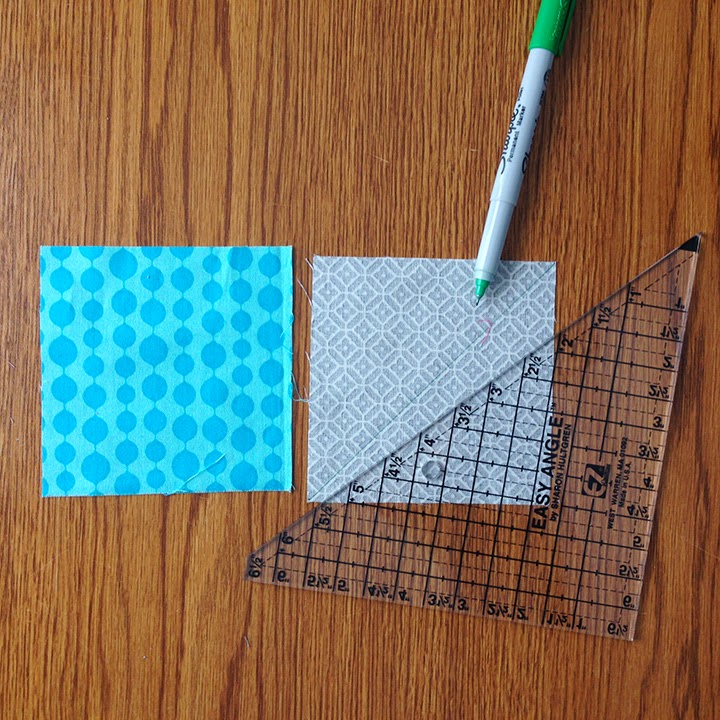
Step 2 : On the WRONG SIDE of ONE of each pair, draw a line from corner to corner. I used a fine line Sharpie for this but you can use a #2 pencil or marking pen/pencil as well.  

I LOVE my Easy Angle Ruler to do this step! It's the perfect size and so easy to handle! 

Step 3 : Place your paired squares together, RIGHT SIDES FACING, and sew 1/4" on either side of the drawn line.  

Chain piecing here makes this go SO much faster.  Sew down the one side of each of your pairs, then sew down the other side of each.  You should have a nice long "chain" of squares. Trim apart and follow next step. 


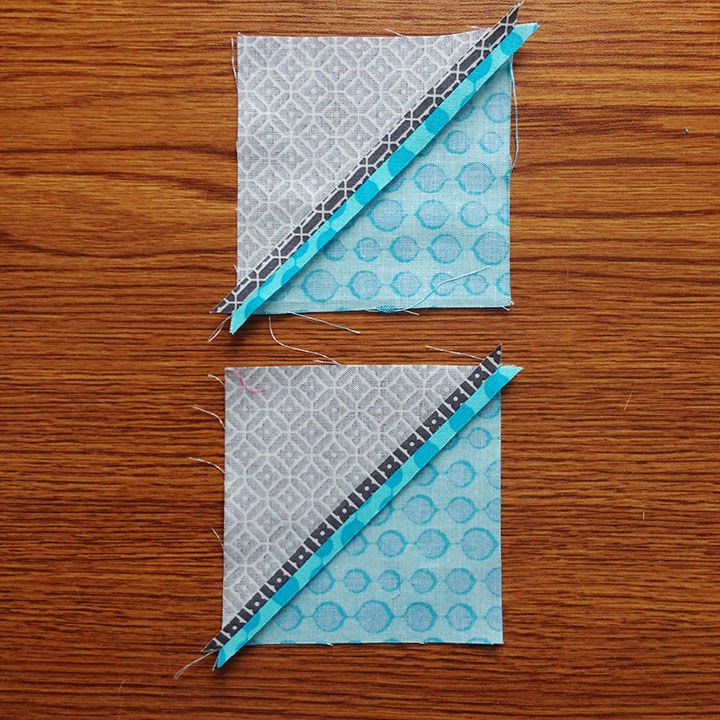
Step 4 : Next, using a ruler, cut ON the drawn line, creating two triangle pieces.  Do this for all 10 pieces. You should have 20 triangles, Half Square Triangles, that is! ;)

Again, my Easy Angle Ruler is my favorite!!!


Step 5 : Next we need to press our HST's.  I HIGHLY suggest pressing your seams open for this project.  There are MANY seams and sewing it together will be easier. Quilting it will be too, whether it be you or your quilter.  Your quilter will thank you for it!

Press all HST's.  You should have 20.


Step 6 : If you cut your original squares at 3 7/8" you should not need to proceed.  Your HST's should already measure 3 1/2" square.

If you cut yours at 4" like I did, we need to trim these HST's down to 3 1/2" square.

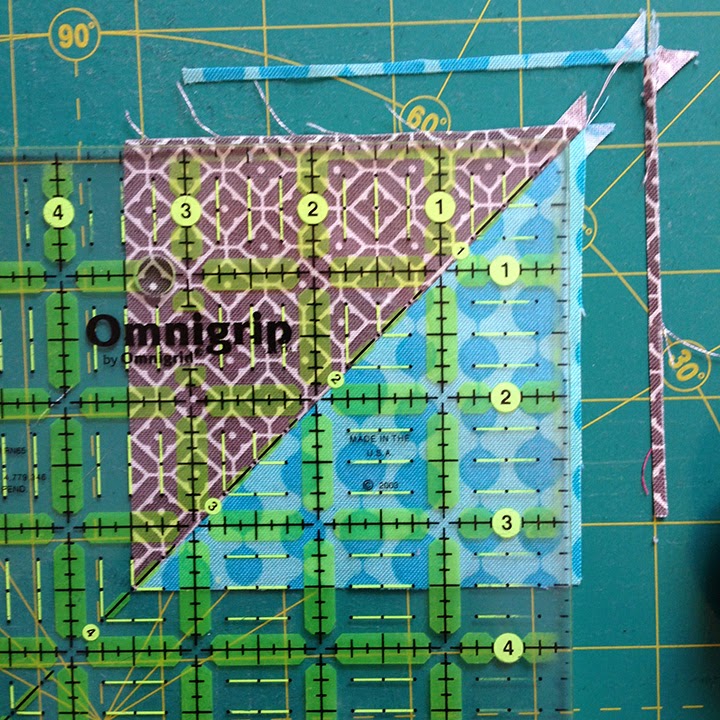
Using a ruler that has a 45 degree line, usually the line that runs from corner to corner, place that line ON your diagonal line as shown below.  Make sure you are checking all sides to be sure you are with in the 3 1/2" marks.

Example.. The left side of the below photo has the HST extending just beyond the 3 1/2" mark, and the same for the bottom.  The top and the right sides, extend beyond the ruler and the 45 degree line matches up with the diagonal line on the HST.

Make sure your HST is set up just like this for each HST before you trim.  Remember, measure twice, cut once!


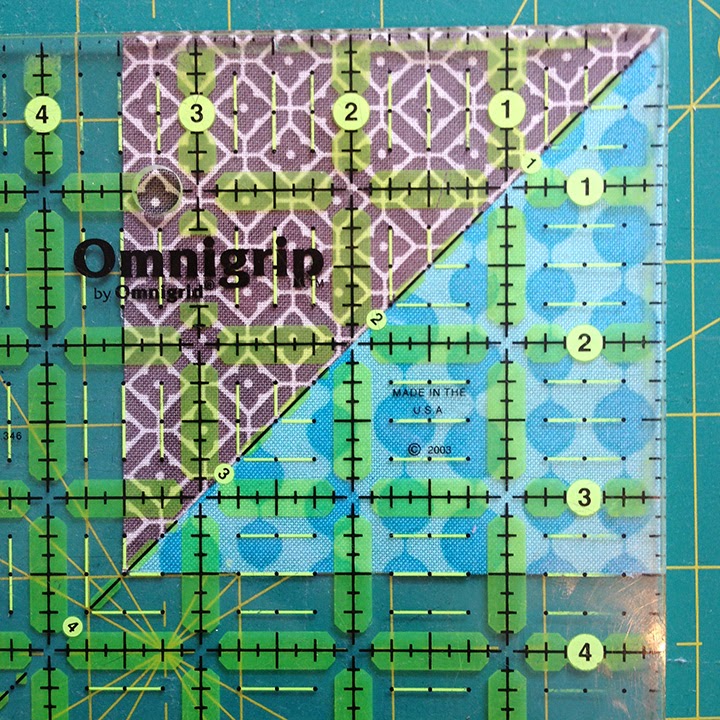
Step 7 : Now holding the ruler still, trim the excess from the right side and the top.

The below photo shows what it should look like.


Step 8 : Rotate your HST 180 degrees.  (Move the bottom left corner so that it is now in the upper right corner).

Line up the left edge and the bottom edge to the 3 1/2" marks on the ruler.  The HST should overhang just a tad on the top and the right again.

Once you have it lined up at the 3 1/2" marks, trim the right side and top.


Here is a photo of what your HST should look like once you've trimmed all 4 sides. 


Here is a photo showing the measurement the HST should be at. Double check just to be sure :)


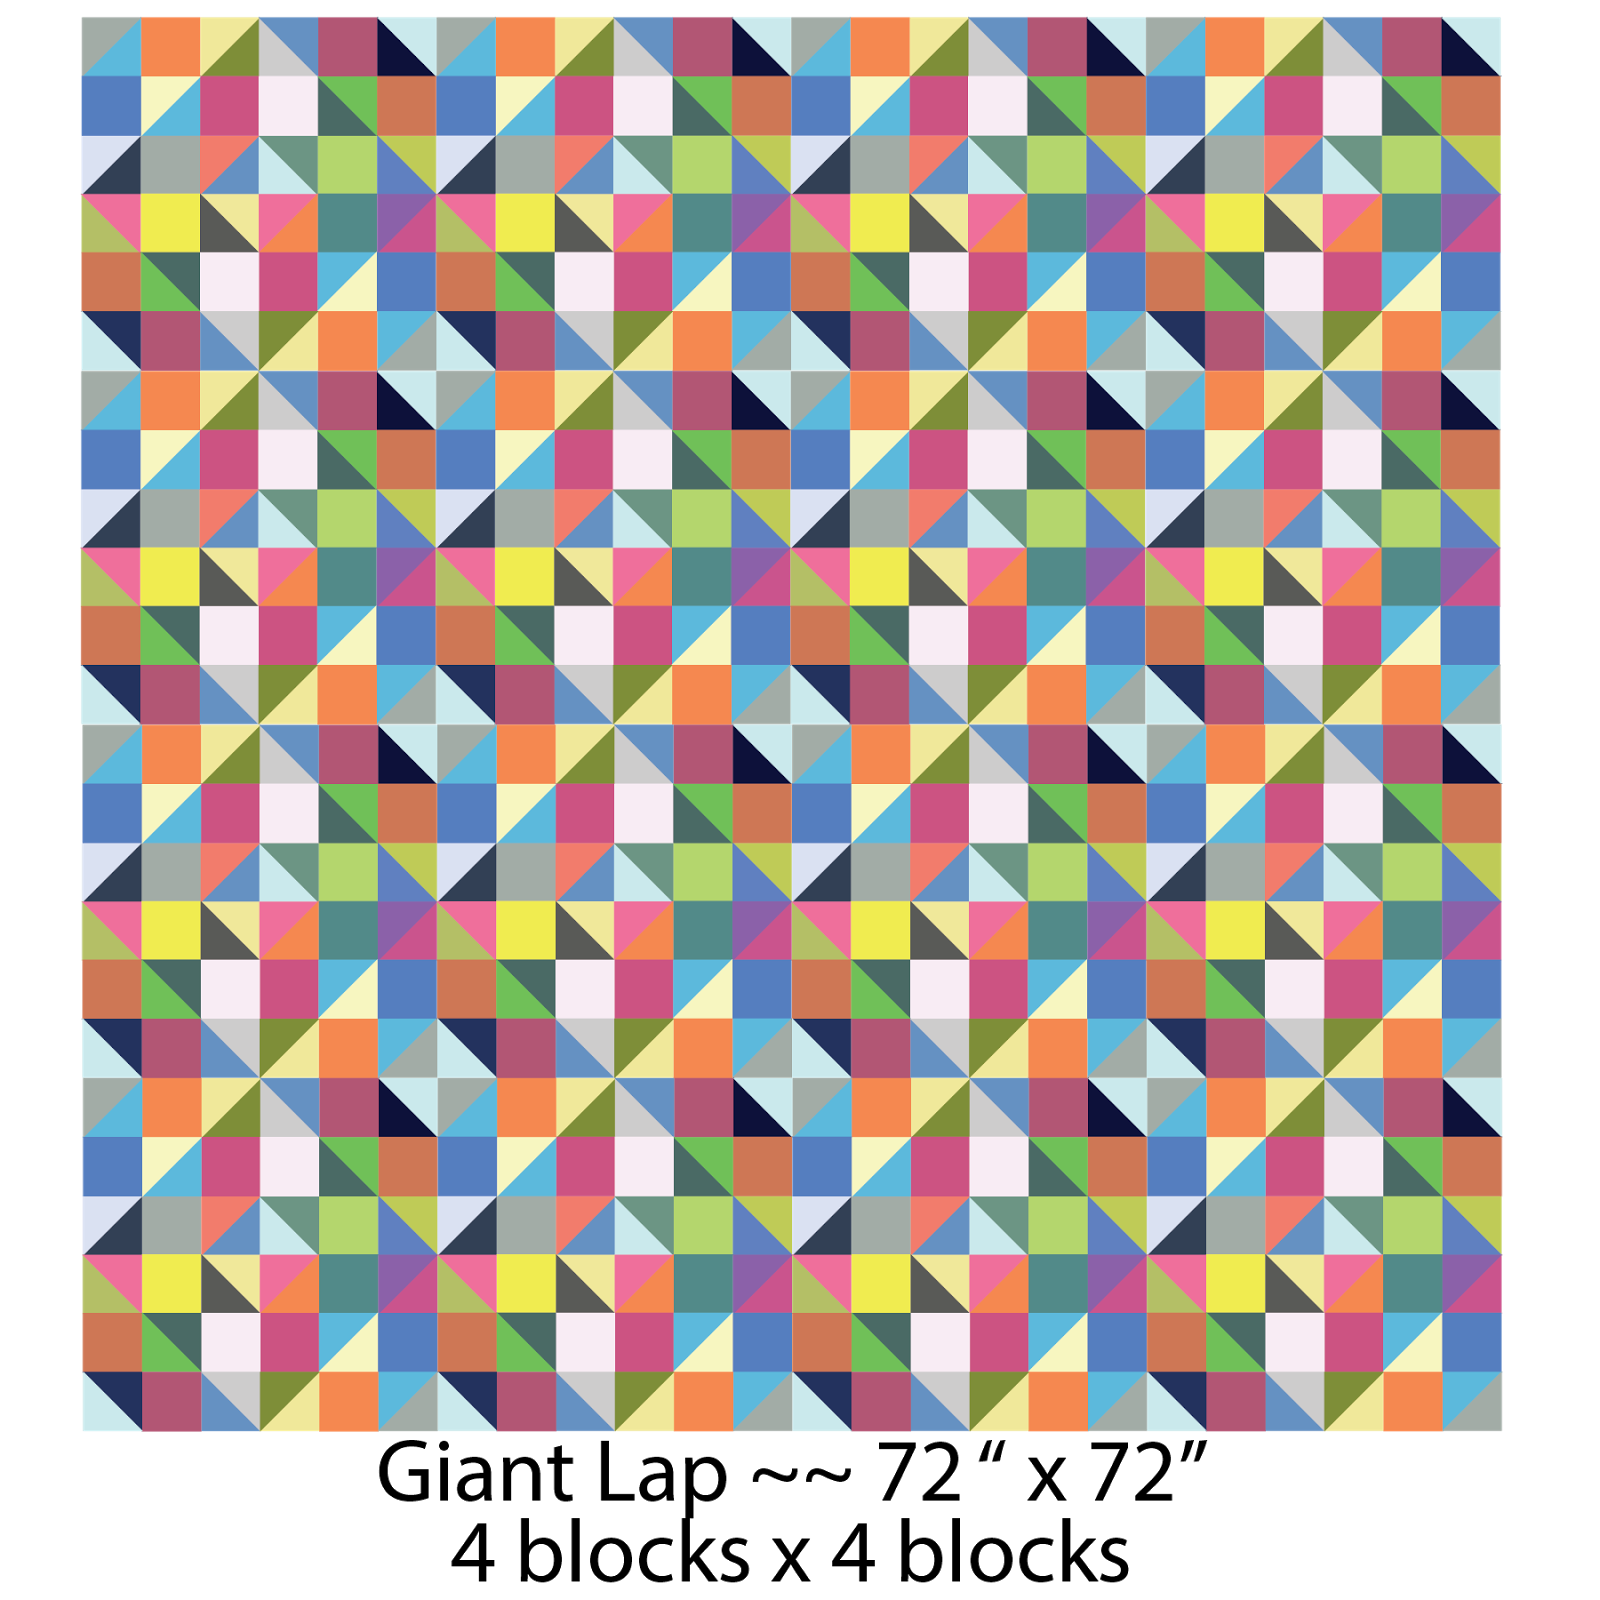
That's it! Just repeat this process for the number of HST you will need for each block depending on the size project you chose.  20 HST will be needed for each block.

Don't worry about keeping each set of 20 together.  Once the blocks start going together, you can pick from the entire pile!

 I know it's a lot of trimming, but having those HST nice and tidy and square will make piecing this quilt so much easier. It's worth it.  Promise!

Remember, you don't have to trim them all in one day. Do a few each day and if you don't get them all done by the next post, don't worry! You will have some done to start your blocks. :)

Don't forget to post pictures in the Flickr group (link above).

Much Love!!!


Sunday, March 23, 2014

Introducing Collywobbles

I'd like to show you one of my newest patterns.  The second one, Cheesecake, I will tell more about her tomorrow.

I have been really really excited to show you.  I think that is the most difficult part of new patterns, waiting to show them to everyone!! 

Introducing.... Collywobbles! 

Goofy name, hm? Well it means "butterflies in the tummy" and after eyeing up this quilt, it sort of does look like butterflies in the tummy.  So it became Collywobbles..

This pattern is available in a full color booklet in paper form as well as a PDF.  The pattern includes instructions for SIX different sizes and the blocks finish at 15"!

I like big blocks and I cannot lie.. heh!

I also LOVE Kona Cotton Solids, too!


Kona Solids used: Bone, Windsor, Pomegranate, Eggplant, Ice Frappe, Sage, Corn Yellow, Melon, Primrose, Chartreuse, Caribbean, Med. Grey, and Plum 

Order yours HERE!!! 


My son thought he would be cute and pop up while I was taking photos.  Who's the cute one now? Heeheee.... #LoveHim


This quilt was designed and pieced by me, KarrieLyne Winters and Quilted by Darla Padilla! Thank you Darla!!!!!! <3 p="">
I hope you love it as much as I do!!

Please check back tomorrow for Cheesecake!

Much Love!!!


Friday, March 21, 2014

Bloggers Choice Fat Quarter Bundle + Giveaway

Good Friday to everyone!!!

Remember when I began the Diamond in the Rough QAL post and I had mentioned that it was inspired by a pillow I had made? 

Well today I get to show you the pillow!! 

Fat Quarter Shop asked me to choose a bunch of fat quarters to make a Bloggers Choice Fat Quarter Bundle for them to feature in their shop as well as on their blog, The Jolly Jabber

If you head over there and comment, you could have a chance to win my bundle!! Click HERE to enter and be sure to do so before March 26th! Good Luck!

I had so much fun choosing these fat quarters and I couldn't wait to cut into them!! (Thank you Fat Quarter Shop!!!!)

Here is the bundle I chose, 12 prints, and 3 solids.  If you click the picture it will take you to Fat Quarter Shop.  There you will see exactly what prints these lovelies are and you can even order them too.  We can be twinsies! 


I loved this bundle even more after I made this panel for my pillow!! 


I decided to do some straight line quilting with  my new Juki!! (More on her later...)


And the finished pillow! Now can you see why I wanted to make more than just one of these blocks!!?? 


 Love! Love! Love!!

P.S.  I've made a Flickr group for all the QAL Photos. Please feel free to add photos of the fabrics/scraps chosen, cut squares, in progress photos, and completed quilts! Click HERE to go to the group. :)

Much Love!!!

Wednesday, March 19, 2014

Diamond in the Rough - Week 2


Welcome back lovelies!!

Every week I will list the below description and I will add the link to the previous posts.  That way if you can't play along right now, you can always come back and each post will have the link backs to each step! :) 


I am so glad you are here to quilt along with me and I am super excited to see all of your results!! 

This week we will be going over cutting directions.  This may seem a bit daunting, but trust me, it's really not that bad and once you get all the cutting done, sewing is smooth sailing!!

Edited to add::::  Some of you have asked about color values with this quilt.  I would suggest a mixture of different values.  You don't want them all dark or all light if you want to see the design "pop". When I put my blocks together, I didn't pay that close attention to placement, I just made sure there was some of each value in my blocks. 

Step 1:  Each block, no matter what size you choose, will have 16 squares that measure 3.5" x 3.5". Don't worry, I won't make you do the math. ;) See below to show how many you will need to cut out for the full size quilt you choose. 

Pillow (1 block) - Cut 16 @ 3.5" x 3.5"
Baby (4 blocks) - Cut 64 @ 3.5" x 3.5"
Lap (9 blocks) - Cut 144 @ 3.5" x 3.5"
Giant Lap (16 blocks) - Cut 256 @ 3.5" x 3.5"
Queen (25 blocks) - Cut 400 @ 3.5" x 3.5"
King (30 blocks) - Cut 480 @ 3.5" x 3.5"

Step 2: This step is very similar to step 1 in the fact that each block has the same number of pieces. However, the size you cut will be determined on how you want to make your half square triangles. 

For instance, if you are a half square triangle (HST) pro and you don't need to, or you don't want to, trim, then you will want to cut your squares at 3 7/8" x 3 7/8".  You want to have HST that measure 3.5" x 3.5" when you are done making the HST so this means your 1/4" has to be perfect.  

If you are like me, I prefer to trim mine down so I cut my starting squares a bit larger. Then when I am done making my HST, I trim them to the perfect size.  That way I don't have to fret quite as much when making them because I know the end result will be perfect.  Granted, this will involve you trimming said number of HST, but I don't mind.  It's way better then ending up with too small or too large HST and trying to squeeze those puppies in. :)

So.....

If you are a HST Pro, cut the below number of squares at 3 7/8" x 3 7/8".
If you are a HST trimming maniac (like me), cut the below number of squares at 4" x 4". 

Pillow (1 block) - Cut 20
Baby (4 blocks) - Cut 80
Lap (9 blocks) - Cut 180
Giant Lap (16 blocks) - Cut 320 
Queen (25 blocks) - Cut  500
King (30 blocks) - Cut 600

There you have it! Chop Chop... heh.. pun intended!! 

I realize when you look at the numbers, especially if you are looking at making a larger quilt, it's a bit off putting.  It's really not so bad though.  Set a goal for yourself so you don't sit for an entire day and just cut.  That's pretty boring and back breaking.  Divide the number of squares you need to cut between a certain number of days and cut that many each day.  You also don't have to have it ALL cut out before we begin sewing blocks.  As long as you have enough to make a few blocks you will be all set.  I just personally think sewing it goes faster when everything is already cut! 

Please let me know if you have any questions!!! 

Happy Cutting and see you next week for sewing instructions!

Much Love!!!

Wednesday, March 12, 2014

Diamond in the Rough - QAL - Week 1


Today I will be displaying the different sizes you can choose for your QAL (quilt along) quilt.

I will list 6 versions here, but feel free to change up the layouts to suit your needs.  Each block assembles the same so that should be easy! 

Below you will find sizes and layouts for a Pillow, Baby (or extra large floor pillow), Lap, Giant Lap, Queen, and King. 

Oh, some of you have mentioned the possibility of not having enough scraps for this QAL.  Don't worry. You don't have to use scraps! You can use whatever you have! Use one line or mix and match! The scrappiness was just an idea.  YOU can make it however YOU want to. That is the beauty of quilting! :) 

Ok, here we go with sizes... check back next week for cutting instructions for each size! 


See you all in a week!!!

Much Love!!!

Sunday, March 9, 2014

Diamond in the Rough - A Quilt Along


Hello friends!

Welcome to my.... Diamond in the Rough Quilt Along!

It's been a very long time since I have done a Quilt Along (QAL) so I thought it was high time I did one.  I had been thinking about doing this for a while now but wanted the perfect pattern.  Not to difficult, not too easy.  You know, all Goldilocks like. 

It all began with a pillow and after making it {the pillow} I wanted to make more blocks just like it... 18 inch blocks and completely scrappy.  We all have scraps we want to use up, right? 

If this sounds like a plan, grab up those scraps and get ready to start cutting!!!

Week 1 : Choose Your Quilt Size ~~ Wednesday, March 12, 2014
Week 2 : Cutting Instructions ~~ Wednesday, March 19, 2014
Week 3 : Begin Piecing Blocks ~~ Wednesday, March 26, 2014
Week 4 : Sewing Blocks Together ~~ Wednesday, April 2, 2014
Week 5 : Completing the Quilt Top ~~ Saturday, April 19, 2014

If you want to get a head start, begin going through your scraps.  You will need pieces at least 4 inches square and if you are ambitious, start ironing them if they need it so you will be ready to cut in a few weeks!

Let me know what you think!! I hope you will join me!! 

Leave a comment if you'd like to play along!! 

#DiamondintheroughQAL (Please use this hashtag when you post your progress on any social media)

Want a sneak peek of this quilt's potential? ;)  These are 4 completed blocks .. I.  Am.  Addicted!!


I truly hope you will join me!! 

Much Love!!!

Saturday, March 1, 2014

Turnovers Pattern Correction

Hello friends!

I am unfortunately writing this post due to an error in my Turnovers pattern that was brought to my attention today. Of course when I saw the email I jumped right on it to see what happened and I figured out I did some math wrong. Ugh.   

I feel horrible.  I go over and over and over my patterns to make sure they are accurate. I have testers as well but sometimes things are just missed.  Its a fact of life and human error. 

I have since corrected the mistake and I am working with all of my PDF distributers to ensure they have the most current and corrected copy and all future prints of Turnovers will have the corrected information.  However, if you have an old PDF version or a print copy, please use the below corrections when you make your quilt.  

The error comes in on page 1 in the cutting of the background strips.  Please use the below corrections:

NEW CUTTING DIRECTIONS:
If there are any questions, please feel free to ask me.  These corrections do not change the amount of yardage needed on the back cover. 

I appreciate that this was pointed out to me so if there is ever a mistake in my patterns, or any pattern for that matter, please reach out to the writer.  We won't know there is an error if it's not brought to our attention. 

Much Love!!!


Real Time Web Analytics