photo blogbuttonhome_zpsbfee85f8.png  photo blogbuttonhome_zpsbfee85f8.png  photo blogbuttonhome_zpsbfee85f8.png  photo blogbuttonhome_zpsbfee85f8.png  photo blogbuttonhome_zps0b2ad4ae.png  photo blogbuttonhome_zpsbfee85f8.png  photo blogbuttonhome_zps0b2ad4ae.png  photo blogbuttonhome_zpsbfee85f8.png  photo blogbuttonhome_zpsbfee85f8.png

Thursday, January 24, 2013

Lattice Quilt

Well this year is definitely off to a great start for projects and finishes! 

I've already showed you my first finish for  the year, my scrappy trip along quilt! I'm still in love with it! 

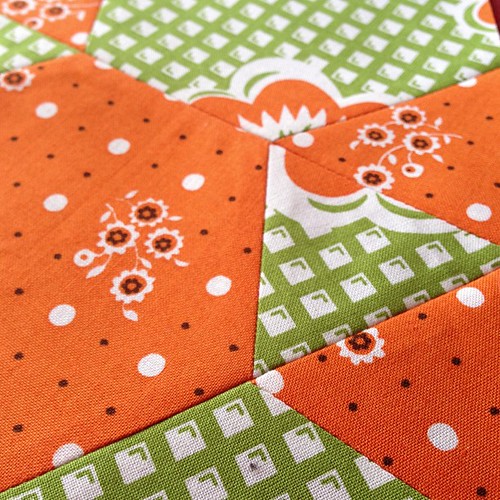
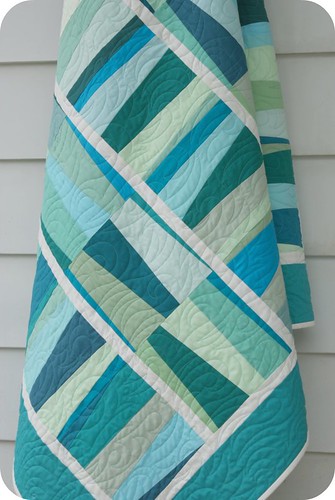
My second finish for the year is a quilt I made for my niece. She was born on 01-23-12 (yes she just turned 1 year old!!!) and she didn't have a quilt yet, while her brother and sister already had two each!  

It began like this... (using Film in the Fridge's tutorial)


And it ended like this... (please excuse the poor quality picture) I had to get it sent off and it was such a gloomy day today. I'm just sick I wasn't very proactive to get better shots while I could have. :(


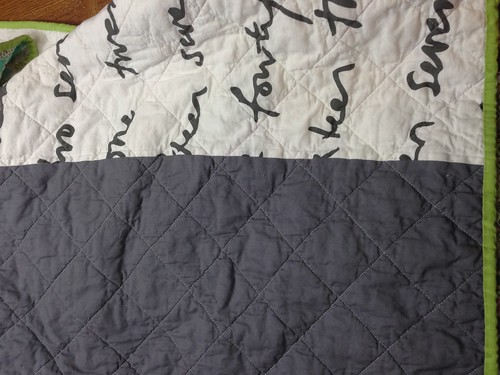
I love the back! I cut out the letters with my Silhouette and then raw edge stitched it to the backing. 

I hope she loves this quilt as much as I do!! 

Keep your eye out for my third finish for the year.....

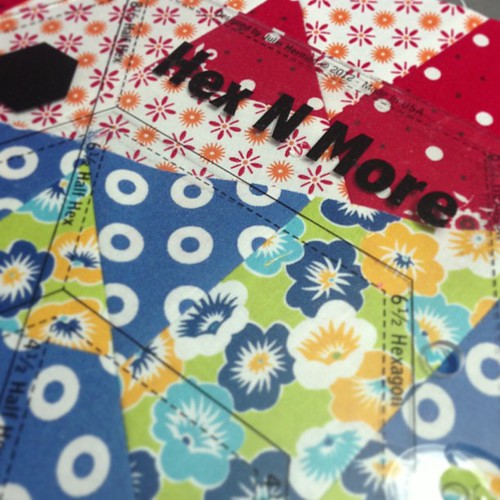
Working on my Toes in the Sand quilt. Pattern by @jaybirdquilts I love how her Hex N More ruler cuts allow for perfect points!  #jaybirdquilts #treasuresandtidbits #toesinthesand #quilting #robertkaufman

Much Love!!!

Wednesday, January 9, 2013

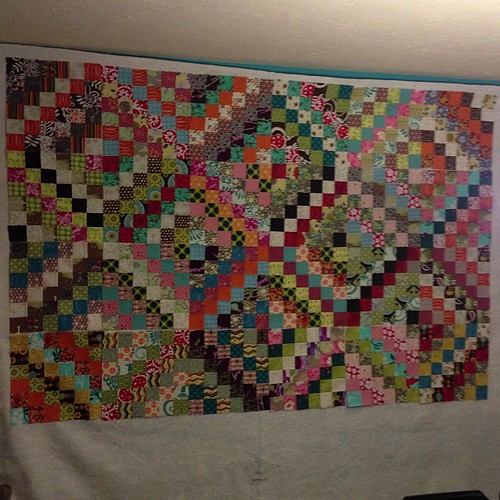
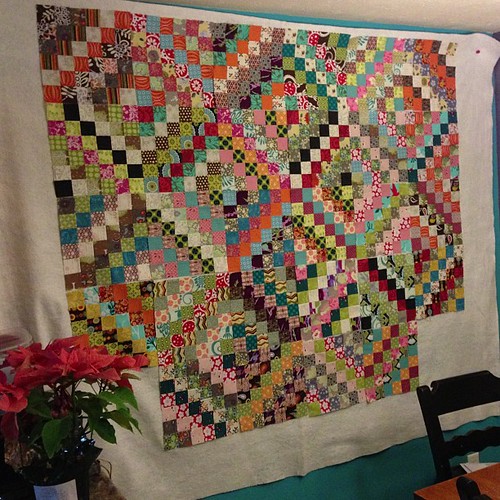
A Beautiful Ugly Quilt

I mentioned in my last post about a new project that has hit Instagram by wildfire, the scrappy trip along (tutorial here). A few people started it and next thing you know there are over 2000 photos tagged with #scrappytripalong. Two THOUSAND!!!! In a timeframe of a little over a week I believe, maybe two. 

I saw these photos popping up all over IG and I couldn't wait to join in the fun! So I went and faced all my fabric. I sat there for a while and pondered it. Hemming and hawing. Second guessing. Having an internal debate really. I wanted to participate but my hinderance was the fabric selection. Anything goes. Its scrappy. *begins twitching episodes*

Now some of you are like, so? Whats the big deal? 

All my quilts, and I mean all of them, are matchy matchy. The scrappiest I've ever done is a mini quilt and pillows, but all those fabrics matched. Even if they weren't from the same line, they matched. 

I don't have OCD or anything like that, but I've always had issues with choosing fabrics. I've sort of relied on the designers to do the work for me in regards to color and never really branched out. Why? Because I didn't want to put hours into a quilt and taking a risk and then end up hating it. My logical side said don't waste your time and effort, stay safe. So that's what I've always done.  Ugh, right? Yep...but that's the truth of it. 

The last few years I've hoarded lovingly collected multiple lines of fabrics. All kept together and not getting all mixed up with other lines. If I got them mixed up, how could I make sure they weren't left out of a quilt? I would oogle over others photos of fabric collections and how they would all be stacked up together and be so pretty, yet none of them belonging to the same line. I wanted that, yet instead of buying a fat quarter here and there, I'd buy the whole line. 

So back to this quilt....I sat there a good while and battled myself and finally decided to wing it. Everyone said how fast this went together so would it really be that much time wasted....that's what I told myself to convince me it was ok. 

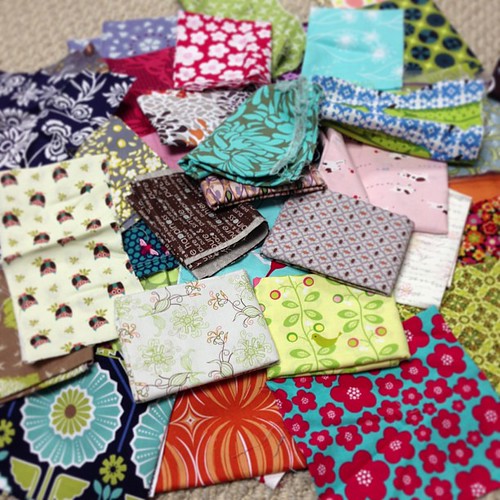
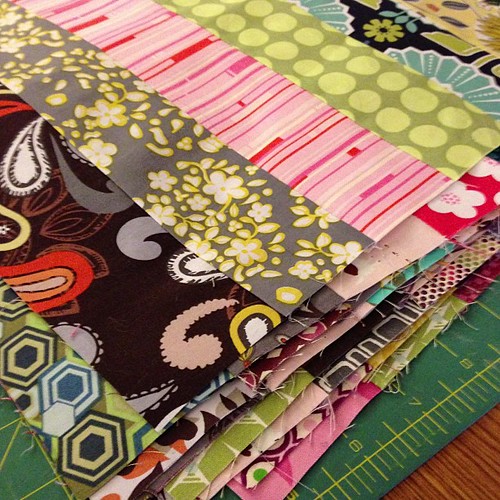
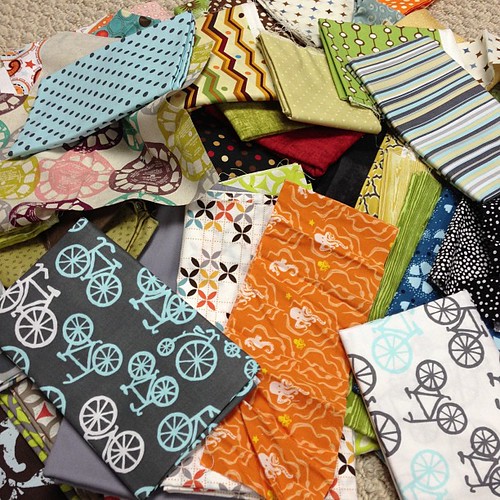
I started pulling fabrics.....this was the start of my pile....
I am a coordinating kind of girl so throwing this all together for the #scrappytripalong is making me twitch. Scrap vomit is truly the correct term. Here's hoping it looks better seen together...lol. #jumpingonthebandwagontoo

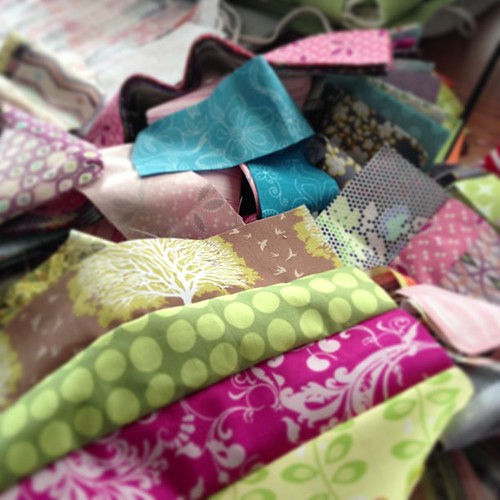
I wish I would have taken a photo of my final pile. You'll notice that in the photo, everything still pretty much matches. I finally said what the hell and just started throwing whatever in that pile. I pulled fabrics out of their matching lines (more twitching wondering how I will ever remember where all these belong), I pulled fabrics out of the scrap bin. I dug through piles of fabrics from previous quilts. One big pile. When I was done I stared at it for a bit. A long bit....

Then I said...this is going to be one "Beautiful Ugly Quilt". 

I quickly gathered up my selections, ironed them, and cut them up. *twitching* These things didn't match, but I pressed on. 

My plan was to do 8 blocks at a time. I chain pieced which for me was very efficient...sewing the first two strips together one right after another 8 times, then I'd go back and add the third strip to all 8 sets, then the fourth, and so on. Clipped each strip set apart and ironed the seams per the instructions and sub-cut, and then ripped each set of 8, stacking them in rows on top of each other so I could chain piece them back together. 

Strips all cut. Chain piecing. Still twitching...lol. #scrappytripalong

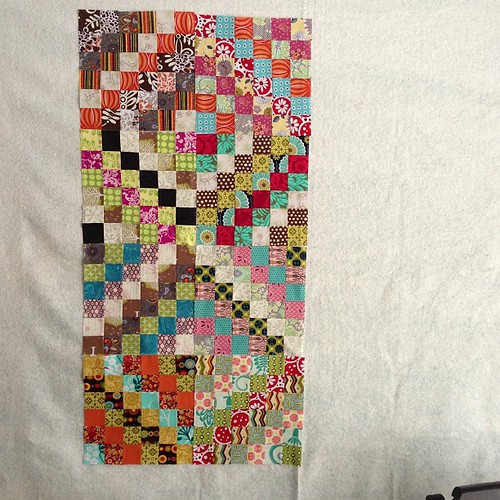
Each block came together, some uglier than the last, but I kept going. 

My first 8 ... 

The start of A Beautiful Ugly Quilt ;) #scrappytripalong

Then I had 16...

Halfway done!! Even though this isn't my norm, I am really starting to like this! #scrappytripalong #abeautifuluglyquilt #quilting

24...

12 more to go! #scrappytripalong

With 12 more blocks to go, I tackled them in one shot...

12 sets of strips ready for me to finish up my #scrappytripalong blocks!!

Almost there...8 left to go...

Day 4: The View From Here *** Four more blocks done! 8 more ready to sew up and she's done! #fmsphotoaday #fmsphotochallenge #scrappytripalong #quilting

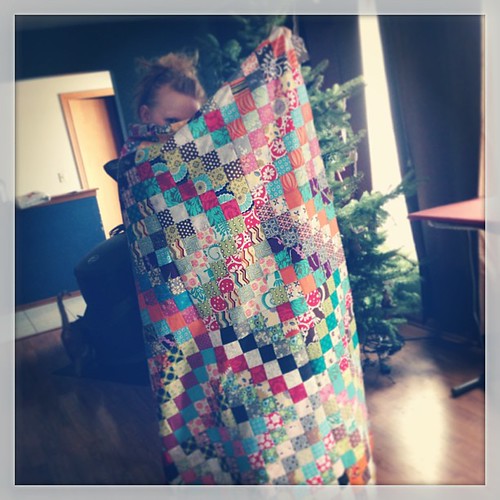
And then it was done....my "Beautiful Ugly Quilt" top was done...so I used it as a cape..heehee

I have a trippy cape! Do you? Heh! #scrappytripalong #quilting #dork

At this point I was completely giddy with this quilt. Seriously. I was in love. I wanted to keep going and finish as soon as possible. I pinched myself a few times because I couldn't believe it, but I really really really loved it! 

My pinwheel quilt will probably always be my favourite quilt, my Linus quilt, but this one, this one is a very close first. As in when I cover up, I have them both..hhaahha!! 

I love this quilt because it is so full of firsts for me. 

My first finish for 2013! My first scrappy quilt. My first non-matchy matchy quilt. My first "take a chance" quilt. My first putting fabrics together from completely different lines. My first time separating my children, my fabric children. 

I learned that it's ok to take a chance, that it's ok to put fabrics together that you may not think will go well together, but in the grand scheme of things, they go perfect. I learned that the whole point of quilting is a creative outlet. Following the line of standards doesn't allow you to do that to its fullest potential. Please don't get me wrong, I am still going to do matchy matchy quilts as there is absolutely nothing wrong with that, but for me, I grew in this experience and to me, that is huge and so important. 

I finally put on my big girl quilting panties...heh! 

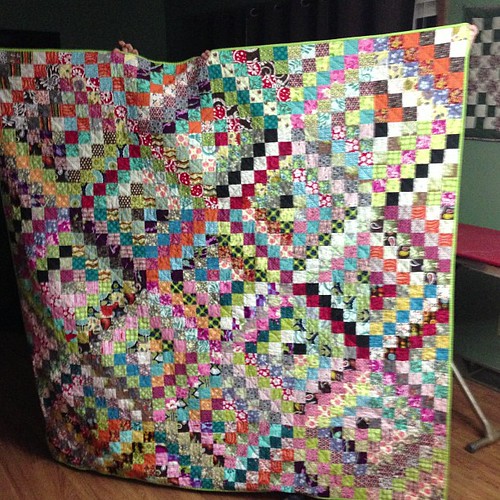
It's done!! I love it!! Every single piece if it!!! #scrappytripalong #abeautifuluglyquilt #quilting

Began December 30th, 2012 ....completed January 6th, 2013. Exactly one week! 

Scrappy Trip Along #1

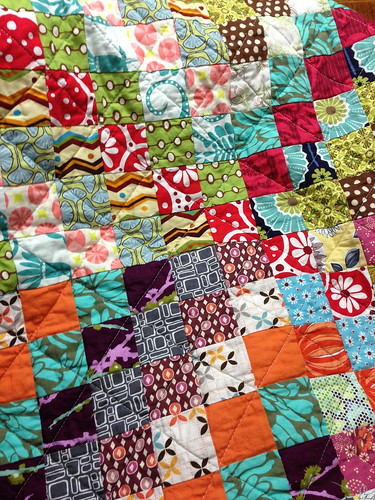
To show the quilting better...

Scrappy Trip Along #1

I am so smitten....so much so that I am making my second one! 

Erm. I might be starting mother #scrappytripalong quilt. Anyone start a step program yet? ;)

A big thank you to @lucyandnorman, @imagingermonkey, @justabitfrayed, and @thatswhatlindseymade.  If I researched correctly, it was these ladies who started all the fun! 

Have you gotten your trippy on? ;)

Much Love!!!


Monday, December 31, 2012

Mingling

Hello again my friends!! 

Can you believe that this is the last day of 2012? Every year goes by faster and faster! 

Just wanted to pop in and say hi and that I hope all of you had a very Merry Christmas and of course a safe New Year!! 

I've been up to a few things since my last post...

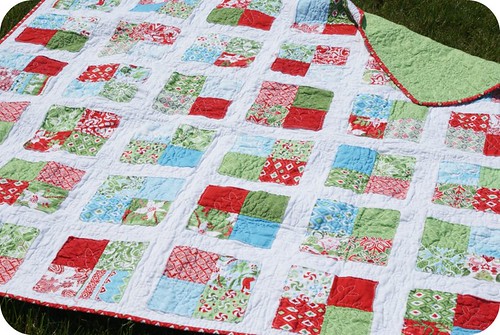
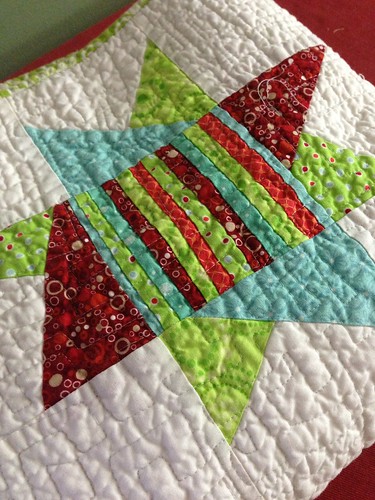
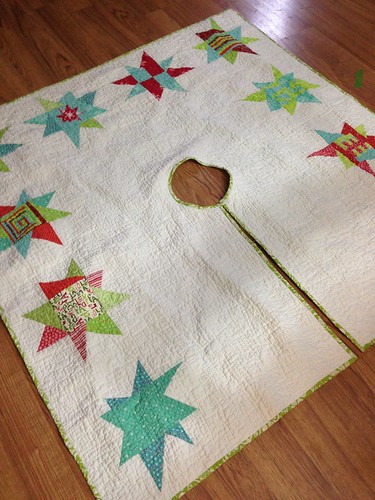
I was in a bee about two years ago or so (gasp!)  called Putting the Bee in Christmas.  It was a bee geared towards making Christmas quilts. So off my fabric went, and happily it came right back. Unfortunately after that, there it sat. This year I really wanted to make a tree skirt so after trying to decide on a pattern, it came to me that I still had these blocks waiting to be made up.  So away to work I went. I didn't do anything crazy with it, but I loved how it turned out! Sometimes simple is just the way to go. 

photo 3

photo 2

Thank you to everyone who helped me make this!!! <3 p="p">

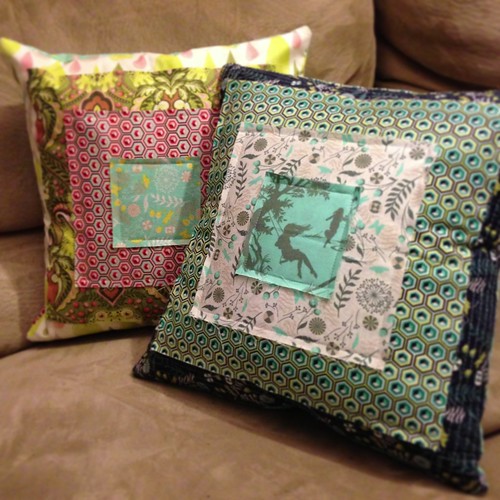
I've also been making some pillows.  I made Rachel's Scruffily Quilt some years ago so when I saw her pillows, off I went! You can find the tutorial for her pillows HERE.

Scruffily Pillows

I've bee n playing around with Julie's Hex N More ruler... this girl is a genius...I've said that since I first read her blog....still a genius!

Playing around with @jaybirdquilts Hex N More Ruler and some @robertkaufman Tidbits and Treasures :)

I've been cutting 1.5" squares of Treasures and Tidbits (Robert Kaufman fabric) for a miscellaneous project.. meaning I have no idea what I am going to do with it just yet. I wanted to try Oh, Franssons stamp collection technique. I used smaller squares but its genius! 

I might be a bit mad...1.5" squares! #treasuresandtidbits #robertkaufman #quilting

Last but not least I got sucked in to the Scrappy Trip Along. I saw photos popping up all over Instagram (I'm KarrieLyne there if you wanna add me) so of course I poked into it and in one day I am almost half way done. Each block is 12" finished and I want to make mine 6 x 6 blocks, so I have 20 left to make. If you'd like to know more (and to make your own...wink wink) you can find the tutorial HERE.  If you want to see more of the wonderful Scrappy Trip quilts I am talking about, there is also a Flickr Group HERE. Beware....it's addicting!

Halfway done!! Even though this isn't my norm, I am really starting to like this! #scrappytripalong #abeautifuluglyquilt #quilting

What have you been up to!!?? 

Much Love!!!
Saturday, December 1, 2012

DIY Subway Art Tutorial

So you've heard of this not so little site called Pinterest, yes? Anyone else concur what a time suck it can be? You tell yourself I will just go peek for a minute and an hour later you've pinned 50 things and liked 50 more. ACK! 

I do really like that site though. I like the premise that I can pin a recipe or a pattern and when I come across a need for it, I know right where to go. Organized bookmarks if you will, only with very pretty pictures! 

After spending so much time on there I thought that if I was going to eat up so much time I should at least have something to show for it. If I am going to pin stuff, I should put some of them to use, right? Otherwise, what good are they? 

One of my favourite things to date that I've pinned is subway art. There are a ton of tutorials out there so I won't do a detailed one, just a run down of the steps I took to do mine. 


This was going to be a softball theme for my daughter and I didn't want the background to be plain. I wanted to jazz it up a bit. 

Step 1:  Paint your canvas with Gesso. (You can find this in the artist paint section. Its like white paint to prime the canvas.) Let dry completely. 

Step 2:  Grab some bubble wrap and cut it into manageable squares. 

Step 3:  Choose your paints. I just used acrylic. Squeeze a dab of each onto a plastic plate and grab some foam brushes. I used one for each color but you could wash one in between each color. 


Step 4:  Using one color at a time, paint your color onto your bubble wrap, leaving a paint free spot to hold. This way your fingers will stay fairly clean. Take care not to paint it too thick. Then press it to your canvas. Keep pressing it in different spots until you need to reload with paint. Repeat until you get the desired look. 


Step 5:  Let dry completely. This really doesn't take too long. Maybe an hour. 

Step 6:  While your canvas is drying, get out your Silhouette and cut your design from vinyl. My canvas is 20" x 24" and the Silhouette can only cut 12" wide so I cut my design sideways by setting my work area to 20" x 12". Doing so allowed me to cut my entire design from only two pieces of vinyl. (Refer to later photo showing brown and green vinyl.) I used THIS video as my original guide. 

Step 7:  After the vinyl is cut, remove all the excess vinyl from around the letters. Take care in doing this step. Go slow so you don't have to re-cut. This will leave you with your letters on the backing only. 

Step 8:  Using a piece of transfer paper (I just used clear contact paper) that is a bit bigger than your design, peel off the backing and lay it sticky side down over your letters. Using an old credit card, gift card, or anything with a stiff edge, run it over all your letters. Press firmly. Now flip it over and glide it over the back too.  Carefully lift the transfer paper minding that each of your letters are securely stuck to it as you pull it away. 


Step 9:  Place the transfer sheet onto your canvas lining everything up. Once you have it placed right where you want it, using that gift card again, start rubbing the letters. Here you have to be a bit more careful because if you push too hard you will rip your canvas. You may want to turn your canvas over on a hard surface and burnish it from the back. Then peel back the transfer paper. You may have to keep using your gift card to get those letters to stick down. Be patient and go slow. It's worth it!


Step 10: Once the transfer paper is removed, take that gift card one more time and give it a careful once over just to be sure all the edges are down onto the canvas. We don't want any leaks. 

Step 11: Grab that Mod Podge and paint a layer over the letters and on the canvas. Don't worry, you will still be able to remove the letters. We want to put this clear layer down so that when we spray paint it, the paint will not leak under the letters so we are creating a seal around each letter. This results in a very crisp letter, which is important, unless you want a different look. If you want a messy look, skip the mod podge.

Funny. I've always called it "Modge" Podge. Until I looked at the photo to realize its Mod, not Modge...lol! 


Step 12:  Let dry completely. 

Step 13:  Grab that spray paint. I only use Rust-oleum's Painters Touch. Best coverage in my opinion. 


Step 14:  Place your canvas over something you don't mind getting paint on. I used a broke down cardboard box.  Spray one coat but don't worry about covering the whole thing. Just do a light coat over the sides and tops. 


Step 15:  Let that dry according to the directions on the can and then spray it with one more coat. Let that dry once again. Make sure its good and dry. You don't want to peel stickers while the paint is wet. 

Step 16:  Now comes the fun part. The reveal! Grab a sharp tool like an exacto knife. VERY CAREFULLY stick the tip of the exacto knife into the vinyl letter. Do not puncture your canvas! Once you get the tip of the knife in the sticker you can pull it up and off the canvas. Repeat until you have removed all of your letters. You are left with a piece of Subway Art! 


I even used Pinterest inspiration to hang it on the wall....with toothpaste! :)

Note: All fonts were found at DaFont.com. Part of the fun was looking for all the fonts! :)

I did my trial run based on the video I linked above and this was the result...


Now go get your craft on! 

Much Love!!!
Friday, November 9, 2012

Help!

My dearest crafty friends, I need your help!

I have this prankish idea to play on one of my former supervisors. She is in much need of a few laughs and smiles.

You know those little trees they sell at Michael's Craft stores? They usually have the burlap wrapped around the bottom and they are not very costly?? You can decorate them yourself....

I want to hang (bare with me here....remember I said it was prankish..heehee) Doritos from them...like ornaments.

My need for help comes in because I need ideas on how to put a hold in the tops of the actual Dorito so I can hang a string on it to put on the tree. Anyone have ideas how to do this with out breaking the Dorito? I can always hot glue a hook on it but I'd rather do the hole and ribbon to make it look "pretty". Heh!

Also, is there a way to preserve it so they don't go bad? Modge Podge?? Would that work? Not sure if that can even be done but I thought it would be nice if it lasted until after Christmas was over!

I'm not crazy, promise! Just want to make someone laugh in a very sad time.

Any ideas you have are welcome!

Ready? Set? Go!

Much Love!!!
Monday, November 5, 2012

It's Been Awhile...

They say that it's better to just jump in the pool instead of gradually wading in. Kind of like ripping off a band-aid. Just do it. 

Apologies first. 

I never meant to just bounce out like I did. Life got completely crazy and hectic and I got so overwhelmed that I went into hibernation, for lack of a better word. I was in full on quilting mode for over a year. That's all I did with all of my free time. If I wasn't working, cooking, cleaning, or putting on my taxi hat to cart my kids everywhere, I was quilting. Every.  Spare.  Minute. 

I was burnt out. Seriously burnt out. Quilting was supposed to be fun and it nearly turned into another full time job. That's not how I ever intended it to be. I was having so much fun creating new tutorials and patterns, but along with that came the editing of pictures and actually creating the tutorials. If you've never done one, they are a ton of work. 

I am not complaining. I enjoyed it. It just got to be too much and I wanted to be able to do other things. I'm pretty sure my kids were sick of me always quilting, too. 

So long story short, I wanted to take a break with out really announcing it. I just wanted some time. But that time turned into weeks, then months, then *gasp* over a year. I kept saying that I'd post and then I'd forget or something would come up or I just didn't feel like it. 

Sincere apologies for skipping out for so long. I honestly never meant to. If any of you are still around, I hope you will understand and forgive. 

On a different note, I do plan on posting again. Perhaps not as often. Probably not like I used to. Maybe. I really don't know where this will take me. All that I know is that I have missed crafting. I miss sharing exciting things that I come across. So I am going to give this another go and see where it takes us. 

I hope you'll come along. :)

All this got started because Christmas is coming and I was thinking of gifts. My new baby niece was born January 23, 2012 and I hadn't even made her a quilt yet. ACK! Her brother and sister each have two. I felt terrible. Yes, I know she has no clue but that's not the point. 

I started looking for a quilt to make. I kept coming back to the string quilts and fell in love with the baby lattice quilt that Ashley made from Film in the Fridge.  So after about a week of obsessing over Pinterest (that's a whole different post...lol) I decided to do this string quilt. It's such a happy little quilt! 

I went to my craft room in search of fabric to use because I knew I had more than plenty. I finally settled on a favourite called Pick A Bunch by Nancy Mims for Robert Kaufman and off I went. 

Five hours later I had this...

And during most of that time I also had this...

A very happy kitty in a box full of fabric. Silly kitty :)

Hope all of you are well...and until next time....

Much Love!!!
P.S.  I have to laugh at myself because I have completely forgotten how to edit my pictures, add watermarks...etc so I hope these come through ok.

Sunday, June 12, 2011

Summer!

So it's not officially summer yet, but it sure has felt like it! 

We've had temperatures nearly to the 100's already. That's early for the mid-west! Then our temps suddenly dropped to like 55! I felt like I was in Antarctica again or something! LOL! They seemed to have evened out for the time being and we have Spring weather right now....70's! If I could live in temps like today all year, I would! However, our weather here is to bipolar to ever know what the next day will bring! 

So what have I been up to and why have I been "off line" for a spell? 

Well it all starts in the spring with baseball for my son and softball for my daughter. My son has games on Mondays, Wednesdays, and Fridays, and my daughter has games on Tuesdays and Thursdays. Plus I work outside of the home 40 hours. That leaves me my weekends. 

The past few weekends I've had company. I had a great time visiting and even found out I was going to be an Auntie again!! Yay!!! I'm pretty excited about that! :D

I know I haven't shared much on here lately in the sewing department, mainly because of everything listed above. Not much time. Actually, I haven't even touched my sewing machine in over 2 weeks! **GASP** I know....I know...horrible. 

However, I had worked on a few things before all the hustle and bustle started, I just couldn't share them at the time. Now I can. :D

I'm sure you've been to Rachel's site, P. S. I Quilt, right? Well, she needed a little bit of help and I was happy to oblige! After all, I do love to sew!! 

She asked me to make her Escapade pattern in all Kona Cotton solids, to be more specific, the Poseidon colorway. 

Didn't it turn out grand!!?? 

escapade loves poseidon.
(Photo courtesy of Rachel from Flickr)
I only pieced the top and then she sent it to her amazing quilter who did an amazing job!! I have plans to make a twin to it, I adore it that much!! :D  

If you love it and the pattern, you can grab it up HERE!!

I also helped Rachel out with her quilt along quilt by piecing the top! This quilt is so FUN to make and I highly encourage you to quilt along with her on this one!! I pieced two tops for her (no I can't show you the other one yet..heehee) and if I can ever squeak some time I will probably make a third for myself to keep!!

Here's the quilt...

my synchronized squares quilt.
(Photo courtesy of Rachel from Flickr)

Want to quilt along with Rachel and make one of these lovlies?! Of course you do...just click HERE for the details! 

Let's see..what else have I been up to? 

Well, I became the mother to a 13 year old. 
I don't even know how that is possible for me to have a teenager. Oh man, does that word make me cringe! LOL! She's a good kid so I'm not too worried, I just feel old. ;) 

I have also bought some more fabric because I couldn't resist...especially since some of the prints have turtles in them!! 


Prince Charming by Tula Pink.....Yum!! Now if I only knew what to do with all those pretty prints and find the time to do it..hahah! 

I hope everyone is doing well! 

I miss you!! Truly I do...it's just that time of year that my kids come before everything else!! I promise to be a Chatty Cathy again soon! 

Much Love!!!
Real Time Web Analytics