photo blogbuttonhome_zpsbfee85f8.png  photo blogbuttonhome_zpsbfee85f8.png  photo blogbuttonhome_zpsbfee85f8.png  photo blogbuttonhome_zpsbfee85f8.png  photo blogbuttonhome_zps0b2ad4ae.png  photo blogbuttonhome_zpsbfee85f8.png  photo blogbuttonhome_zps0b2ad4ae.png  photo blogbuttonhome_zpsbfee85f8.png  photo blogbuttonhome_zpsbfee85f8.png

Tuesday, August 31, 2010

Tidbit Tuesday #16

Hello and welcome back to Tidbit Tuesday!! :D

The common saying is that we all learn from our own mistakes. Well, this time I want all of you to learn from my mistakes, not your own. 

One thing that you don't always see in blog land are the mistakes that we make. Mostly because we don't like to admit that we made a mistake. I don't necessarily like to admit it either, but one of the reasons I blog, is to teach. If I never show you the mistakes I make, how can you learn from them?  :)

Today's tidbit is thanks to a dear friend, Tracey, over at TraceyJay Quilts. I love this girl. She cracks me up and she has the cutest little man and on top of that, I swear we have the same exact taste in fabrics and quilting! She's like a bloggy sister. :) 

Tracey started the "Putting the Bee in Christmas" bee and this was her month. She chose two blocks and one was a cartwheel block. This block has lots of curves to sew.

Why is this the focus of Tidbit Tuesday? Pins. Pins? Yep. Pins. 

I don't pin. Ever. Well, not never, but I can count on one hand the amount of projects where I've used pins, not including pin basting quilts to quilt them. I just don't like them. It takes too much time and they poke you and that hurts. Pins are not my friends....

....until....

This happened...
Do you see that mess in the upper right corner? Ack!!! I ripped and sewed that same darn seam three times, on two different corners of the block. I was ready to email Tracey and say I quit. LOL! 

Of course I couldn't do that and I never would. So, I ripped it once more. Eyed my pins. Grumbled. Gave my pins a lecture about not poking me and started again. This is what it looked like...


No, they are not perfectly spaced but they did the job. Do you see the ends? They meet up! I nearly stood up and jumped up and down, and even better, my lecture worked. No pokes! :D 

I was still nervous though, because I still had to sew it down. So I complimented my sewing machine so she'd play nice, I lectured my pins once more to keep their ends to themselves and trucked along.....to get this!

**That top corner looks crooked. I think it's the angle that I took the photo because it wasn't crooked**

Can you believe that pins could make that much of a difference?! Ok, for those that actually use pins, I know you're shaking your heads yes and probably saying "I told you so!"...but for me, I had no idea they could be so useful. Especially with curves! 

So, the morale of the story is, use pins, especially with curves, unless you have this handy dandy little tool that I need to order. Head on over to THIS post and see how Julie at Jaybird Quilts puts this amazing little foot to use! She's quite the movie star too. ;)

Oh, by the way...this is how the block turned out....

Until next time...

Much Love!!!

Sunday, August 29, 2010

Charm Pack Quilt Along - Final Step

How is everyone coming along in their charm pack quilt along? Did you get all your blocks done? I hope so, or hope that you are almost there because the best part is putting it together! 

Oh, if you are just joining us, no worries. You can join in at ANY time! Just click HERE for all the steps. :)

The only thing left to do is to put your blocks together, add the two borders, sandwich, quilt, and bind and enjoy! 

The hardest part about this step is deciding on which layout to use!! I can attest to that, since I change dmy mind 5 times before setting on this one....and I love it!!


At the end of the post, I will show you some more layouts in case you missed them the first go round. I encourage you to play around with your blocks though. You may find a layout different than what I've posted! Or, you might decide on one, lay out your quilt and not like it in the fabric you are using. So just move them around a bit until you say "THAT'S IT!!". :D 

Once you decide on how to lay out your blocks, just sew them together into rows of 5. Then sew those rows together. Remember when you are pressing your rows, press them in opposite directions so that your seams nest nicely. 

Once your blocks are together, you can add on your borders. Now, you can add or subtract borders as you choose. There is no right or wrong so do what you like. My instructions are just a guide. :) 

My first border, the white, I cut eight 2.5" strips so I had enough to go around. Then for the outer border I cut eight strips at 4.5" wide. Before you cut this, measure your fabric first. I had a tad over 36" fabric so I was able to trim the edge and still get 8 strips. If you have less than 36", you will want to cut your strips at either 4" or 4.25" so you have enough. Then add them to your quilt. White first, then print. 

After that, you are ready to press your top nicely, sandwich it, quilt it, then bind it!!

So, with that being said, and to keep consistent, let's meet back here in two weeks, on September 12th,  to show off our completed quilts!! I can't wait to see them all!

As promised, here are some of the layouts you can choose....or see if you can come up with something different. :)

Charm Layout 1

Charm Layout  2

Charm Layout  3

Charm Layout 4
Charm Layout  5

Charm Layout 6

Remember...have fun with this!

Much Love!!!

Friday, August 27, 2010

We Have A Winner!!

First I want to say thank you to everyone who entered!! Overall I had 1188 comments and let me tell you some of them were doozies!! LOL! So many of you cracked me up!! Special thanks to all those that shook their pom poms ;) and of course, a warm welcome to all of my new followers! Thank you!!!

I wish I could give one to everyone, but we all know how these things work. Only one winner, but a very lucky winner! To be fair, I am using the help of Random.org to choose a winner for me. So here goes....

Lucky #....... ***Drum Roll Please***

And the lucky #979 is....... ***another drum roll please***.... (by the way, my daughter just told me I'm a dork cuz she is reading over my shoulder. Guess what? She's a dork too...haha)


Woooo Hooooo ThatsSewShawna!!! You win!!! Congratulations!! I just need you to email me HERE with your full name, address, phone number, email address, and please confirm the 3 dies that you want to be sent to you. (only because you may have changed your mind..hee hee) and I will get the information to Carolyn so she can send you your BRAND NEW GO CUTTER!!!! Yayy!! :D

Thanks again to all of you who entered and all of your sweet comments! They all really warmed my heart! :)

Much Love!!!

Tuesday, August 24, 2010

It's Giveaway Time!!!

**Giveaway is now closed**

I know that today is normally Tidbit Tuesday, but I think you'll like this a bit more. I think. ;) 

You know how I've been ohhhing and ahhhhing over the AccuQuilt Go! cutter, right? 

This awesome quilters tool!!! Remember?


Guess what??!!

Carolyn over at AccuQuilt says I get to give one of these babies away!!!  ***shake your pom poms!!***

Not only do I get to give one of these away, the winner will also get their choice of THREE dies to go with it!! ***shake your pom poms!!***

Are you as excited about this as I am??!!! ***shake your pom poms!!*** 

Here's the dealio......

You get FIVE chances to win!!

1.) Post a comment. Anything you want. Tell me the first thing that pops into your head. :)

2.) Follow my blog, but only if you want to, and post a comment saying you do. :)

3.) Tweet about this giveaway on Twitter and link to it, then come back here and post about it. :)

4.) Blog about this giveaway and link to it, then come back here and post about it. :)

5.) This is the most important one!! Head over to {{ AccuQuilt }} and choose THREE of your favouite dies for the GO! Cutter, then come back here and tell me what they are.  
Remember you have to post a comment for each of the items you completed. If you only comment once saying you did all five, you only get one chance to win. 
Please do not comment more than 5 times to make this fair to everyone! I like it when everyone plays nice in the sandbox. :D

This giveaway will close on Friday August 27th at 9 pm central time where I will announce the winner! ***shake your pom poms!!*** 

Good luck!!

Much Love!!!

Sunday, August 22, 2010

GO!! Have Some Fun

Not too long ago I told you all that I received this in the mail...
I also told you that I'd be reviewing the product and giving my 2 cents. Ok, maybe 4 cents. ;) I say 4 cents because I also have a tutorial for you after my review! Yay!

Let's just say I have been a busy little turtle (turtle...because I like them better than bees!) today playing with this awesome tool! I knew I'd love it, but I didn't know that I'd love it as much as I do. 

When I was asked to review this item I was offered three dies and I was allowed to choose them myself. One of the dies that I chose was Drunkards Path. I have been eying quilts made with this block for months and I've been wanting to make one but I was scared of all those curves. However, I was more intimidated with the fact that I had to cut all those pieces out. Let's be real. I don't like cutting. It's my least favourite part of quilting so that quilt never would have made it to my machine. Well, maybe four blocks or so before I got tired of it...lol! 

Today I decided to give it a whirl. I pulled out my GO! and grabbed a layer cake and some yardage and went to town. 

I read the instructions on how to use it like 5 times. I didn't want to ruin my new baby, ya know! They make it so simple though! 
  • Open the GO! cutter. 
  • Lay out the die FOAM SIDE UP on the cutters "table"
  • Place your fabric on top of the die
  • Place the cutting mat on top (they make this two sided so you can't mess that up either!)
  • Then gently place into roller and crank the handle till it comes out the other side! 
  • Say "Weeeee!!" Yes,  you have to say that as you do it. Each time. Trust me. It's fun :D
  • Then remove the cutting mat and squeal at what you've just accomplished!! (My neighbors may have thought I was nuts...LOL)
That's it! Easy peasy and so fun! Each and every time you do it! No hand cutting. None. Zip. Zilch. Nada. Zeta. Nil. Diddly Squat! <--- that's my favourite...haha! 
Now you're probably asking how long this took me, right? Of course you are! 

First imagine if you had to cut out enough pieces **by hand** to make 36 drunkard path blocks. That's one each of the arc and the quarter circle, so 72 pieces. Estimate how long that might take you. 

Now how excited would you be if I told you that I cut each block piece that I needed to make an entire quilt in 30 minutes? Yep! Enough blocks to make 36 quilt blocks!! That includes cutting time for my solids! I think I even had a potty break in there! LOL! 

I love the fact that you can cut more than one layer at a time! I had the best results using only 3 layers, but 4 worked too. I just had to snip a few threads here and there, which is no biggie. 

I've heard a lot of talk about the waste that comes with using this tool. Yes, you will have waste, but you would if you had to hand cut this as well. In my opinion, my time is much more valuable than having a little bit more waste in fabric! I also haven't thrown my scraps away. I figure I will find some kind of use for them! :D  ((ohhh.....light bulb moment...maybe a wonky log cabin block quilt...ohhh...or a string quilt....! See...sometimes waste is a GOOD thing! ))

Here is an example of what is left when using  Layer Cake pieces on one side of the die. (I say one side because you can actually cut two complete blocks with this die if your fabric is larger.) Not too much, really.


Another feature I loved about this die and tool set is that there is no guessing. When you cut out the two pieces, they have corresponding notches (you can see them in the above photo) to match up for sewing! How cool is that!? Ingenious! 

So, my overall perception on the Go! cutter is that I LOVE IT!!! A lot! More than a lot! I need more dies now, like the hexagon one! :D  Way more positives than negatives and I'd recommend it to every quilter out there! Seriously......let met tell you one more reason why...

I made a quilt top that measures 58" x 58" today. In 5.5 hours total...that includes some laundry time so even less than that. I think it took me like an hour to sew the 36 blocks together. **gasp** Yes, circle piecing all those blocks in an hour!? Then just a little more time to sew them together and put the borders on! Eeeeeps! When was the last time you made a quilt like this in 5.5 hours?! I can't say that I ever have! 

A HUGE thank you to AccuQuilt for giving me a chance to use this awesome machine!!! Love every bit of it and I can see a lot of use in the future!!! :)

*******************************

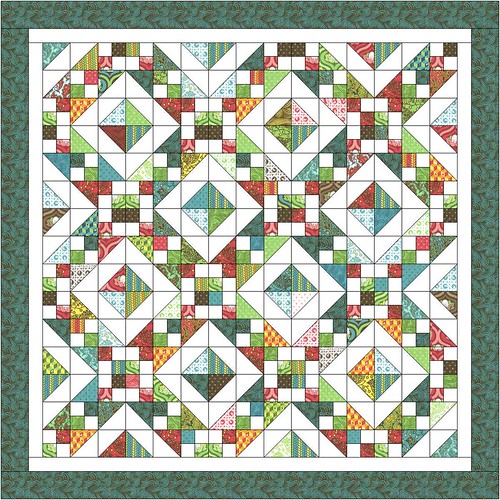
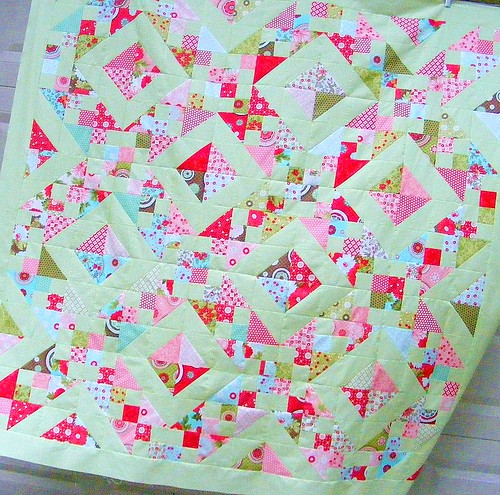
You've been waiting patiently for the tutorial so here you have it....my drunkards path quilt top... 


 Drunkards Medallion

**Supplies**

1 layer cake
1 1/2 yards of a coordinating solid
1/2 yard for binding
3 3/4 yards for backing

Start by setting up your AccuQuilt GO! machine.

Choose 20 layer cake pieces. Your leftovers will be used in the border so don't leave all your least favourites in the pile. ;)


Next you need to cut your solid fabric.

Cut ten strips that are 10" wide. Then sub cut them into 10" squares.

Now you are ready to cut!

Lay your fabric on top of the die. I did three pieces at a time. You can do four, but you may have to snip some threads here and there. Test it out and see what works for you.

Do this for all 20 prints and all 20 solid pieces. 


This is what you get! Woo Hoo!!

**Note: I forgot to take a photo of the white pieces, but the process is the same.

From the prints you need to have 20 of the arc pieces and 16 of the quarter circle pieces.
From the solid you need to have 16 of the arc pieces and 20 of the quarter circle pieces.
The extras, you can set aside for scraps or to use in the back of the quilt.

Match a print arc piece and a white quarter circle piece and sew together according to the instructions with the die. Make 20 blocks.

Next, match a white arc piece to a print quarter circle and sew together according to the instructions with the die. Make 16 blocks.

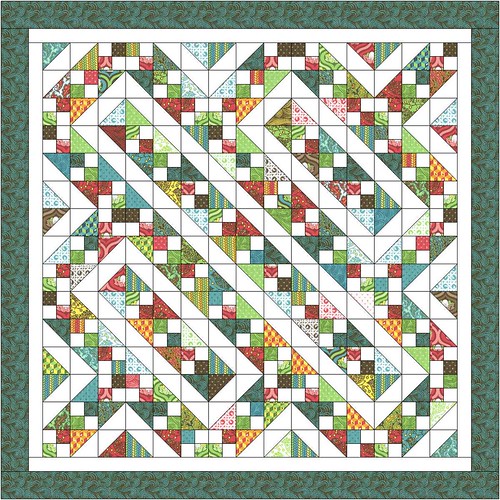
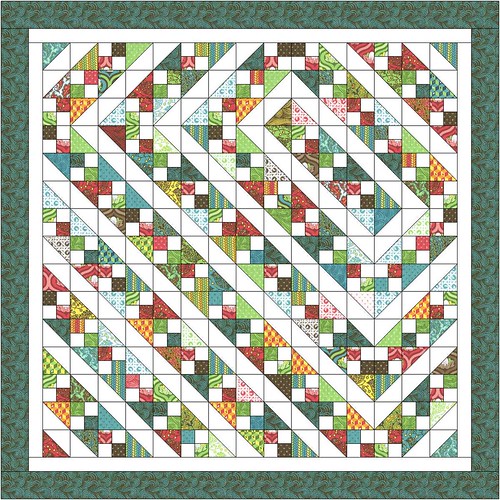
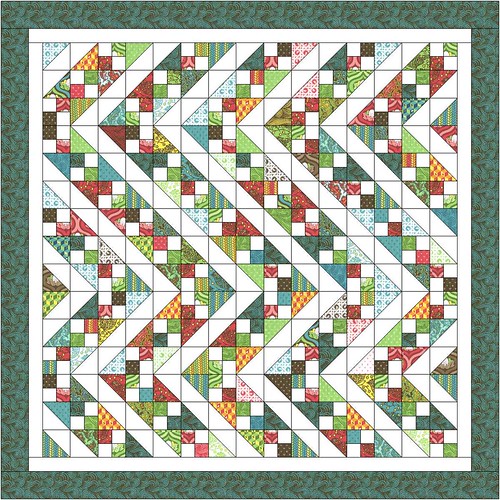
Then lay them out in a pleasing order. This is how I chose to lay mine out. Hence, Drunkards Medallion. :)


Then just sew your blocks together to form rows. Then sew your rows together. This should measure 42.5" squared when you are done.

From the solid, cut 5 pieces that are 4 1/2 inches wide for your first border. You will have to piece two sides.

I also added a scrappy outside border with the left over Layer Cake pieces. I cut them in half (5" x 10") then sub cut them randomly. Just sew pieces together until you have a strip that is as long, or a bit longer than 42.5".  Repeat for the other side. Press and trim ends if necessary.

Repeat for the top and bottom, only making the strips longer. Sew them on. Press. Trim ends if necessary.

Then you are ready to sandwich, quilt and bind your new quilt top that only took you a few hours!

Once I have her quilted I will show another photo. I was just so excited to have a "what looks to be complicated" quilt top done in 1/2 a day! Woo Hoo!!!

Don't forget to keep your eyes out for a giveaway here soon too!! ;)

Much Love!!!

Friday, August 20, 2010

Crossing Paths

Happy Friday!!!!! 

Guess What!? Remember a few weeks ago I showed you a sneak peek of an Origins quilt? I am pleased to say that I can finally show it to you!! 

It's my second Moda Bake Shop quilt! Woo Hoo!!! I'm still pinching myself that I have designs posted there but I am having so much fun with it and I can guarantee you that you will see more in the future!

Have a looksie.....let me know what you think?....then you can head over to Moda Bake Shop for the instructions if you'd like.  :)


Aaaannnnnndddddd......Leah over at Burgundy Buttons has put a kit together!! Click HERE if you are interested! I am so excited about this and let me just tell you that Leah, she is as sweet as they come and she has the cutest little accent ever! :) Thanks so much Leah!!! You rock! 

Enjoy!
Much Love!!!

Tuesday, August 17, 2010

Tidbit Tuesday #15

Today's tidbits come from Sarah over at Confessions of a Fabric Addict!
  •  I use empty Kleenex boxes (the upright kind) as mini trash bins on my sewing and cutting tables to catch threads, fabric snips, etc.  (I take the plastic out of the top first.)  You can empty them out and re-use them, or just throw them away when they are full!
  • Storing projects - I love the little brown kraft Starbucks bags for storing projects I've got upcoming, where I've bought the fabric, but haven't started the quilt yet.  I also staple a pretty piece of card stock on the bag with the name of the project or intended recipient written on it, then put it on a shelf where it can stare at me accusingly until I make it!
  • I have categories set up on my Bookmarks (or Favorites) pull down menu for the internet for "Quilting Ideas" and "Tutorials".  That way, when I see something I want to use later, I can sort it out for easy locating later, instead of wondering where in the world I saw it! 
I love all these tips, especially because you can recycle everyday stuff! That means more money for more fabric! Heh!

Great tips Sarah!  Thank you!!

Have tips you'd like to share? Please email them to me HERE and I'll feature them on Tidbit Tuesday!

Much Love!!!

Monday, August 16, 2010

Strawberries Anyone?

I was sitting at my desk today eating strawberries and I think I had at least five people come up to me and ask me what the heck I was doing...LOL!

When you eat strawberries you remove the green leafy parts, or at least most people do. I always used to think they were a pain in the rear to remove so I started using a straw. Yep, a straw!

Let me explain...

Gather your strawberries, and of course a straw. The best ones are from fast food restaurants like Wendy's or McDonald's because they are fatter and they are stiff!

Hold your strawberry and position the straw beginning at the bottom, pointing towards the top.

Then impale your strawberry! LOL!

Remove the top, then the straw, and you have a perfect strawberry to munch on! :D

Unless your strawberries are HUGE, one impalement should work, if you have some left over, just do it again.

Much Love!!!

Sunday, August 15, 2010

Charm Pack Quilt Along - Step Three

Hello Friends!! Are you ready to start putting your blocks together? Yes? Fantastic because that is the next step! Block Assembly! Woo Hoo!! 

First off though, I must apologize to Miss Sarah. She is the one who shared the technique with me on how to do the 4-patches in the first method and I completely forgot to add the credit in that post. She has made a quilt using a block that is very similar to this one and she emailed me with the tip on how to do them. Thank you again Sarah on those instructions!! My apologies for not giving you the credit the first go round...I have it updated now :)

Ok...block assembly. This is really easy. It's just like putting together a 9-patch block.

My first tip would be to suggest not spending a ton of time on which pieces to use in each block. I'd actually suggest putting your HST in one bag and the 4-patches in another, mix them up,  and just grab and go. If you happen to choose one with the same fabrics, you can choose again, otherwise, just let them fall where they may. 

Choose three 4-patches and six HST (half square triangles) and lay them as shown in the below photo.

Sew each row together and press them in opposite directions. (Press top row to the left, middle row to the right, and bottom row to the left again). This way the seams will nest when you sew the rows together. 
 
Then all you have to do is sew the rows together and voila! :D


You can make this one block at a time or you can chain piece them to do all 25 at the same time. I like to do mine in rows. Sew the first two pieces of row one together for all 25 blocks, then go back and add the third piece, press them all and put them in a pile. Then repeat for rows 2 and 3. Then all you have to do is sew the rows together. Much faster :) 

This weeks assignment will be to complete all 25 of your blocks! I will be back here on August 29th with the finishing instructions! 

A couple of you have been busy beavers and have already completed your tops!! Aren't they wonderful??!! 

This one was done by Kim...*swoons over 12 Days of Christmas** :)
Charm Pack Quilt Along

This one is by Thomas.... it's blissful!! :)
Freckled Whimsy QAL

I can't wait to see these start piling in!! Remember to post your photos in the Flickr Pool so I can swoon over them all :)

Much Love!!!


Friday, August 13, 2010

Friday The What?!

Happy Friday the 13th!!!! Hopefully all of you have escaped unscathed...lol! I'm just glad it's Friday, even if it is supposed to be the day of all bad luck! I'm not superstitious anyway! 

I know I haven't been posting a lot of "sewing" things lately but I promise, I have things in the works that I will show you when I can. I know how much you hate teasers. :) 

So today I will share these two videos...

We've all seen this one. It's catchy and you almost can't help but dance and wiggle your butt to it.... 

Don't deny it... hee hee!


There are some covers for this song, like THIS ONE. I thought it was pretty cool that Beyonce even brought him into one of her performances...LOL! Good sports! I love it! I should have warned you about that first cover though, huh? :D

Ok...the second video I am going to share is one I saw for the first time yesterday while watching CMT. I've always loved Sugarland and I don't know how I missed this song, let alone the video. Totally makes me laugh and reminded me of the Single Ladies video, hence the sharing of both. 

Have a giggle with me...?


Mmmm....Cake...LOL!! :D 

Hope you had a few laughs with me! One can never have too many of those, now can we? 

Much Love!!!

Thursday, August 12, 2010

Hit Me Again Tube Sock!

Have you seen this commercial? I can't help it. It cracks me up each time I see it.


I've had the candy. I can tell you that the tube sock will shock you MUCH more than this candy will.  LOL!! Honestly, barely a fizzle, but the taste is good.

The one thing I can't figure out...besides the crazy idea of the old man actually *liking* getting shocked by the tube sock, is why on earth is one leg bigger than the other, and one arm shorter?

Thoughts? :D

Much Love!!!

Wednesday, August 11, 2010

Exciting News!

I don't have too much to share today as I've had family in town, but I think what I have is pretty exciting! :D
 
Do you remember my birthday wish?  An AccuQuilt Go! Fabric cutter? Well......guess what?
This one ended up on my doorstep on Monday!!! *Jaw Drops* I know!!! Last week I received an email from Carolyn with AccuQuilt asking me if I'd be interested in test driving one of these!! I think I stared at that email for a good 10 minutes before I blinked! LOL!! 

I am very excited to say that I will be putting together a quilt using this bad boy in the next few weeks or so along with a review of my use,  so keep your eye out for that! 

Wanna know the best part? Do ya? Huh? Do ya? :D

They are offering me a second one to GIVE AWAY to one of my readers!!! Woo Hoo!!!! The giveaway isn't just yet, but keep checking back so you can all enter!!!

I feel so blessed that I've been given some amazing opportunities over the last few months and I'm really happy to be able to share in that with you! Thank you AccuQuilt!!

Much Love!!!

Tuesday, August 10, 2010

Tidbit Tuesday #14

Somehow it's Tuesday already! I didn't mean to disappear here but I've had family back in town again and I've been spending a lot of time with them. My dear niece and nephew of course! How can I not spend all the time I can with them? :)
So with out further ado, today's tips come from Audrey! I've been a fan of Audrey and her blog for some time now.  A while back her blog name caught my eye in the suggestions of blogs to read., and I've been hooked ever since!  Pickles & Bacon.  Cute, huh? :)
**********
1. )  Starch for ANY edge not cut on the grain.  Doesn't matter if it's 45*, ANYTHING cut off the grain, it will help immensely to keep the shape of the piece.  Also, you don't need best press, the Faultless 97 cent stuff from Wal-mart works just as well. 

2.)  Americana quilting thread works GREAT for doing bindings.  I'd always get ticked because when I'd go to hand stitch it to the back I'd always get at least 1 knot and this is glazed cotton but for 99 cents, you really can't go wrong, even if you try it and don't like it you're only out a buck and change after tax. 

3.)  If I have a bunch of scraps from a particular line I'll stick them all in a Ziplock bag and put that in my scrap bin. 

4.)  Quilt pattern bags are great for the patterns that don't come in a bag.  Amy Butler patterns come to mind on this one, they don't come in a bag but it's hard to keep all the pieces together once you use them, her patterns fit in the 6x9 bags and you can find small quantities on etsy and ebay for cheap. 

5.)  Keep a small rotary mat and smaller ruler in arms reach at all times.  I've found when doing some star blocks you need to trim after stitching one seam, makes it easy to turn my machine out of the way trim, press and move on. 

6.)  Sterilite containers from Wal-Mart are great for keeping projects in order, go grab some horizontal badge holders from the office section and you can very easily cut card stock to make inserts, to identify projects, also keeps all materials in one place.  I have 3 shoebox size and 3 12 qt size. 

7.)  The 12x12 iris cases that are made for scrapbooking papers are great when working on quilt blocks.  For my star sampler quilt along I'm keeping my layer cake and finished blocks in there.  Again, I'm a fan of all in one place. 

8.)  Another scrapbooking intended thing is the 3 drawer 12x12 Sterilite drawers, they're stack-able and great for storing layer cakes and charm packs that have no intended immediate use.  Having animals it's really important for me to keep them out of their reach and such.

Wow!! Thanks Audrey for all your tips!! 

Have a tip or five you'd like to share? Email me and I'll feature them here! :)

Much Love!!!

Wednesday, August 4, 2010

WIP Wednesday #2

I've been working on a few things this week.

A few bee blocks, that I will share as soon as I have them done. :)

And this....
More on this soon ;)

Much Love!!!

Tuesday, August 3, 2010

Tidbit Tuesday #13

I first want to say thank you to those that have emailed me tips to use here on my blog!! I will be posting each and every one of them so keep your eyes out! If you have more, keep them coming! Please. :)

Today's tip I overheard from Grey Cat over at Grey Cat Quilts when I was at our local Stitch 'N' Bitch. I have yet to try this myself, but I think its a fabulous idea, and it came in perfect timing with a request I received today. ;)

Ever have trouble with your ruler slipping while you are cutting your fabric? 

Try taking rubber cement and applying it to the underside of your ruler, just in the corners. Maybe 1" squares worth, in each corner. Allow it to dry completely. This should help your ruler not to slip. Then when it stops "sticking" or it gets fuzzy, you just rub it off and re-apply! Easy Peasy!!

I'm going to get me some rubber cement this weekend and give it a go! 

Thanks Grey Cat!! :D

Psst....make sure you go check out Grey Cat's blog! This woman is super creative and so much fun to hang around! Tell her I said hello! :)

Also, head on over to Julie's blog! She has an awesome giveaway going on right now!!! Here's a peek... Click HERE to enter :)

Much Love!!!

Sunday, August 1, 2010

Charm Pack Quilt Along - Step Two

Ok, is everybody ready for step two in the Charm Pack Quilt Along

Did you miss step one? No problem. You can join in at any time! Click HERE for all the steps. :)

Want to print the instructions for step one in PDF? Click HERE to download. 

Want to print the instructions for step two in PDF? Click HERE to download. 

Alright...here we go :)

For this next step we need to make our Four-Patches. We need a total of 75 as we will have 25 blocks and each block needs 3 Four-Patches. 

I am going to show you two ways to do this.  You only need to do ONE. I recommend you try each method and choose the one that works best for you. Meaning, the one that gets you 4 1/2" square Four-Patches. :)

First Method
1.  If you haven't already, you will need to cut 38 - 5" squares out of your solid, or you can use charms from a solid charm pack too. 

2.  Choose 38 charms in the print. 

3.  On the WRONG side of each of your solid charm, you will need to draw a vertical line in the center, or at 2 1/2" in from the side. 
 4.  Place the solid square RIGHT sides together with a printed charm.  Sew 1/4" on each side of the line you just drew.
5.  Cut on the drawn line. 
*please ignore the fact that I must have had my fingers in the way of the flash..lol*

6.  Press to the dark fabric. You should have two pieces for each charm.
7.  Choose two pieces so that each piece has a different print.

8. On the WRONG side of one of the pieces, draw a line down the center, at 2 1/2".
9.  Place this piece RIGHT sides together with another, making sure that the print is on top of the white on the opposite piece.
10. Sew 1/4" seam on either side of the drawn line.
11. Cut on drawn line.
12. Press to one side and you now have two Four-Patches. :)
13. Repeat for each pair. You will end up with 76 Four-Patches in total, so you will have one extra.

Method Two

1.  If you haven't already, you will need to cut 38 - 5" squares out of your solid, or you can use charms from a solid charm pack too. 
2.  Choose 38 charms in the print.

3.  Cut each print AND each solid in half. (2 1/2" from edge)
**NOTE: I didn't take a photo of the solids cut in half, but you will need to cut each of the 38 solids in half as well.**


4.  Pair one print with one solid and sew them together with a 1/4" seam. Press to the print.

5.  Now you will need to cut each of these in half. Again, 2 1/2" from the edge. 
6.  Next, pair them up so that each piece has a different print. 
7.  Sew them RIGHT sides together, making sure the print is on top of the white or vice versa. Sew with a 1/4" seam. Press to one side. 
8.  Voila. Two Four-Patches. 


9.  Repeat with all 38 charms and prints to yield 75 Four-Patches. 


****************************

Each of your Four-Patches should measure 4 1/2", just like your half square triangles. Before you start chain piecing (if you use that method) please do a test one first, to ensure they do not turn out smaller than 4 1/2". If they are a tad larger, you can always trim them down, but you can't make them bigger. :) 

This step will not take as long as the last one as there are fewer charms to work with and hopefully no trimming. Yayyyy!!! :D 

I will still give everyone two weeks to complete this step, and perhaps catch up on the last step so I will post Step 3 on August 15th! 

As always, if you have any questions, feel free to ask in the comments (just leave your email address so I can respond back to you) or you can email me HERE

I hope everyone is enjoying this quilt along. I'm really excited to see so much interest and I can't wait to see everyone's quilt come together! 

Feel free to add photos of your progress to the Flickr Pool too. :)

Enjoy your day and Happy Quilting!

Much Love!!!
Real Time Web Analytics