photo blogbuttonhome_zpsbfee85f8.png  photo blogbuttonhome_zpsbfee85f8.png  photo blogbuttonhome_zpsbfee85f8.png  photo blogbuttonhome_zpsbfee85f8.png  photo blogbuttonhome_zps0b2ad4ae.png  photo blogbuttonhome_zpsbfee85f8.png  photo blogbuttonhome_zps0b2ad4ae.png  photo blogbuttonhome_zpsbfee85f8.png  photo blogbuttonhome_zpsbfee85f8.png

Friday, April 30, 2010

Quilt Labels - Which Pens To Use

Ok, I'd like to think I'm pretty good with Google. That if I have a question, I'm pretty confident I can find my answer on my own. Not that there is anything wrong with asking someone else, but, I usually learn even more than I was bargaining for when I try on my own first.

I seemed to have failed last night, or perhaps, the information just is not out there. I'm going with the latter, because I'm good with Google. ;) 

Either way, I'm taking it upon myself to add it to the world wide web so ya'll don't have to go through what I did last night.

Lemme explain...

I've been one of those that didn't really realize the importance of using labels on my quilts. I've never labeled one. I know. That's bad. Noodle lashings later please. :) I've read so many stories of quilts from the past and no one knowing where they were from or how they came about, and it broke my heart. So much love and time goes into a quilt, they deserve to hold the information of their origination. Future generations deserve to know where they came from and the history behind them. I'm going to label all my quilts from now on. I will also label the ones that I've made in the past that I can get my hands on.

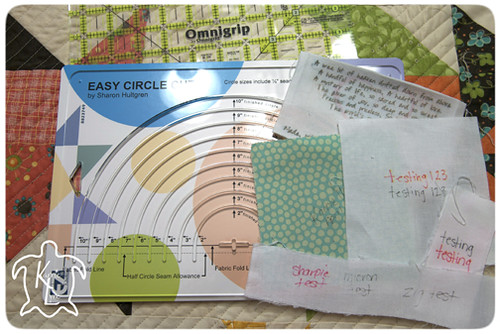
So, last night I started playing with options. The one that I REALLY wanted to work was this one. I designed a really cute label, followed all of the directions carefully, printed my label and it was beautiful. I loved it. I let it sit for a couple of hours and then I did a hand washing test. My label was no longer pretty. It was faded and the ink bled.  (see the large "wordy" label in the photo below). It was horrible. I haven't given up on this yet though. My printer is a photo printer and word is that won't work as well. I'm hoping sometime this weekend to try a normal ink jet printer to see if the results are the same. I will get back to you.

Good and Bad

After this disappointment I tried a Pigma Micron pen as my local quilt store recommended them as well as many others on the www. Also recommended were zig pens and even Sharpies. As you can see above, I didn't have much luck with these either. I was getting worried as to how I was going to be able to do my labels. If the labeling didn't last, what was the point to even do them?

I persevered. Today I went shopping and grabbed a few more pens and did an experiment. I am by no means a professional or a spokesperson for any of these pens, this is purely just my experience and results may vary depending on fabric used, detergents, etc...  

Let's do some test writing... 
Pen Test - Writing on Fabric
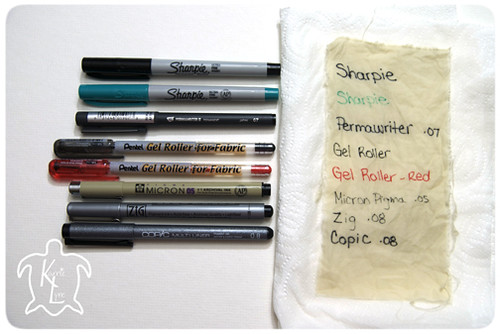
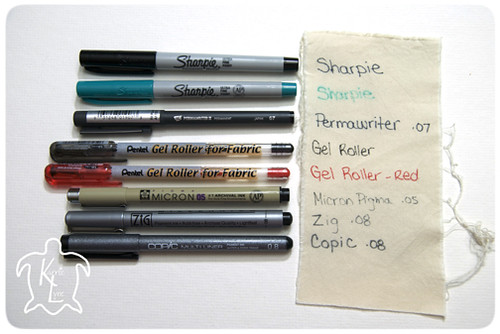
 I used 8 different pens. Sharpie in black and a turquoise color, a Perma Writer II, a gel roller in black and one in red to see if there is a color variation, Pigma Micron, Zig and Copic Multiliner.  I used Moda's Solid Natural fabric. 100% Cotton. I did NOT pre-wash this, it's right off the bolt. I did iron on freezer paper to the back of it to make it easier to write on. I also took a pass with the iron (cotton setting, no steam) after I wrote on the fabric. The above photo shows the results.

Pen Test - Just Wet. No Scrubbing
This photo shows the fabric after I ran it under cold water. No scrubbing. It's just wet.

Pen Test - Scrubbed and Still Wet
This photo shows it scrubbed for about 4 minutes using dish soap detergent. Mine is Dawn hand renewal. I don't know if that makes a difference, but it shouldn't. I scrubbed it pretty hard against itself, more so than I believe a washing machine would. I'm tough that way. :)

Pen Test - Final Result
This shows how it turned out after all that scrubbing and about 20 minutes in a high heat dryer! I also hit it with a hot iron, set to cotton, no steam, to get the wrinkles out.

The first thing I notice is how the ranted and raved about Pigma pen is one of the lightest ones on that fabric. I choose NOT to use that one. I feel the same about the Zig Millenium pen. Granted, on quite a few of the pages I read about Pigma pens, was that you had to let it sit and dry for 24-48 hours before washing it. I did not try this. I'm not that patient. =P

I wouldn't use the sharpie either. The black did better than the turquoise but still faded quite a bit. Now, I have heard that if you prewash your fabric before using the sharpie, it lasts longer, but I did not test that. I'm a bit weary about using a Sharpie on my precious quilt anyways. 

The gel roller actually turned out the best out of all of them. The color didn't fade at all, even in the red. You do have to write a wee bit slower with this one for good coverage but it would be worth it.

The Perma Writer II turned out really well too. The tip is finer than the gel rollers so that is a positive if you have to trace fine lines.

The Copic Multiliner did well too. These are actually more for drawing, such as anime. When you use them with Copic markers, it won't bleed. However, that's a whole different ballgame. It's just nice to know they work on fabric too.

My end result is I want fantastic results, and I want them NOW! LOL. I am by no means saying not to use Pigma Pens. My own local quilt shoppes recommend them. It's just that I am not that patient. The gel rollers and the perma writer II are both pens made specifically for fabric and they turned out great! I choose these babies! :D

I would love to hear your opinion on what you use, good and bad, and if you try something similar to what I did, let me know your results. Or, even if this information was helpful to you, or not. :) 

Happy Quilting....and as always....

Much Love!!!

Monday, April 26, 2010

Sew Wonderful

I've been busy. Really busy. Busy sewing. It's what I did most of the weekend and I got a lot done, unless you are counting domestic stuff. I didn't get much of that done at all...lol!  However, who knew that after all that, my body would be sore?! I know its from hunching over a counter cutting and I probably don't sit in my chair properly either, but wow. I felt like I was 80 last night. Not that I know what 80 feels like but I felt like it anyway. It's much better today but it sure surprised me! Anyone else ever get like that, or do I just need to sew more? You know, like exercise. They say the more you do it, the less painful it is...lol! 

Now here's the hard part. I can't really share with you exactly what I've been working on. I have two good reasons. 

1. One of the things I was working on is a gift so I cannot share until it's finished and it has been received. Just let me tell you that I love it and want to make one for me myself and I. It's adorable if I do say so myself. Trust me :)

2. Rachel said I can't share my "completed" pinwheel quilt top until it's been two weeks  and we all share together, so I have to abide. Its more fun that way. Trust me :)  If you want to see previous pix of my pinwheel quilt coming along, click over on the left on my flickr badge and you can see the blocks there. :)

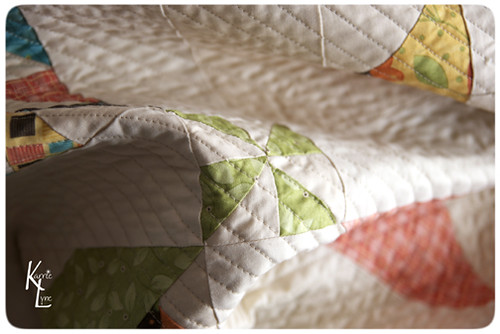
Now she DID say completed so I won't share that but I will give a sneak peek. I'm 1/4 of the way done quilting this puppy! It will be nearly 80" square and I decided to straight line it, with a twist. Hence the reason I'm only 1/4 of the way done, but I am so loving it. Have I said that before? That I love it? In case I haven't. I LOVE THIS QUILT!!! :D 

Sneak Peek #2

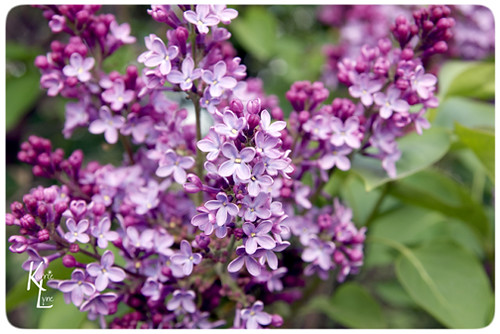
These wonderfully smelling beauties have started blooming. I {heart} lilacs. They smell so good. In a few days I will bring snippets of them in my house. It doesn't take too many and the house smells fresh and springy! :)

Day 116 - My Lilacs

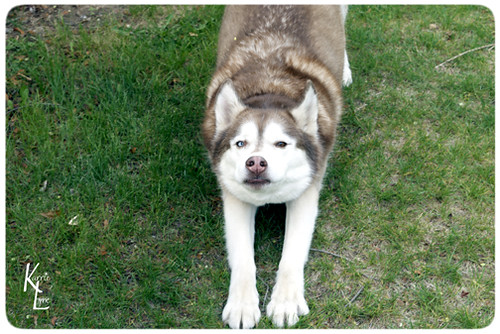
This last photo is just funny to me. Bodie, my husky, never lets me get a full on face shot. I think it's because he hates the flash, even though I haven't used a flash with him in years. I caught him during a stretch. He couldn't really look away...lol. One of these days I want to get a "nice" shot of him. He really is a beautiful dog. 

Gottcha

Enjoy!

Much Love!!!

Wednesday, April 21, 2010

I'm A Nikon

I was going through some of my YouTube favourites and came across a video I had forgotten about.  I first saw it on Julie's blog a while back. I found it quite amusing then, and I find it quite amusing now.  It's one of those videos that you either hate or love. I love it. Because it's funny, and I like to laugh. :)

Give it a chance...just don't watch it with your young'ins!


Watch those thumb prints... =P

Tuesday, April 20, 2010

Squeeeeeee!!!

Just a little announcement... because I'm totally excited!! I FINISHED all of my 25 pinwheel blocks for Rachel's Pinwheel Quilt Along!!! The final 4 I wrapped up tonight! *Squeeeeeeee!!* No, I don't need a bag to breathe in....yet. ;)

The last thing I need to do before the sashing is to make my mini pinwheels (min pins). Again. Yes, again. I had already made up 10 of them and then a few days later (in the shower no less...this seems to be where I remember everything I forgot) I realized that I had used the wrong background fabric for them. If that's not a "hityourselfontheheadreallyhardlikeadork" moment, I don't know what is. So....tomorrow I need to re-make all 16 of them. Then...she's ready to be pieced with sashing...be still my heart. :)

I'm trying to figure out how to quilt this thing. It's my baby and I don't want to ruin it and I'm not so established in the actual quilting part. I thought about straight line quilting it every 1/2 inch, but with it being nearly 80" square, I might just be totally whacko for attempting that. I mean, that's like 160 lines, 80" long..EACH. Yipes! I could squiggly line quilt it, which I would need to practice because I'm not so hot at that either, so even though straight lining it would take a great deal of time, I know I'd like it better. 

Do you think straight line quilting it would look good? All suggestions greatly appreciated! :)

This is the part that is going to stress me out the most, but, I'll cross that bridge when I get there! For now, I will revel in the excitement that all my blocks are done and I am head over heels in love with all them!!

Much Love!!!

Friday, April 16, 2010

Lost Things

Just a little something short and sweet I wanted to share. 

I love stop-motion films and this one is no different. I can watch it over and over and see something new each time.

It's amazing and beautiful and I truly appreciate the creativity and all the time that went into the making of it. 

Have a look...


Much Love!!!

Thursday, April 15, 2010

Round and Round We Go

It is getting so close to finishing up my pinwheel quilt from Rachel's quilt a long. This weekend she is supposed to post the last block and then there is just the sashing. Eeeeepss!! 

Now of course I couldn't make it easy and just do the 16 blocks she is posting, I want mine to be 25 blocks. Mainly because I want it to be bigger, plus I just want more pinwheels! Soooo...I've been scouring the net to see if I can find more blocks. I've found a few but there is more scouring to be had.

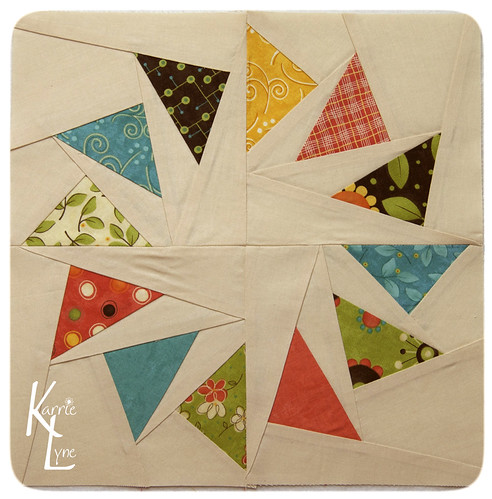
Tonight I came across a block that isn't necessarily a pinwheel, but it sort of is, and I loved it and I knew I wanted it in my quilt! I saw it here on Kerry's blog first. She posted what tutorial she used, which can be found here on Christina's blog. Then I saw it was paper piecing. As much as I liked the block, that in itself almost made me pass on it. 

The last time I tried paper piecing it was a mess. Not a fun mess either, mind you. The last time I tried it those paper pieces didn't want to come out for nuthin'. I pretty much had to soak it in water to dissolve that darned paper the last time. See why I was disappointed? However, once I like something, it's not easy for me to let it go. No matter what. So.....I said I'd give it another go. Only this time I was going to shorten my stitch length, a lot. I didn't know this tip the first time I tried it, but was advised to do so by a woman at the shoppe I purchased my machine from. I knocked my stitch length down to 1.25 and had at it. When it was time to remove the paper, it tore right out! I was VERY pleased!

This block was not difficult in my opinion, however I do strongly suggest that you start with fabric that you are not planning to use in  your project and do a practice block to get the feel of how it goes together. Doing this will ensure you are not wasting your really nice fabric and if you make a mistake,  you're not out that fabric for your project. I ended up using my Frolic scraps and didn't get it right until my 3rd block. Third time really is a charm. Once you get the hang of it, it's really easy and goes together pretty quickly. I'm not sure I'd do an entire quilt like this, but maybe, now that paper piecing is a piece of cake. :)

Here is the completed block... 
Day 105 - Extra Pinwheel Block #2

Here is what my workstation looked like when I was done... =/
I'm Just A Tad Messy

I'm not usually that messy....usually. ;)

Much Love!!

Wednesday, April 14, 2010

Nature's Teacher

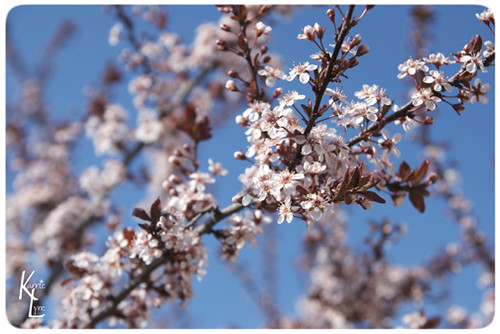
I have this tree in my front yard and I love it so. It's beautiful because it is a deep plum color and every spring it blooms these wondrous dainty pink flowers. I wait for it every year. Anticipate it. Wait some more. Then it happens. Those sweet baby flowers emerge and cover the entire tree. I only get to enjoy this vision for about a week. At that point the petals start to fall and all that is left is a pretty purple tree. 
 
One week out of fifty two. It's one of nature's teachers. It teaches you to enjoy the things you have when you have them. To appreciate it then and now, because you never know when it will be gone.
 
Day 104 - Flowering Plum Tree

Speaking of appreciation....I never thought in a million years that connecting with people over the internet would be a lasting endeavor. At one time in my life I always wondered how you could connect with someone that you've never met in person. Over the years, time and time again, its been proven  to me that you can. Different connections with different types of people. Some short lived. Some that have lasted years. No matter the time, they are moments cherished. 
 
Someone that recently came into my life via the intrawebs is Jeannie. It all started on Flickr over pancakes and cinnamon rolls, which still cracks me up.  She is one of the sweetest people I "know" and she is very dear to me. Compassionate, caring, kind, cheerful and quite an inspiration. I think she'd tell you that I was the enabler of the two of us, but I just might disagree. ;)

Thank you, Jeannie, for making me smile each and every day! You truly are a gem! :)

Just to show how sweet she is....lookie what I got in the mail today from her! The inspiration, I think, was because I got her hooked on the Keurig. Ok, maybe I am a wee bit of an enabler... hee hee :)
 
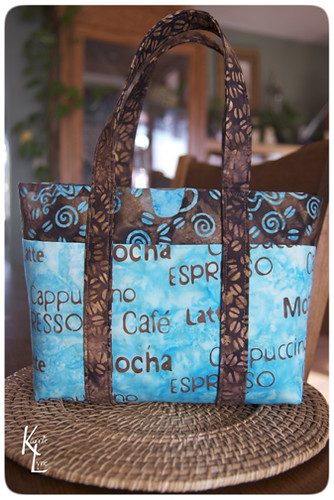
Bag From Lv2Create

Much Love!!!

Monday, April 12, 2010

Monday Madness

Monday is almost over. Thank goodness! That means one day closer to the weekend! I guess I count down a bit early, huh? 

Good things can happen on Monday's though. This is what came in the mail for me today! Nothing like yummy fabric to cheer me up after a long day! :)

Day 102 - Monday Smiles

I urge you to go check out Burgundy Buttons! Leah is great and she ships super fast. I ordered this on the 8th, at night, and I got it today! She also runs great sales. Just subscribe to her blog and you'll be the first to know!! 

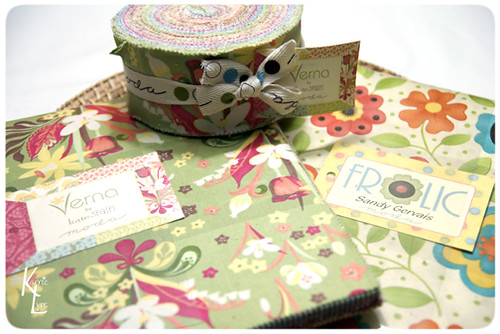
Another place I fancy is Fat Quarter Shop.  They have everything! They ship super fast! They even send notifications when they get something in, upon request. That's how I got my Frolic Layer cake for my Pinwheel quilt so fast. :)

Speaking of Fat Quarter Shop, Jaybird Quilts is hosting a give-a-way from them. Head on over and post your comments on her blog so you have a chance to win the Soul Mates quilt kit!! I wanna win that kit sooo bad! It features Frolic....and the name is just perfect. If you comment and win and don't want it, I'll be happy to take it off your hands. :)

While you're there, have a lookie around Jaybird's blog. Oh, and sign up for her hexagon quilt along too!! The more the merrier! :)

Much Love!!!

Friday, April 9, 2010

Heartfelt Thanks

You know those moments where you are so touched that you just can't help but get all choked up? I had one of those moments today. 

It had been a really, really long week. When I got home from the office I took a minute to sit down and read a few blogs to unwind. I just happened to check my blog stats first and thought for sure something crazy was going on in blogland because I had *a lot* of hits.  I checked the track backs for most of the hits and I was stunned. Don't worry. That's a good thing! :)

The links tracked back to Jaybird Quilts, and as always, I was happy to see a fresh post from her. Wait. Fresh post? I don't know why I said that. Anyway, I was enjoying all the photos she was posting of that cute little viking nephew of hers, finding some new Flickr groups, reading about her friends......and then there it was.....

Me! Little ole me counted in as one of her friends, and she thinks I am funny, AND that I make cute stuff!!! Ok, so she spelled my name wrong, and I'll give her crap about that later {haha} but how sweet is that??!! And she wonders why I think she's cool? She really is the bomb diggity, aaaaaaand the queen of hexagons!

By the way, if you haven't figured it out, she's famous. I have her signature and one day it will be worth a million dollars. :)

Thank you for making my day Julie! You truly are a peach. Or you can be an apple, but I like peaches better. :)

Much love!!!

Tuesday, April 6, 2010

It's A Thug Story

I've never really been one for rap music. Some of it is ok and some of it I love, but most times I pass. 

This may be old news but I saw it for the first time the other night. I just might like rap more if all the songs were like this....


I just cannot help but crack up... T-Swizzie...oh..and that "Big Ass Chain"...LOL! 

I {heart} Taylor Swift, and maybe now I even like T-Pain a wee bit more too. :)

Much Love!!!


Sunday, April 4, 2010

Happy Easter!


Hoping everyone had a blessed day and if that silly bunny brought you my chocolate, please return it. :)

Saturday, April 3, 2010

A Wee Bit Crazy?

One of my New Year's goals was that I was going to finish more of the projects I start. I know that I've definitely kept that up, although I still have quite a few that I began long ago that someday I'd like to finish but all these new ones keep popping up. I read so many blogs that are FULL of inspiration and the gears just get a turning. 

I don't know exactly why, but I've become strangely addicted to pinwheels and hexagons. Browsing through Flickr, those items always draw me right in. In looking through so many wonderful projects, I kept coming back to the same one. One that I know would take a LONG time. One that I kept trying to sweep under the rug and cover my eyes about.  I kept telling myself I would hate this project once I started it, even though it is a beautiful quilt.

So I gave in. I thought by now I'd be sorry, but far from it!! I am actually really enjoying it and I can't wait to see how it comes along.

Have you ever seen the Grandmother's Garden quilts? Oh. My. Goodness! They are beautiful. They are (in most cases) completely made my hand, meaning hand stitched. No machine.

This is my next endeavor.  I think I might be a wee bit crazy. I know I've tried to do hand piecing before with the Josephs Coat quilt along, but as pretty as that quilt was, the prep work was awful for me. All that gluing and I kept getting stuck with all those applique pins.  Whine whine whine! I know...but this one is different. No pins. No glue and no accuracy when cutting these babies out.

Here's how I started...

I chose a Moda Layer Cake, Boutique which has 42 10 inch pieces of fabric in it. I am using 1" hexagon pieces to do the English Paper Piecing. You can purchase your own HERE, or you can print  your own as well. I am too lazy to print and cut those all out. :) I also used their hexagon cutting guide. Its the one at the bottom of the page. Using this chart I knew my squares for piecing had to be 2.5". Using a layer cake makes this easy. I take about 5-7 pieces, keeping them all lined up and cut at 2.5", 5", and 7.5". Then I rotate my cutting mat and repeat. If they are not perfect 2.5" squares, its ok, just as long as they are close. Do this for all layers and you have 672 squares. 

Now, for the actual sewing...I followed THIS wonderful tutorial but made a few of my own changes. I did not cut my fabric into hexagon shapes. I left mine 2.5" square. Why waste time trimming? The other thing I did different, was I did not use a pin to keep the paper in place and I back stitched twice on each corner. I found that this held them down better for me, but it's not required. The best part of this method is that you can leave your basting stitches in your work because it is all in the back and you are NOT sewing through the paper, so no clipping of any threads!!  What a time saver! The only time you might have to is if you use hexagons bigger than 2" because you have to make an extra stitch on the sides.

I haven't decided officially on how many rows my flowers will be. Right now I am just doing the center with one row, but I think I will add one more row of colour and then white to surround the flowers. We shall see. Once I finally decide, I will figure out just how many of these little guys I am going to have to hand sew together and begin a count down. :)

My Very Own Flowers

**Edited to add a photo of the back of my hexies per request. Hopefully this will make more sense with the visual. :)

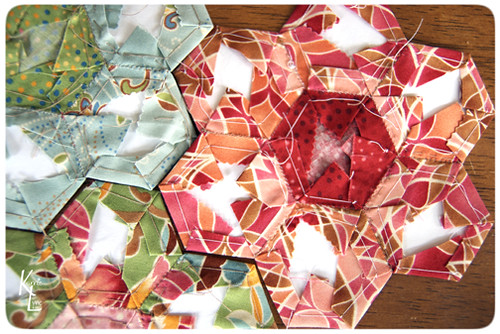
Day 94 - Back of Hexies

They really are quite simple and addicting. Wanna give it a go with me? Hee Hee!! :)

Much Love!!!
Real Time Web Analytics