photo blogbuttonhome_zpsbfee85f8.png  photo blogbuttonhome_zpsbfee85f8.png  photo blogbuttonhome_zpsbfee85f8.png  photo blogbuttonhome_zpsbfee85f8.png  photo blogbuttonhome_zps0b2ad4ae.png  photo blogbuttonhome_zpsbfee85f8.png  photo blogbuttonhome_zps0b2ad4ae.png  photo blogbuttonhome_zpsbfee85f8.png  photo blogbuttonhome_zpsbfee85f8.png
Showing posts with label Potholder Tutorial. Show all posts

Sunday, August 22, 2010

GO!! Have Some Fun

Not too long ago I told you all that I received this in the mail...
I also told you that I'd be reviewing the product and giving my 2 cents. Ok, maybe 4 cents. ;) I say 4 cents because I also have a tutorial for you after my review! Yay!

Let's just say I have been a busy little turtle (turtle...because I like them better than bees!) today playing with this awesome tool! I knew I'd love it, but I didn't know that I'd love it as much as I do. 

When I was asked to review this item I was offered three dies and I was allowed to choose them myself. One of the dies that I chose was Drunkards Path. I have been eying quilts made with this block for months and I've been wanting to make one but I was scared of all those curves. However, I was more intimidated with the fact that I had to cut all those pieces out. Let's be real. I don't like cutting. It's my least favourite part of quilting so that quilt never would have made it to my machine. Well, maybe four blocks or so before I got tired of it...lol! 

Today I decided to give it a whirl. I pulled out my GO! and grabbed a layer cake and some yardage and went to town. 

I read the instructions on how to use it like 5 times. I didn't want to ruin my new baby, ya know! They make it so simple though! 
  • Open the GO! cutter. 
  • Lay out the die FOAM SIDE UP on the cutters "table"
  • Place your fabric on top of the die
  • Place the cutting mat on top (they make this two sided so you can't mess that up either!)
  • Then gently place into roller and crank the handle till it comes out the other side! 
  • Say "Weeeee!!" Yes,  you have to say that as you do it. Each time. Trust me. It's fun :D
  • Then remove the cutting mat and squeal at what you've just accomplished!! (My neighbors may have thought I was nuts...LOL)
That's it! Easy peasy and so fun! Each and every time you do it! No hand cutting. None. Zip. Zilch. Nada. Zeta. Nil. Diddly Squat! <--- that's my favourite...haha! 
Now you're probably asking how long this took me, right? Of course you are! 

First imagine if you had to cut out enough pieces **by hand** to make 36 drunkard path blocks. That's one each of the arc and the quarter circle, so 72 pieces. Estimate how long that might take you. 

Now how excited would you be if I told you that I cut each block piece that I needed to make an entire quilt in 30 minutes? Yep! Enough blocks to make 36 quilt blocks!! That includes cutting time for my solids! I think I even had a potty break in there! LOL! 

I love the fact that you can cut more than one layer at a time! I had the best results using only 3 layers, but 4 worked too. I just had to snip a few threads here and there, which is no biggie. 

I've heard a lot of talk about the waste that comes with using this tool. Yes, you will have waste, but you would if you had to hand cut this as well. In my opinion, my time is much more valuable than having a little bit more waste in fabric! I also haven't thrown my scraps away. I figure I will find some kind of use for them! :D  ((ohhh.....light bulb moment...maybe a wonky log cabin block quilt...ohhh...or a string quilt....! See...sometimes waste is a GOOD thing! ))

Here is an example of what is left when using  Layer Cake pieces on one side of the die. (I say one side because you can actually cut two complete blocks with this die if your fabric is larger.) Not too much, really.


Another feature I loved about this die and tool set is that there is no guessing. When you cut out the two pieces, they have corresponding notches (you can see them in the above photo) to match up for sewing! How cool is that!? Ingenious! 

So, my overall perception on the Go! cutter is that I LOVE IT!!! A lot! More than a lot! I need more dies now, like the hexagon one! :D  Way more positives than negatives and I'd recommend it to every quilter out there! Seriously......let met tell you one more reason why...

I made a quilt top that measures 58" x 58" today. In 5.5 hours total...that includes some laundry time so even less than that. I think it took me like an hour to sew the 36 blocks together. **gasp** Yes, circle piecing all those blocks in an hour!? Then just a little more time to sew them together and put the borders on! Eeeeeps! When was the last time you made a quilt like this in 5.5 hours?! I can't say that I ever have! 

A HUGE thank you to AccuQuilt for giving me a chance to use this awesome machine!!! Love every bit of it and I can see a lot of use in the future!!! :)

*******************************

You've been waiting patiently for the tutorial so here you have it....my drunkards path quilt top... 


 Drunkards Medallion

**Supplies**

1 layer cake
1 1/2 yards of a coordinating solid
1/2 yard for binding
3 3/4 yards for backing

Start by setting up your AccuQuilt GO! machine.

Choose 20 layer cake pieces. Your leftovers will be used in the border so don't leave all your least favourites in the pile. ;)


Next you need to cut your solid fabric.

Cut ten strips that are 10" wide. Then sub cut them into 10" squares.

Now you are ready to cut!

Lay your fabric on top of the die. I did three pieces at a time. You can do four, but you may have to snip some threads here and there. Test it out and see what works for you.

Do this for all 20 prints and all 20 solid pieces. 


This is what you get! Woo Hoo!!

**Note: I forgot to take a photo of the white pieces, but the process is the same.

From the prints you need to have 20 of the arc pieces and 16 of the quarter circle pieces.
From the solid you need to have 16 of the arc pieces and 20 of the quarter circle pieces.
The extras, you can set aside for scraps or to use in the back of the quilt.

Match a print arc piece and a white quarter circle piece and sew together according to the instructions with the die. Make 20 blocks.

Next, match a white arc piece to a print quarter circle and sew together according to the instructions with the die. Make 16 blocks.

Then lay them out in a pleasing order. This is how I chose to lay mine out. Hence, Drunkards Medallion. :)


Then just sew your blocks together to form rows. Then sew your rows together. This should measure 42.5" squared when you are done.

From the solid, cut 5 pieces that are 4 1/2 inches wide for your first border. You will have to piece two sides.

I also added a scrappy outside border with the left over Layer Cake pieces. I cut them in half (5" x 10") then sub cut them randomly. Just sew pieces together until you have a strip that is as long, or a bit longer than 42.5".  Repeat for the other side. Press and trim ends if necessary.

Repeat for the top and bottom, only making the strips longer. Sew them on. Press. Trim ends if necessary.

Then you are ready to sandwich, quilt and bind your new quilt top that only took you a few hours!

Once I have her quilted I will show another photo. I was just so excited to have a "what looks to be complicated" quilt top done in 1/2 a day! Woo Hoo!!!

Don't forget to keep your eyes out for a giveaway here soon too!! ;)

Much Love!!!

Monday, August 16, 2010

Strawberries Anyone?

I was sitting at my desk today eating strawberries and I think I had at least five people come up to me and ask me what the heck I was doing...LOL!

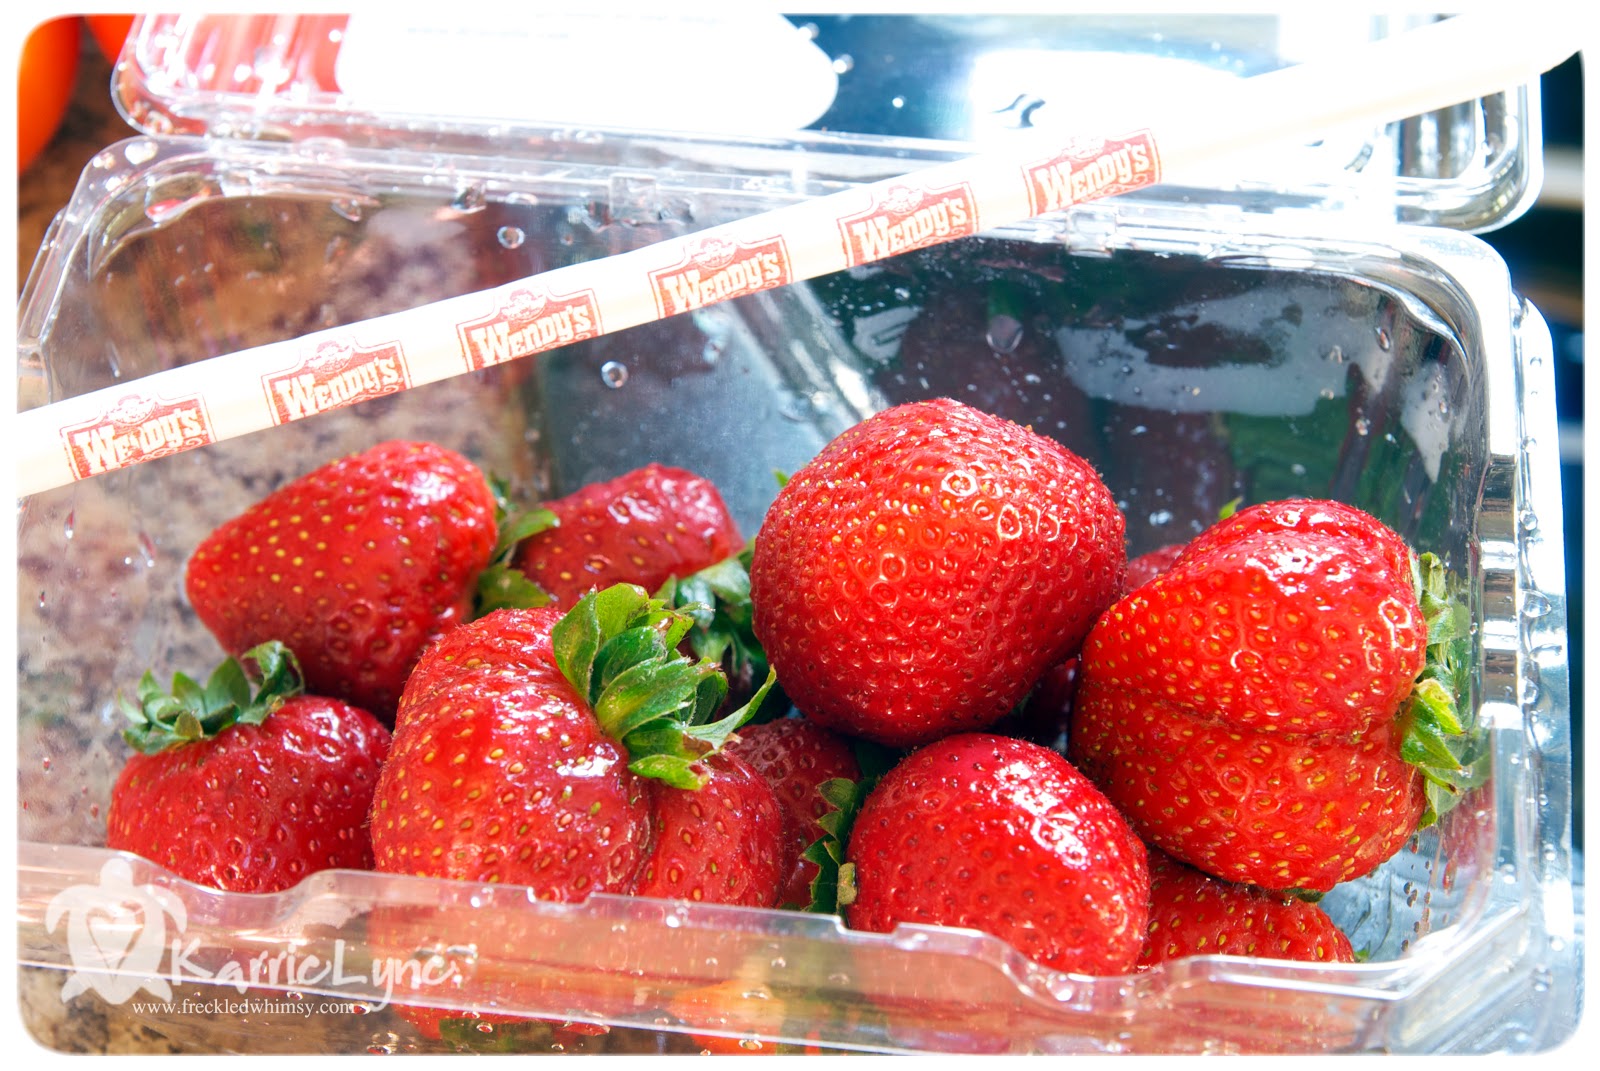
When you eat strawberries you remove the green leafy parts, or at least most people do. I always used to think they were a pain in the rear to remove so I started using a straw. Yep, a straw!

Let me explain...

Gather your strawberries, and of course a straw. The best ones are from fast food restaurants like Wendy's or McDonald's because they are fatter and they are stiff!

Hold your strawberry and position the straw beginning at the bottom, pointing towards the top.

Then impale your strawberry! LOL!

Remove the top, then the straw, and you have a perfect strawberry to munch on! :D

Unless your strawberries are HUGE, one impalement should work, if you have some left over, just do it again.

Much Love!!!

Sunday, May 9, 2010

My First Tutorial! :)

First things first...Happy Mother's day to all you mothers, whether you have children with or without fur! :) Today is bitter sweet for me. I love being the mother to my children and enjoy this day with them, but it is also a day where I miss my own mother very much. It's been 2.5 years but days like today make it seem like yesterday that I lost her. It makes days like this tough. However, my own children bring me smiles all day long. :) 

For example, the newest craze for all the kids here are Silly Bandz. I personally do not get the frenzie, but then again, it keeps the kids busy trading and having fun and out of trouble, so who am I to care? Today, my son traded one of his own for this one for me! :) Awwwww...it's a turtle! :)


As a treat for you mothers and others, I've created my very first tutorial!! I am in a potholder swap, which is actually what inspired this so I hope you enjoy and if you have ANY questions, please feel free to email me!

{Half Square Triangle Potholder Tutorial}
Do you ever get done with a project using a jelly roll and you have scraps left over? I think we all do but I've come up with a tutorial using these scraps for a cute potholder that you can make for yourself, give as a gift or maybe even swap with! 

Ready? Here goes....
First, gather up your extra strips from your jelly roll (or you can cut 2.5" in strips from other fabrics). I am using Eva by Basic Grey for Moda.
Potholder Tutorial Pictures 
Choose 6 strips to make 3 sets of two strips. I like to choose contrasting strips so the design in the potholder shows up better. You will need 2 strips for one strip set that are at least 24" long each and the other 4 (other 2 strip sets) will need to be at least 14" for this specific pattern to work. However, you can make about a million designs with half square triangles so you are not limited to those sizes. :)

Choose%206%20strips%20-%203%20pair

Once you have your strips chosen in pairs, put them together, right sides facing, and sew on each side. Yes, down EACH side.  Trust me. :)
Potholder Tutorial Pictures
Once you have done this with all 3 strip sets, take the one where you needed at least 24" and lay it on your cutting mat. This strip will yield 8 half square triangles. Using a square ruler with a 45 degree line (Mine is a 6.5" ruler by Omnigrid) and starting from the right hand side line up your 45 degree line on your ruler on the bottom line of stitches, leaving an overhang on the right side of the ruler enough for you to cut a line from the top to the bottom of the strip.  (Leftys, you will do just the opposite as me by starting on the left side, but the same process).
Potholder Tutorial Pictures
With everything lined up nicely, cut from the bottom to the top at that angle. 
Potholder Tutorial Pictures
Now, all you have to do is slide your ruler up so the 45 degree line is now in line with the top stitches of your strip. Don't twist or turn your ruler, just slide it straight up until the lines match up. You also have to make sure the cut line you just made, is lined up with the edge of your ruler. Once you have done this, cut along the ruler.
Potholder Tutorial Pictures
Next cut, slide your ruler back down (no turning or twisting) and line up that 45 degree line on your ruler and the edge of your fabric with the edge of the ruler, and cut.
3rd cut
You will repeat these steps until you have 8 half square triangles. 
Potholder Tutorial Pictures
 Press them open to the dark side. Ohhhh...be careful of the dark side...lol!
  
Once pressed, this is what you will have! These will be the HST that will surround your inner 4 HST. Easy peasy, huh? 
Potholder Tutorial Pictures
Next, grab one of your remaining strips. I am using the prints that I used in the inner part of my potholder. Repeat the same step in cutting out your triangles, only this time, cut 4. 
Potholder Tutorial Pictures 
Again, press to the dark side...oohhhhhh... ;)
Potholder Tutorial Pictures
Last strip. Repeat again until you have 4 HST for the outside corners of your potholder!
Potholder Tutorial Pictures
Press to the dark side. But you already knew that! :)
Potholder Tutorial Pictures
Now comes the fun part!! Lay them all out in desired pattern. For this tutorial, I used this pattern.
Potholder Tutorial Pictures
Once you have it all set out and in the design you want, you need to sew them in rows. I chain piece mine but please do this however you feel most comfortable where you won't get lost in piecing these.

Important!! When pressing your seams in these rows, make sure you press the rows in opposite directions. This helps when sewing the rows together. The seams will nest right together! 
Potholder Tutorial Pictures
This is what I mean by the seams will nest...
Potholder Tutorial Pictures
Now, sew your rows together and press seams to one side. 
Potholder Tutorial Pictures
From here you can decide if you want to trim up your square or not. You should at least square it up, but I actually trimmed mine down to 9".

Now that you have the top done, you need to sandwich it. I use one layer of cotton batting, one layer of insul-bright, and for this, I strip pieced the back but you can do whatever you like for your backing. Just make sure it is bigger than your potholder top.
Potholder Tutorial Pictures
Next, just layer and quilt it as you please. Then trim it up to add your binding and you are done and have a cute little potholder on your hands! :) I'll be honest here. I hate putting binding on these little boogers the same way I do my quilts because it usually doesn't play nice since they are so small. I found THIS tutorial and I {heart} it a lot for these little babies!
Potholder Tutorial Pictures

After washing them, my potholders came out to be approximately 8.5", which is a little bigger than a normal potholder, but I like them a bit bigger in case I want to use them to set a hot pan on as well. 
I hope my partner likes her potholders and I hope you enjoyed my first tutorial! :)

Remember, email me if you have any questions! :)

I'd love to see your project if you followed my tutorial too! :D

Much Love!!!
Real Time Web Analytics