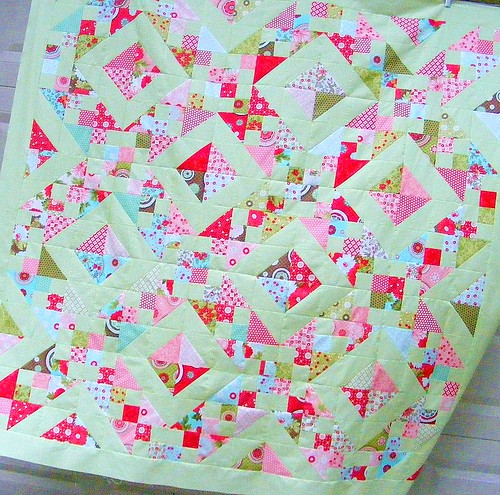
Hello Friends!! Are you ready to start putting your blocks together? Yes? Fantastic because that is the next step! Block Assembly! Woo Hoo!!
First off though, I must apologize to Miss Sarah. She is the one who shared the technique with me on how to do the 4-patches in the first method and I completely forgot to add the credit in that post. She has made a quilt using a block that is very similar to this one and she emailed me with the tip on how to do them. Thank you again Sarah on those instructions!! My apologies for not giving you the credit the first go round...I have it updated now :)
Ok...block assembly. This is really easy. It's just like putting together a 9-patch block.
My first tip would be to suggest not spending a ton of time on which pieces to use in each block. I'd actually suggest putting your HST in one bag and the 4-patches in another, mix them up, and just grab and go. If you happen to choose one with the same fabrics, you can choose again, otherwise, just let them fall where they may.
Choose three 4-patches and six HST (half square triangles) and lay them as shown in the below photo.
Sew each row together and press them in opposite directions. (Press top row to the left, middle row to the right, and bottom row to the left again). This way the seams will nest when you sew the rows together.
Then all you have to do is sew the rows together and voila! :D
You can make this one block at a time or you can chain piece them to do all 25 at the same time. I like to do mine in rows. Sew the first two pieces of row one together for all 25 blocks, then go back and add the third piece, press them all and put them in a pile. Then repeat for rows 2 and 3. Then all you have to do is sew the rows together. Much faster :)
This weeks assignment will be to complete all 25 of your blocks! I will be back here on August 29th with the finishing instructions!
A couple of you have been busy beavers and have already completed your tops!! Aren't they wonderful??!!
This one was done by Kim...*swoons over 12 Days of Christmas** :)
This one is by Thomas.... it's blissful!! :)
I can't wait to see these start piling in!! Remember to post your photos in the Flickr Pool so I can swoon over them all :)
Much Love!!!


I am weeks behind but I love this quilt so will keep on trucking!
ReplyDeleteThese look great! I have yet to crack open my charm packs :( But.....school starts soon, so I'll be able to get this started!
ReplyDeleteSounds fun and easy. I cant wait to lay them all out and see how it looks
ReplyDeleteThanks for the credit, Karrie! I wasn't really worried about it - you shouldn't have either - but thanks for thinking of me!
ReplyDeleteKarrie, I have given you a Versatile Blogger Award! Check it out here: http://confessionsofafabricaddict.blogspot.com/2010/08/oh-look-bunny.html
ReplyDeleteThose are some darling quilts. Love your blog!
ReplyDeletelook at people... quilt tops done already... oh my!! i better get to work!
ReplyDeleteI finished putting my quilt top together. Now all I have to do is quilt and bind. So excited!! Thank you!!
ReplyDeleteGorgeous quilt! :o)
ReplyDeleteI love this quilt and planning to make it for my quest bedroom! I was wondering what the block size is? I need to make the quilt a little larger to fit a queen size bed and I'm trying to figure out yardage!! Thanks for your help!
ReplyDeletejamiemueller0522@yahoo.com
Where can I find Step 1 and Step 2?
ReplyDelete