photo blogbuttonhome_zpsbfee85f8.png  photo blogbuttonhome_zpsbfee85f8.png  photo blogbuttonhome_zpsbfee85f8.png  photo blogbuttonhome_zpsbfee85f8.png  photo blogbuttonhome_zps0b2ad4ae.png  photo blogbuttonhome_zpsbfee85f8.png  photo blogbuttonhome_zps0b2ad4ae.png  photo blogbuttonhome_zpsbfee85f8.png  photo blogbuttonhome_zpsbfee85f8.png

Friday, December 31, 2010

A Year To Remember

Wow, what a year! 

I remember last year making goals for this year and one of them was to finish more projects! I think I've achieved that....

22 Quilts - full size and mini
2 Quilt tops
8 pillows
1 crocheted afghan
handful of potholders
a couple pouches
a couple pincushions
some other odds and ends....

Quilts and pillows seem to be my forte....haha!

I'd say it was a good year. Even more so that I can say that I have hardly any UFO's! Let's see...my hexagon quilt along quilt (which I WILL finish), drunkards path quilt that just needs to be quilted, circle around quilt that just needs to be quilted and two quilt projects that I started (and hate) that will never ever get finished so I don't really think those count as UFO's...LOL!  

Not to shabby if I do say so myself. 

Note: Two quilts are not shown here because ... well I can't show them to you yet. (groans) But trust me when I say I have two more completed and will be showing them to you soon! :D

1. Scruffy Quilt 3, 2. Zees Quilt, 3. Half Square Triangle Quilt, 4. Completed Pinwheel Quilt, 5. Square Dance Completed, 6. Tinker Coin Quilt, 7. ALQS4 Front Complete, 8. Random Reflection in Fandango, 9. Random Reflections in Eva, 10. Crossing Paths, 11. DQS9 Complete!!!, 12. My Charm Pack Quilt, 13. September Moda Bake Shop Goodie, 14. "Busy Like A Bug", 15. Autumn Strings Quilt, 16. Boxed In, 17. Sweet Divinity - Pocket Full of Pinwheels Tutorial, 18. Flower Box w Tutorial, 19. Crushed Diamonds - Kona Crush, 20. Opposites Attract, 21. Java Stars Quilt & Tutorial, 22. Drunkards Medallion Top , 23. Circle Around Top Complete, 24. Day 87 - Yummy As Sherbet, 25. Pretty Pair of Pillows, 26. Pillow Talk #3, 27. Angel Pillow on It's Way, 28. process pillow 3, 29. Pillow Talk Swap 4 Pillow, 30. Pillow Giveaway

A year ago, I never expected to be where I am. I never thought I'd ever, ever, ever, make so many quilts, let alone in one year! I've had so much fun making everything, but even MORE fun making tutorials for all of you!! 

Thank you so much, to all of you, who have followed me through such an amazing journey!! Shall we see if I can churn out more in 2011? We'll see... ;) 

I'd love to hear your "totals" for 2010!! Did you beat me? I bet some of you have! :D

Wishing all of you a very blessed 2011. 

Much Love!!!

Thursday, December 30, 2010

I Smell Java!

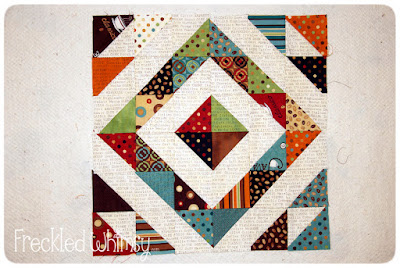
Sooooo....I've been baking again! I had so much fun making this quilt and I hope all of you love it as much as I do!! 

If you'd like to see the entire quilt, along with the complete tutorial, please head on over to Moda Bake Shop and maybe even leave a comment there to tell me what you think. :D

Here's a sneak peek of Java Stars ...


As promised in the tutorial, here are some ways to use up those scraps from putting this quilt together! 

You will have a bunch of triangles left over from trimming the corner squares of the block. If you keep these together after trimming, just run these through your machine using a 1/4" seam allowance to make half square triangles. Then use my HST Tutorial to trim them to the same size, 3 1/4" square. You should have 36 HST so you can arrange them in a 6 x 6 layout. 

HST are one of my favourites because there are so many possiblities to arrange them. Play with them until you find a layout you like and then make it into a pillow!  Here are a few to get you started... I went with the bottom one. If you play with the blocks, you can actually arrange them so all the words face the same way. :)


The other pieces that you have left over from the layer cake and the background fabric you can use to make 9 blocks to put in a baby quilt or perhaps even use it as a wall hanging.


Take these, and sew them together as so using a 1/4" seam allowance...


Press them towards the darker fabric. 

Next you may need to trim the end of each of the 36 pieces so that you have a straight edge. Trim the end that has the wider edge of the background fabric. (In this case the cream fabric). 


Divide your pieces into 4 piles of 9 so that the direction of the words is the same in each pile. 

Arrange your blocks as so, once again making sure that your words on the background fabric are all in the same direction. You will use one piece from each pile. 


Flip the pieces on the right, to the pieces on the left and sew where the fabrics meet...


Press each half in opposite directions...


Then sew the top and bottom halves together, matching center seams.


Press.


Next we need to trim the blocks as shown.


Rotate the block and trim the other two sides.


Square up your block if necessary.

Now you should have 9 of these cute little blocks that you can put into a quilt any way you please.


You can just sew the 9 blocks together and add borders. Or you can add a sashing with the blocks and then add your borders. OR....you could incorporate these into the backing of your Java Stars quilt too! That would save you from purchasing more backing fabric. :) 

If you want to take it one step further, with the remaining pieces you just trimmed off from these, you can repeat the process and even make 9 more smaller blocks to use as you please.

And just to show you that all my quilts DO get used...


Oddysey (on the left) just happens to be sleeping on the quilt that will be my Moda Bake Shop tutorial next month using Kate Spain's Central Park. :)

Enjoy! 

Much Love!!!

Tuesday, December 28, 2010

Tidbit Tuesday #31

Oh. My. Goodness. 

I love the holidays but boy am I glad it's over. All that hustle and bustle has gotten me completely worn out! 

I hope all of you had a joyous holiday and got all the goodies you wished for!! 

On to tidbit Tuesday once again! Yay! :D 

This is another one of those things that I learned at my Stitch ~n~ Bitch that I had noooooo clue about. 

Do you know that your batting has a right side and a wrong side to it? Uh huh...it sure does! 

Who'd a thunk it? ;)


All battings will be a bit different so you may have to test them (I will tell you how). I always use Warm & White or Warm & Natural off the roll, so just like fabric, the sides that are folded together are the wrong side and the side facing out is the right side. Or if you are using it packaged, the side that is flatter/smoother with the "flakes" in it is the right side. The photo above shows right and wrong. The top corner shows the right side and it is laying on the wrong side so you can see a bit of a difference. It's much easier in person though. :)

Here is one of the FAQs directly from The Warm Company

"Is there a top and bottom side to Warm & Natural?
Yes. The side with "flecks" (plant and leaf particles) is the top side. The whiter side is the bottom side. If you iron a quilt or wearable made with Warm & Natural, press with the top side toward the iron and make sure your iron is on a low setting. If you make a white quilt consider quilting with Warm & Natural bottom side up."

This rule (I believe) is only for batting that is needle punched. 

You are probably asking why on Earth it even matters, right? Well I did a bit more research on this too and it's because it is needled from the right side. This pushes fibers all in one direction. This means that if you put your quilt sandwich together and put the wrong side of the batting facing your quilt top, when you quilt it, your needle is punching through the opposite way it was punched, or against the grain, causing more friction than needed on your needle and machine. Now, granted, it doesn't make "that" much of a difference. I know for a fact I've been putting my batting on the wrong way because I lay it out the same way every time ( or used to ) and my quilts have turned out fine. However, it does makes quilting a smoother process. :)

Do you ever use a dark backing and you get little pieces of batting punched through? It's because you put your batting wrong side up. Next time, put it right side facing your quilt top and you shouldn't get those pokies. 

If you are not sure how to tell what side is right or wrong, first feel it. Run your hand over each side. Generally speaking, the smooth side will be the right side and the bumpy side will be the wrong side. If you are still not sure, take a machine needle and push it through on one side, then the other. The side that it pushes through the easiest will be the right side. 

I'd love to hear your thoughts and/or comments on this, or if you have more tips about this! I definitely thought it was interesting as I had never even thought twice about which was the right way to lay my batting. Now we all know! :)

Much Love!!!

Friday, December 24, 2010

Shake Up The Happiness!

To all my dear friends...

Here's wishing you a very Merry Christmas (or Happy Holidays) filled with lots of love and smiles and laughter! 


Much Love!!!

Wednesday, December 22, 2010

Good Friends

Yesterday was Tidbit Tuesday, wasn't it? Oops! This is one of those weeks where I've lost track of the days and completely passed over the idea of Tuesday...LOL! 

I promise to have a tidbit next Tuesday! Honestly, I'm running out of tidbits to share! So the tidbits may not be coming each and every week. 

Unless you yourselves have a tidbit you'd like to share? If you do, please email me at karrielyne@gmail.com and put Tidbit Tuesday in the subject line. If you have a blog, please include that as well so I can link to you and give you proper credit! :D

In the mean time I have an early Christmas gift to share with you! 

One of the best things I've discovered while blogging are friends. People that I never would have otherwise met, which is an awful thought in itself. So many wonderful friends I've met! 

One friend in particular who knows just how much I love turtles. She made me this....

A mug rug! My very first mug rug! Isn't it cute!!?


She also sent me a design journal! We had been talking about these journals that had graph paper in them that were bound a few months ago and then she goes and sends me one....with a hand made journal cover WITH TURTLES!!!! 


Close up of the turtles. :)


And the final touch of the matching beaded bookmark!


The inside...


Miss Sarah, thank you so much!! Every time I use this journal I will remember how lucky I am to have a friend like you! :)

Much Love!!!

Sunday, December 19, 2010

Opposites Attact

I've been working on a quilt for my nephew and today I can say that it's done. Well, almost. 

I don't usually, actually never, take photos of a "completed" quilt before it's washed. Mostly because I see that as the final test and it's actual completion. However, with it being winter and it not being light out as long, the opportunity to take good photos is very limited. I wanted to be able to show this quilt before it was sent off to its new owner and today is the last day of good light that I will have. 

So, I have the binding pinned down (which will be stitched down by hand tonight) and a quilt to share. :)

This is the quilt he will hopefully love for many many years...
Opposites Attract - Pattern by Julie Herman
Pieced and Quilted by KarrieLyne
Started 11/29/10
Completed 12/19/10
 
I used the Opposites Attract pattern from Julie at Jaybird Quilts. She has them in her shop and it's such a wonderful pattern! So easy and so versatile! Julie shows her quilt matching up the prints, I changed it up a bit and jumbled mine all around to give it a bit more of a scrappy look.  I used the All-Star 2 line  by My Minds Eye for Riley Blake. Soooo Cute!

Here is an up close shot of how I quilted it. I just used an all over meandering being careful not to stitch over the raw edges. I've made the mistake of doing that before and the fraying process was a mess! I can't wait to see how this one comes out of the wash! I may have a chance to take more photos on Wednesday (hoping for the day off...lol) so maybe you will see it all squished up and frayed too. :)


Merry Christmas little guy! :)

Much Love!!!

Saturday, December 18, 2010

Block-A-Palooza!!

If you haven't seen it already, hop on over to Quilt Dad's blog and read all about the new quilt along featuring 18 other bloggers who will design the blocks!! Two blocks per week and a quilt by Spring! 

Woo Hoo!!

I'm totally doing this! I mean...it's being presented in Sunkissed by Sweetwater for Moda! This line is to die for! I mean, seriously! It's beautiful!


Who's with me? :D

Much Love!!!

Friday, December 17, 2010

Daisies and Dots Quilt and Tutorial

So I have been teasing you for a spell now with this fabric, and it is finally time for the reveal!

I adore this quilt! With all the bright colors in the prints, you just can't help but smile! 

Introducing.... "Flower Boxes"... 

Daisies and Dots line by Piece O Cake for Robert Kaufman - Fabric releases January 2011!  
Pieced and quilted by KarrieLyne.
Began 12/03/10. Completed 12/10/10.  

The cutting is fairly minimal and soooo easy! The piecing, simple too! Definitely a quilt that you can put together in a weekend! 

Would you like to make one too??!! 

Guess what? I've made a tutorial for you!! Whoop! 

Just head on over to the Swatch and Stitch on Robert Kaufman's site and you can download the PDF tutorial there. :)

Want to make it in this fabric line?! Run, not walk, to your local quilt shoppe and beg, on your knees, for them to get this yummy line in! Seriously, they can't resist that kind of begging. :D  

I hope you like it! I know I do. :)

Much Love!!!

Tuesday, December 14, 2010

Tidbit Tuesday #30

Thirty? Wowzers! I guess they add up fast, huh? :)

Today's tidbit comes from Sandi over at Piecemeal Quilts, who happens to host our monthly Stitch ~n~ Bitch with her mom! Thanks Sandi and mom. :)

Do you ever come up short on your backing fabric? Care not to piece it with other fabric to make it the right size?

Well maybe this technique will help you out.

I have never tried this, but Sandi has, so it is do-able. :)

Click on over to Flynn Quilt Frame Company and scroll down to the heading that says Diagonal Pieced Back. There is even a link for you to print the instructions.

Don't want to do all that math on your own?

No problem. Click HERE for a calculator to do it for you! Woo Hoo! :D

There are also some illustrations on that second link that makes the process make much more sense!

I think I may even give this a go on my next smaller quilt. :)

Thanks Sandi!

Much Love!!!

Sunday, December 12, 2010

Pillow Talk Swap 4 Tutorial

Hello!! 

I hope everyone has had a great weekend! It's been super snowy and blowy here this weekend. Yuk! Double Yuk! I need to live somewhere warm like Florida or California. 

One good thing about it being nasty outdoors is that I get a lot of sewing done, including my Pillow Talk Swap 4 pillow. Woo Hoo!

As promised, a tutorial to go along with it. :) 

Here is the pillow all complete and ready to ship out...


Start out by choosing some of your favourite fabrics. Here was my layout...

I am using 11 fabrics here. You can choose more or less. It's totally a personal preference.

I am using Darlene Zimmerman's Dresden Plate ruler. This is important. You could probably use any dresden ruler. The process will be the same. 

For this tutorial I am using the 6.5" mark on the ruler.

From each of your fabrics, cut a strip that is 6.5" wide.  I double up my fabric to make this process go faster!

Lay out your strip of fabric and lay your ruler so that the edge is along the 6.5" mark on the ruler.


Cut along each edge of the ruler.


Now flip your ruler 90 degrees and lay it down right along the edge you just cut.


Then cut along the edge of the ruler.

You now have two "plates". Or 4 plates if you doubled your fabric.


I cut 4 plates from each of my fabrics but you will only need 39 "plates" to make this pillow.

You will need to sew three rows of 13 plates.

Begin by laying out your plates in a pleasing order, alternating each plate.

I show 10 plates wide here, you need 13.
Start with the first row.

Take plate #1 and plate #2. Flip plate #2 right sides together with plate #1 making sure that a bit of fabric overhangs. (see photo)


Sew a 1/4" seam.

Press.


Add plate #3 in the same manner...


The overhang will be at the bottom this time.

Keep sewing the pieces together for each of the three rows. Press each row.

Sew rows together matching seams.


Next we have to trim off the edges. I trimmed mine to 18" square.

The cutting mat I have is 18" wide so it was perfect for this step. If you have a larger mat, just use the 18" marks.

Lay out your pillow and center it in the 18" space on your cutting mat so that when you trim, both sides will be equal. Once you have it set, trim sides.


Turn your pillow 90 degrees and do the same step to trim the other side.


You should have a nicely squared pillow top now.


You can stop here if you want, but I wanted a larger pillow so I added borders. I added strips that measured 1 3/4" (before sewing).

My pillow now measures 20" square.


At this point, you need to quilt it. I recommend this as it gives your pillow some stability and added depth. For the backing I usually use muslin. It's fairly cheap and you won't see the back anyway. For the batting, I use the same stuff I put in my quilts, Warm and White.

Layer it: muslin, batting, and pillow right side up.

Quilt as desired. I quilted mine in a cross hatch design with stitches about 3/4" apart.


Now comes the back. I like envelope style backs so that is what I will show you here. However, you can also find out how to do others like using a zipper.

Cut two pieces. One measuring 20" x 16". One measuring 20" by 13". (If your pillow is smaller or larger, use your measurements)

On the 20" side of each piece, fold over the edge 1/2" and press. Fold that same edge over again, and press. Then stitch about 1/8" from edge. (see photos)


Get your quilted pillow top and lay it right sides up. Notice I haven't trimmed off the sides yet. I do this step last.

Lay down your larger back piece first, right sides together. Make sure the edge that you folded over is facing the center of your pillow top.


Lay down your second piece, again the folded edge towards the center. Pin all around the pillow to hold this in place.


Sew around the edges. I use a 1/4" seam but in the corners and along the spots where the folded edges of the back lay, I back stitch. Then I sew forward and back stitch again to reinforce the spots that will have the most stress.

After you have it all stitched down, trim off the excess batting and backing and turn your pillow right sides out! Stuff it with a 20" pillow form and ...

Voila!


You may be wondering why a 20" pillow form when my pillow actually measures 19.5"? I like to make my pillows 1/2" smaller than the form for a nice snug fit. I don't like floppy pillows. :)

I hope you enjoyed the tutorial and, as always, if you make one, please put it in the Flickr Pool so I can ooohhh and ahhhhh over it. :)

Much Love!!!
Real Time Web Analytics