photo blogbuttonhome_zpsbfee85f8.png  photo blogbuttonhome_zpsbfee85f8.png  photo blogbuttonhome_zpsbfee85f8.png  photo blogbuttonhome_zpsbfee85f8.png  photo blogbuttonhome_zps0b2ad4ae.png  photo blogbuttonhome_zpsbfee85f8.png  photo blogbuttonhome_zps0b2ad4ae.png  photo blogbuttonhome_zpsbfee85f8.png  photo blogbuttonhome_zpsbfee85f8.png

Tuesday, March 12, 2013

Facebook

Hello!!

I was having a lot of fun making changes to my blog. After making the new header I wanted a matching signature, divider bar, and then I decided to make my own social media buttons! 

This resulted in me making a Facebook page for Freckled Whimsy! There isn't much there yet, but it would give me warm fuzzies if people liked my page. I promise, there will be postings there! I just have to figure out the whole Instagram Facebook integration stuff! 

So if you are interested, no bribing involved, go ahead and like my page. You can click the pretty little orange button over on the left side or you can click HERE to see my page. 

Much Love!!!

Tuesday, March 5, 2013

Changes

I want to say thank you to all of you who answered my question about pattern choices. You all gave some really great insight! 

I titled this post "Changes" because there will be a few changes coming in the near future. GOOD changes! 

First up was a blog update. It's been a few years since I have done anything with the look of this blog, so I freshened it up a bit! A few more tweaks will probably be made, but just wanted to give you a heads up so you knew it was still me here. ;) 

What do you think? 

Much Love!!!

Sunday, March 3, 2013

Question #1


I was curious...

When you are looking to make a quilt, what draws you to a pattern? 

What makes you choose one over another?

There is no wrong answer here. 

Just be honest. :)

I hope everyone has had a splendid weekend!!

Much Love!!!

Monday, February 18, 2013

Quilt Label Tutorial

Hello and Happy Monday!! 

Mondays are usually a blah kind of day so I thought I'd bring you a little tutorial on how I do my quilt labels. 

If you don't label your quilts, I'll let you off the hook *wink* but going forward I truly encourage you to label them. They are important for so many reasons. They tell the why, the who, the when, the where and really, anything you want them to. Think of all those quilts from the past and how we all try and figure out where they came from, its legacy.  Be sure to leave your legacy on your quilts. You worked hard on them. You and your quilt deserve that much. :)

Now, a lot of people ask what to put on the label. Well, that's really up to you. I think in part it depends on its purpose. If its a quilt for yourself or a gift, the name of the quilt, it's recipient, you're name, the date (I personally use the date I completed it), maybe a location, and any other little tidbits you want.  Maybe a quote, or a short story. Some people like to put their address on their labels. I really only do this if I am sending my quilt out and I want to make sure I get it back no matter what! 

Due to the fact that there are so many different things to put on a label, I choose to hand make mine every time. I love the idea of creating labels on Spoonflower and I even went out there and designed a few. After I thought about it for a while, I decided each quilt I make is different and unique, I want my labels to reflect that same thing. I didn't want the same label on every quilt. 

Another reason I make my labels like this is so I can sew them right into the backing of my quilt. I generally piece all my backs so this isn't an extra step for me. You know that by sewing them right into the quilt that they won't be removed with out compromising the quilt itself. Very important!!

So, here is how I make my labels. It's super simple and so versatile. 

Here we go...

Step 1: Find a free font site to choose the font you would like to use. I like DaFont.com. Tons to choose form and they are FREE! They even have directions on how to install them! 

Step 2: Bring up any program where you can write text and change the font. I use Photoshop, but you can use whatever you have on your computer. It doesn't have to be fancy, just so you can type words and change the font. 

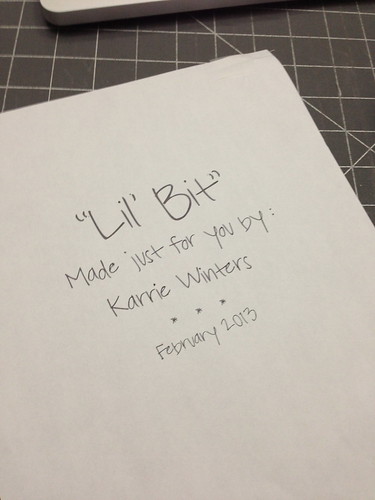
Step 3: Create a new document.  If you can choose the size of your document, choose the size you want your label to be. If you can't, just use the rulers as a guide.  For this label I am using  6 x 6.  

IMG_1686

Step 4:  Type out your label. Create it just as you want it to be shown on the back of your quilt. Add words, quotes, shapes, anything you can trace. Don't make it any more complicated than your tracing abilities will allow. :) 

Step 5: Now print that out. 

IMG_1689

Step 6: Cut your fabric that you are using for your label. This works best with very light fabrics but you can test different colors to see how they will work. 

Step 7: Lay your fabric centered over the paper you just printed. I use a bit of tape to keep it in one place. 

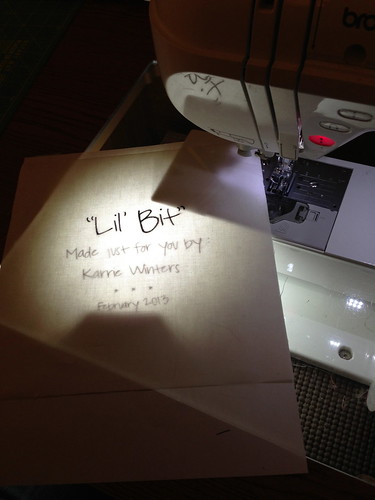
Step 8: Now comes the tracing part. You can do this a few ways. I used to tape this up to a window so the light would shine through and trace it. This works but I find my arm gets tired and I keep having to fiddle with the pen to keep the ink at the tip. So I created my own light table. My sewing machine table has a plexiglass insert and the machine is lowered so I have a space between the bottom of my machine and the top of the table. I put an Ott light in that space, placed my paper over top of that. 

IMG_1684

If you don't have a set up like this you could use any light box or you should be able to purchase a piece of plexi glass and then just set books or the like on either end to create a space to put a light underneath. 

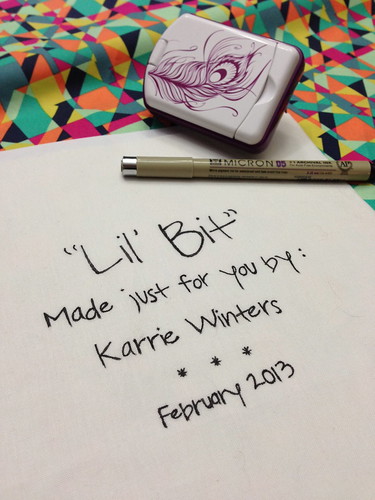
IMG_1688

Step 9:  Once you have your light source set up, start tracing with an archival safe pen. For this quilt I used a Micron 05. 

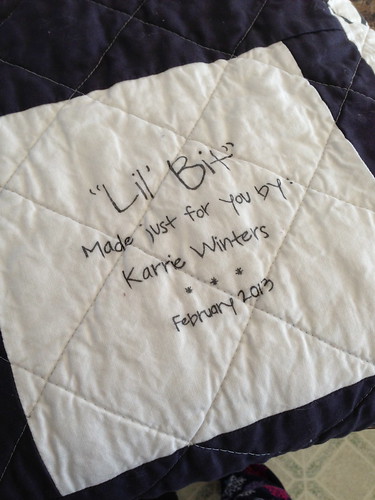
Step 10:  Sew it into your quilt backing! This shows how it looks sewn into the quilt after it's first washing. 

IMG_1723

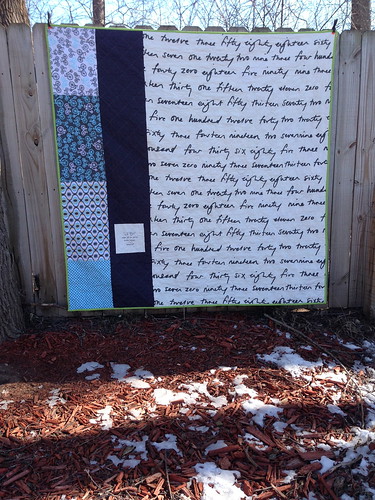
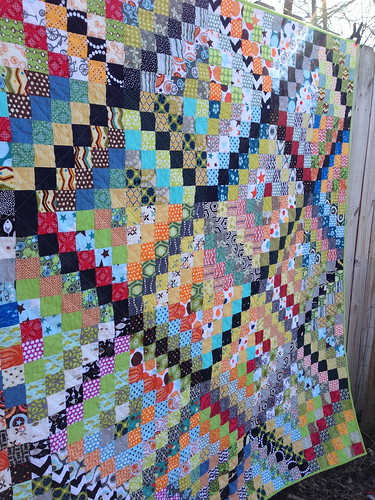
Scrappy Trip Quilt #2

And here's the quilt it went into. Finish #4 for 2013. 

Scrappy Trip Quilt #2

Began January 11, 2013 and finished on February 16, 2013
Pieced and quilted by me
I did 6 blocks on January 11, and finished the rest from February 11-16th ;)

I would love to see your results if you try this!! 

Much Love!!!

Tuesday, February 5, 2013

Lickety Stitch

Quilting is my #1 hobby, hands down, but as a crafter, we all know we never just stick to one thing. Our creative minds just explode with ideas and, well, we just need to let that out or the world may come to a shortage of chocolate. Heh! 

I am finding that my second crafty love is cross stitching. It all began with The Frosted Pumpkin Stitchery and all their most adorable designs. I just couldn't resist. You can find their (Amanda and Ashleigh's) designs HERE and HERE. 

It started with this...

Then my good friend, Heather, designed this spectacular Holiday Holly Deer so I tested the pattern for her. I love how it turned out! 


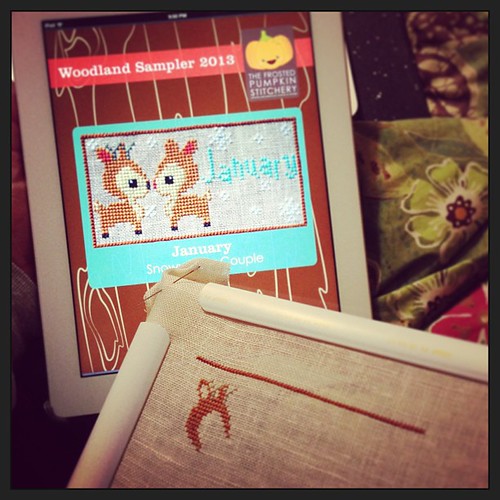
Then The Frosted Pumpkin Stitchery released their Woodland Sampler. It's only February and its already so full of cuteness! I can't wait to see what each month will bring! I am secretly hoping there are turtles, even though turtles are not traditionally in the woods... ;) 

Here are a few shots of my progress with the sampler...

The start of something so sweet, even sugar can't touch it! :) #woodlandsampler #crossstitch #thefrostedpumpkinstitchery

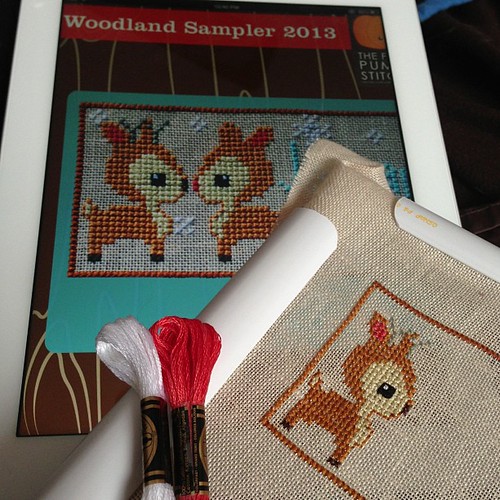
One adorable little deer finished! So cute I can't stand it! :) #woodlandsampler #thefrostedpumpkinstitchery#crossstitch

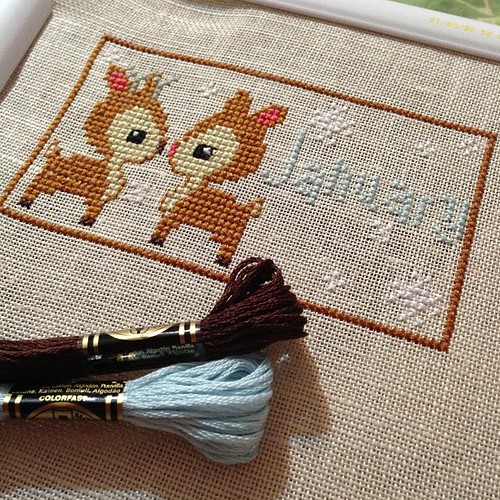
Here is January all finished and full of cute!

January is done! Adorable little deer couple! #woodlandsampler #thefrostedpumpkinstitchery#crossstitch

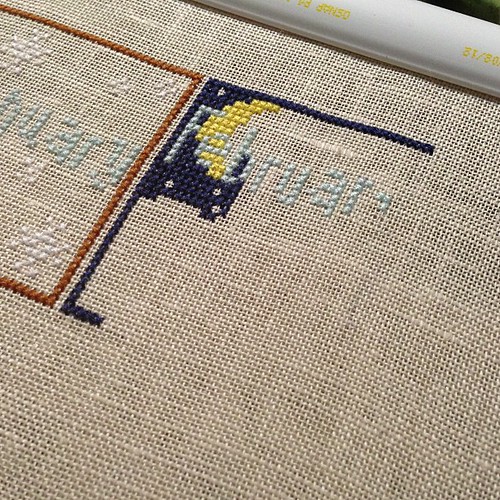
..and on to February..

Progress! I've only had to rip out twice because I can't count! Heh! #woodlandsampler #thefrostedpumpkinstitchery

If you'd like to stitch along with the Woodland Sampler, you can sign up HERE for only $16.95 for the whole year! Even though it's February, you will still get Januarys pattern too. :) 

What are you waiting for? Come join me? 

Much Love!!!

Tuesday, January 29, 2013

Toes in the Sand

In my last post I gave you this sneak peek...

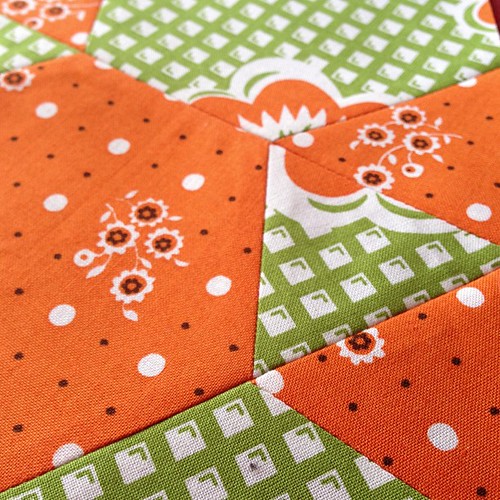
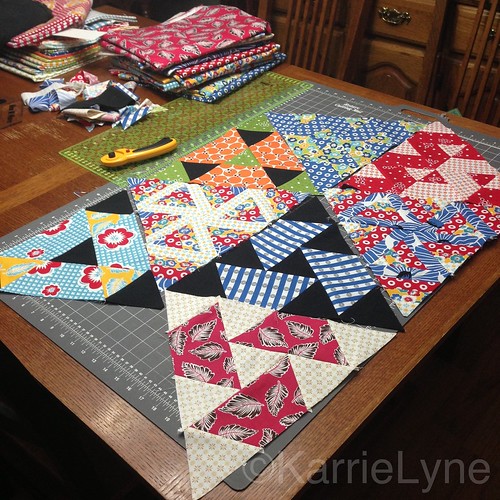
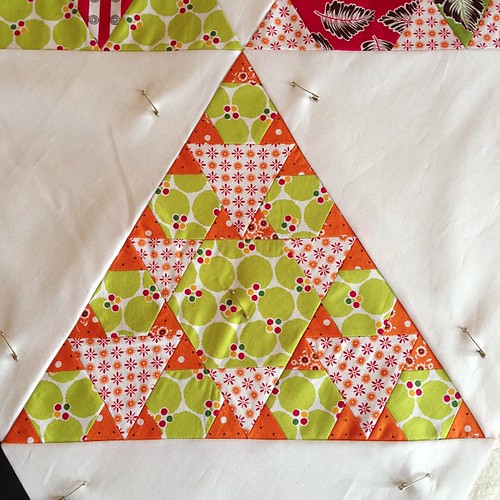
Working on my Toes in the Sand quilt. Pattern by @jaybirdquilts I love how her Hex N More ruler cuts allow for perfect points!  #jaybirdquilts #treasuresandtidbits #toesinthesand #quilting #robertkaufman

Here are a couple others...

Toes in the Sand by Jaybirdquilts


My favourite block!! Those tiny triangles are 1"! ##jaybirdquilts #toesinthesand #robertkaufman #pieceocakedesigns #treasuresandtidbits

Note those tiny triangles are 1"! But never fear, it is still super easy to piece! Honestly that block (#7) is the one that intimidated me the most and I saved it for last. After piecing it I sort of felt silly because it really was so easy and it is easily my favourite block in the pattern! 

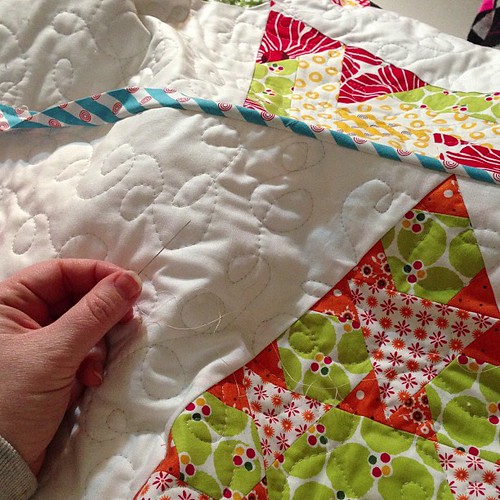
Almost done...on goes the binding!!

Stitching!

And then its all done!! 

It's done! It's done!! Time to throw it in the wash and dryer to make it all squishy!! :) Full pictures tomorrow! #toesinthesand #robertkaufman #treasuresandtidbits #jaybirdquilts

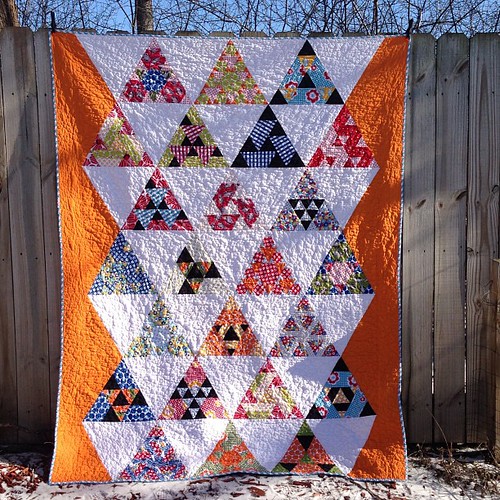
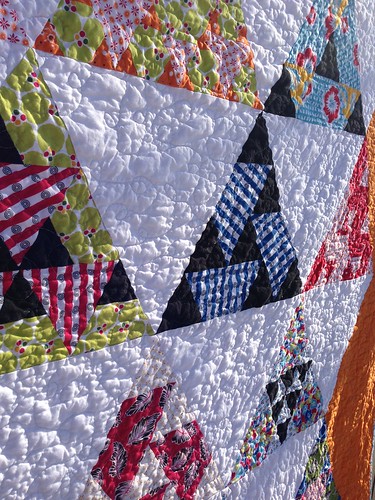
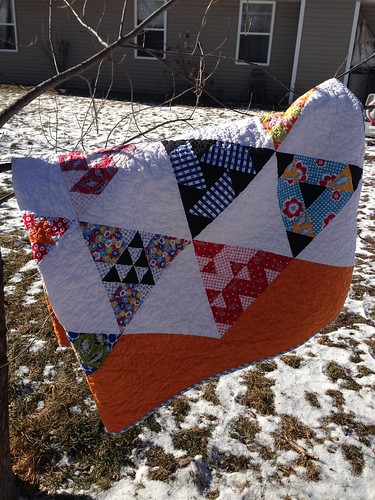
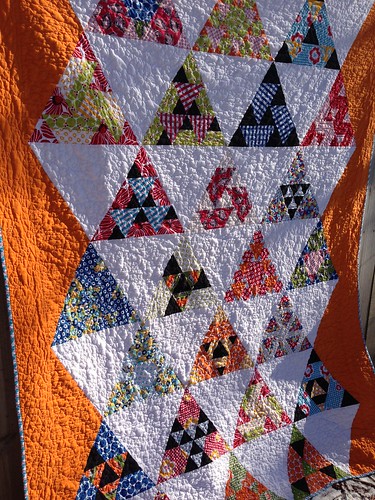
Here she is....in all her orange glory!! 

I present to you my quilt. The pattern is by Jaybird Quilts and it's called Toes in the Sand. You can use the templates included with this pattern but I much prefer to use her Hex n More ruler. It is seriously the bomb!! I've always hated piecing triangles because lining them up to match points is aways a pain. Not with Julie's ruler! She makes it so easy to get perfect points its ridiculous! (No, she didn't ask me to say that..hahaha! She also didn't ask me to promote anything for her. I just love her stuff that much. It promotes itself!) 

My third finish for 2013!! I love it!! Pattern is Toes in the Sand by @jaybirdquilts. Fabric is Treasures and Tidbits by Piece O Cake Deaigns for @robertkaufman @allieheath :)
Began 12-27-12 and finished on 01-24-13
Pieced and quilted by me
Fabric is Treasures and Tidbits by Piece O' Cake Designs for Robert Kaufman

Thank you Julie, for an amazing pattern and an amazing ruler!! 

If you are interested in making your own Toes in the Sand quilt, I know Fat Quarter Shop has it and is sending it out as a block of the month. You can check that out HERE.  Also make sure to add your quilt to her Flickr group HERE

Just to show you how much I enjoyed piecing this quilt, I am going to make it again!! That's a rare occurrence for me, to make a quilt more than once.  So stay tuned as I piece my second Toes in the Sand! 

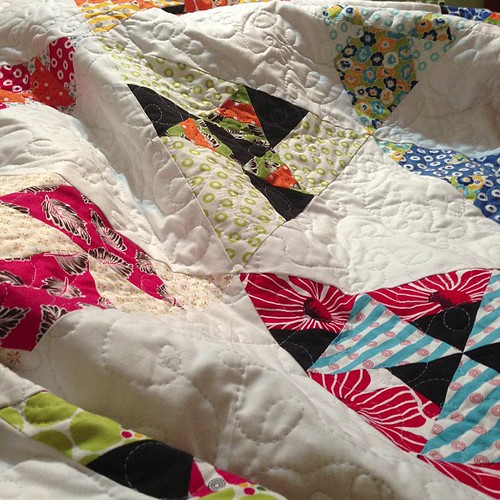
Just a few more bits of eye candy...

photo 2

photo 3

photo 1

Much Love!!!

Thursday, January 24, 2013

Lattice Quilt

Well this year is definitely off to a great start for projects and finishes! 

I've already showed you my first finish for  the year, my scrappy trip along quilt! I'm still in love with it! 

My second finish for the year is a quilt I made for my niece. She was born on 01-23-12 (yes she just turned 1 year old!!!) and she didn't have a quilt yet, while her brother and sister already had two each!  

It began like this... (using Film in the Fridge's tutorial)


And it ended like this... (please excuse the poor quality picture) I had to get it sent off and it was such a gloomy day today. I'm just sick I wasn't very proactive to get better shots while I could have. :(


I love the back! I cut out the letters with my Silhouette and then raw edge stitched it to the backing. 

I hope she loves this quilt as much as I do!! 

Keep your eye out for my third finish for the year.....

Working on my Toes in the Sand quilt. Pattern by @jaybirdquilts I love how her Hex N More ruler cuts allow for perfect points!  #jaybirdquilts #treasuresandtidbits #toesinthesand #quilting #robertkaufman

Much Love!!!
Real Time Web Analytics