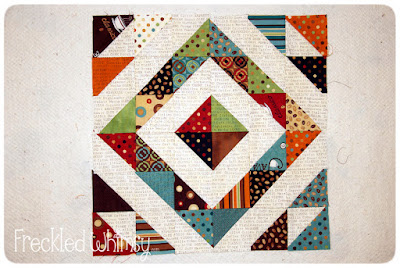
Sooooo....I've been baking again! I had so much fun making this quilt and I hope all of you love it as much as I do!!
If you'd like to see the entire quilt, along with the complete tutorial, please head on over to Moda Bake Shop and maybe even leave a comment there to tell me what you think. :D
Here's a sneak peek of Java Stars ...
As promised in the tutorial, here are some ways to use up those scraps from putting this quilt together!
You will have a bunch of triangles left over from trimming the corner squares of the block. If you keep these together after trimming, just run these through your machine using a 1/4" seam allowance to make half square triangles. Then use my HST Tutorial to trim them to the same size, 3 1/4" square. You should have 36 HST so you can arrange them in a 6 x 6 layout.
HST are one of my favourites because there are so many possiblities to arrange them. Play with them until you find a layout you like and then make it into a pillow! Here are a few to get you started... I went with the bottom one. If you play with the blocks, you can actually arrange them so all the words face the same way. :)
The other pieces that you have left over from the layer cake and the background fabric you can use to make 9 blocks to put in a baby quilt or perhaps even use it as a wall hanging.
Take these, and sew them together as so using a 1/4" seam allowance...
Press them towards the darker fabric.
Next you may need to trim the end of each of the 36 pieces so that you have a straight edge. Trim the end that has the wider edge of the background fabric. (In this case the cream fabric).
Divide your pieces into 4 piles of 9 so that the direction of the words is the same in each pile.
Arrange your blocks as so, once again making sure that your words on the background fabric are all in the same direction. You will use one piece from each pile.
Flip the pieces on the right, to the pieces on the left and sew where the fabrics meet...
Press each half in opposite directions...
Then sew the top and bottom halves together, matching center seams.
Press.
Next we need to trim the blocks as shown.
Rotate the block and trim the other two sides.
Square up your block if necessary.
Now you should have 9 of these cute little blocks that you can put into a quilt any way you please.
You can just sew the 9 blocks together and add borders. Or you can add a sashing with the blocks and then add your borders. OR....you could incorporate these into the backing of your Java Stars quilt too! That would save you from purchasing more backing fabric. :)
If you want to take it one step further, with the remaining pieces you just trimmed off from these, you can repeat the process and even make 9 more smaller blocks to use as you please.
And just to show you that all my quilts DO get used...
Oddysey (on the left) just happens to be sleeping on the quilt that will be my Moda Bake Shop tutorial next month using Kate Spain's Central Park. :)
Enjoy!
Much Love!!!


What you have done with the scraps look great!
ReplyDeleteI am putting together a quilt but have already used the scraps up in another mini quilt, am I working backwards?!
Very clever!
ReplyDeleteGreat job KarrieLyne!! It is super cute!!
ReplyDeleteKarrieLyne I love this one! Thanks for the little tutes on the other leftover blocks too... fun fun
ReplyDeleteGorgeous MBS quilt, as usual, and how creative (and thoughtful!) of you to give us tips for using the leftovers!! Woohoo!!
ReplyDeleteI would be so scared to cut off that piece!! But of course it looks fantastic.. and I'm sure you put every piece to use making something GREAT! I love everything!
ReplyDeleteThank you for reading my mind! I just read the tutorial on MBS and thought "but there's so much leftover!" :D And here you are with suggestions for all the leftovers!
ReplyDeleteThe possibilites are endless. Thank you for the great MBS project and so many more options. Happy New Year and look forward to your many projects.
ReplyDelete-modalissa.blogspot.com
This quilt was really neat looking. I did a french press insulating sleeve with the java for MBS, so there is another option for the extra fabric not to mention potholders and mugrugs galore!
ReplyDeleteWow, I'm really impressed with what you've done with the scraps! Off to comment on Moda Bake Shop ;)
ReplyDeleteYOU NEED TO STOP! you keep coming up with all these great ideas and quilts, I can't keep up!! I have so many of yours bookmarked in my "to make someday" folder, it's getting ridiculous!! I still haven't even finished the charm pack quilt along!!
ReplyDeleteOk, it's almost the New Year, I *will* sew more this year!!
(really, don't stop! I'm just sayin', I need to get MY butt in gear!)
Thanks for sharing the tutorial on using scraps. And the kitties look so comfy LOL!!
ReplyDeleteHave I told you I love it when you bake?? :o) This is way cool!!
ReplyDeleteBy my calculations there's enough fabric in one layer cake to make either two Java Stars quilts this size or one in a larger size- am I correct? Because I'd like to make a larger size but don't want to find I don't have enough fabric half way through.
ReplyDeleteAaah, after 13 years I made it. Had all the parts for the top cut, and nog finished it, it is a beautiful quilt.
ReplyDelete