First things first...Happy Mother's day to all you mothers, whether you have children with or without fur! :) Today is bitter sweet for me. I love being the mother to my children and enjoy this day with them, but it is also a day where I miss my own mother very much. It's been 2.5 years but days like today make it seem like yesterday that I lost her. It makes days like this tough. However, my own children bring me smiles all day long. :)
For example, the newest craze for all the kids here are Silly Bandz. I personally do not get the frenzie, but then again, it keeps the kids busy trading and having fun and out of trouble, so who am I to care? Today, my son traded one of his own for this one for me! :) Awwwww...it's a turtle! :)
As a treat for you mothers and others, I've created my very first tutorial!! I am in a potholder swap, which is actually what inspired this so I hope you enjoy and if you have ANY questions, please feel free to email me!
{Half Square Triangle Potholder Tutorial}
Do you ever get done with a project using a jelly roll and you have scraps left over? I think we all do but I've come up with a tutorial using these scraps for a cute potholder that you can make for yourself, give as a gift or maybe even swap with!
Ready? Here goes....
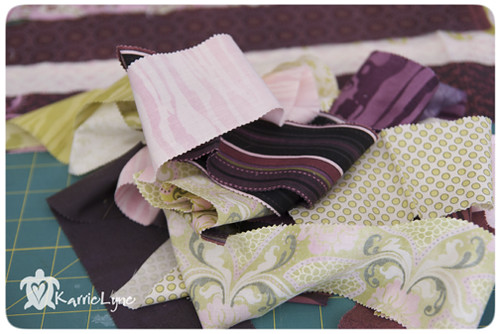
First, gather up your extra strips from your jelly roll (or you can cut 2.5" in strips from other fabrics). I am using Eva by Basic Grey for Moda.
Choose 6 strips to make 3 sets of two strips. I like to choose contrasting strips so the design in the potholder shows up better. You will need 2 strips for one strip set that are at least 24" long each and the other 4 (other 2 strip sets) will need to be at least 14" for this specific pattern to work. However, you can make about a million designs with half square triangles so you are not limited to those sizes. :)


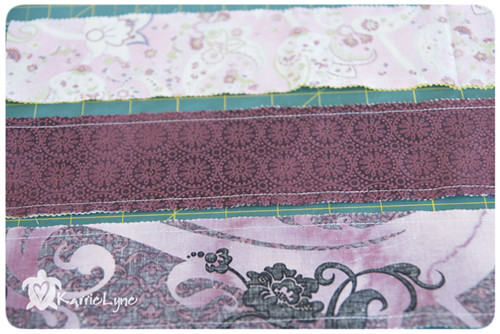
Once you have your strips chosen in pairs, put them together, right sides facing, and sew on each side. Yes, down EACH side. Trust me. :)
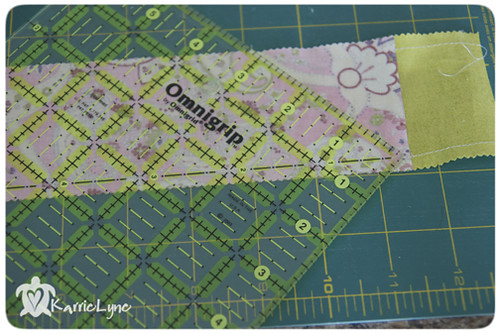
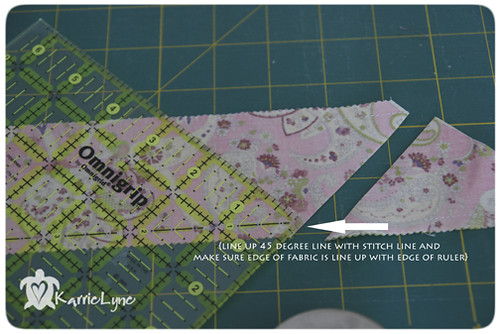
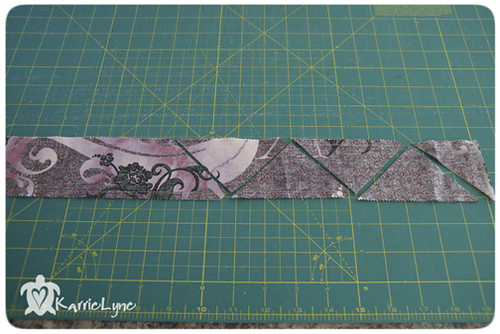
Once you have done this with all 3 strip sets, take the one where you needed at least 24" and lay it on your cutting mat. This strip will yield 8 half square triangles. Using a square ruler with a 45 degree line (Mine is a 6.5" ruler by Omnigrid) and starting from the right hand side line up your 45 degree line on your ruler on the bottom line of stitches, leaving an overhang on the right side of the ruler enough for you to cut a line from the top to the bottom of the strip. (Leftys, you will do just the opposite as me by starting on the left side, but the same process).
With everything lined up nicely, cut from the bottom to the top at that angle.
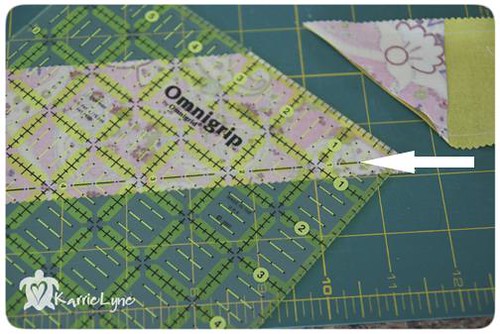
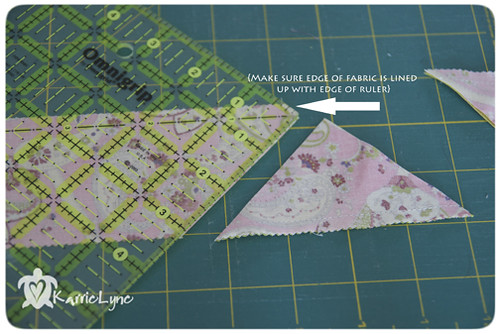
Now, all you have to do is slide your ruler up so the 45 degree line is now in line with the top stitches of your strip. Don't twist or turn your ruler, just slide it straight up until the lines match up. You also have to make sure the cut line you just made, is lined up with the edge of your ruler. Once you have done this, cut along the ruler.
Next cut, slide your ruler back down (no turning or twisting) and line up that 45 degree line on your ruler and the edge of your fabric with the edge of the ruler, and cut.
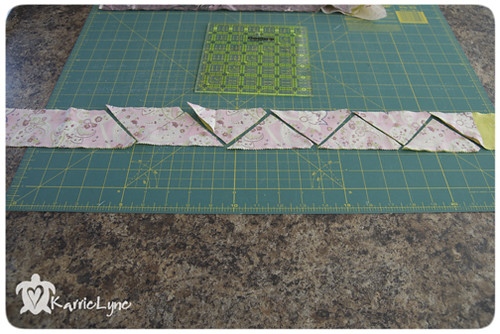
You will repeat these steps until you have 8 half square triangles.
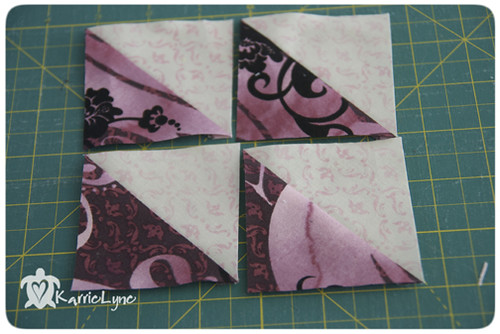
Press them open to the dark side. Ohhhh...be careful of the dark side...lol!
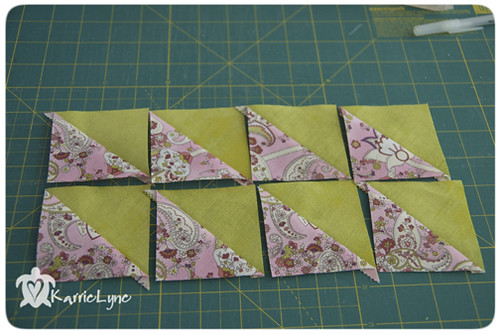
Once pressed, this is what you will have! These will be the HST that will surround your inner 4 HST. Easy peasy, huh?
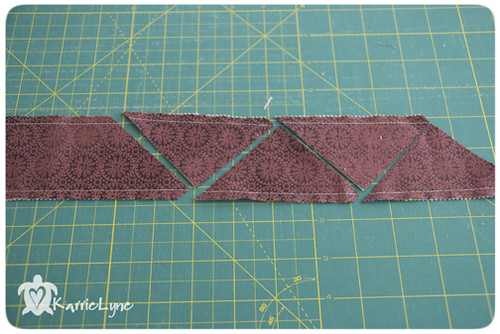
Next, grab one of your remaining strips. I am using the prints that I used in the inner part of my potholder. Repeat the same step in cutting out your triangles, only this time, cut 4.
Again, press to the dark side...oohhhhhh... ;)
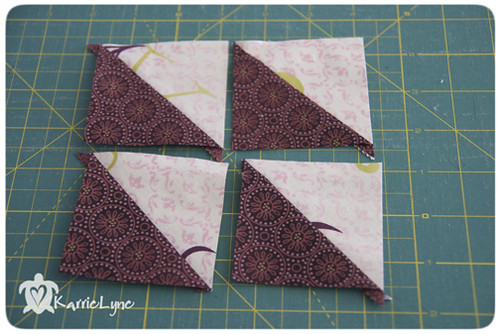
Last strip. Repeat again until you have 4 HST for the outside corners of your potholder!
Press to the dark side. But you already knew that! :)
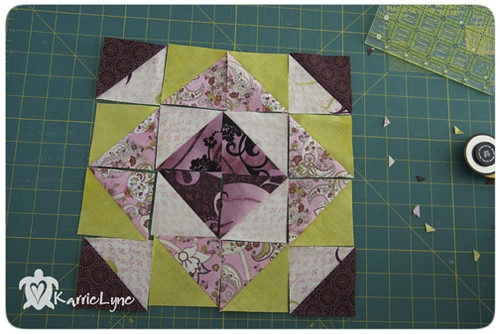
Now comes the fun part!! Lay them all out in desired pattern. For this tutorial, I used this pattern.
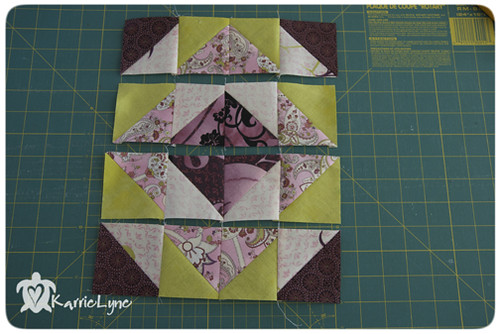
Once you have it all set out and in the design you want, you need to sew them in rows. I chain piece mine but please do this however you feel most comfortable where you won't get lost in piecing these.
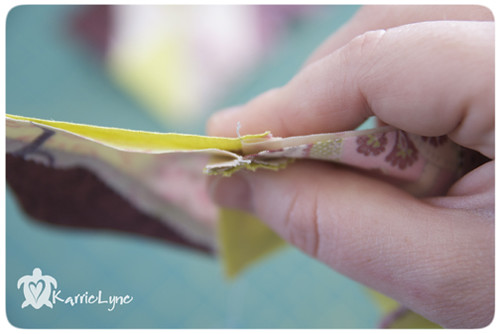
Important!! When pressing your seams in these rows, make sure you press the rows in opposite directions. This helps when sewing the rows together. The seams will nest right together!
This is what I mean by the seams will nest...
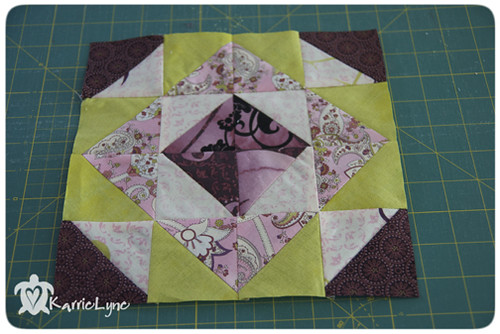
Now, sew your rows together and press seams to one side.
From here you can decide if you want to trim up your square or not. You should at least square it up, but I actually trimmed mine down to 9".
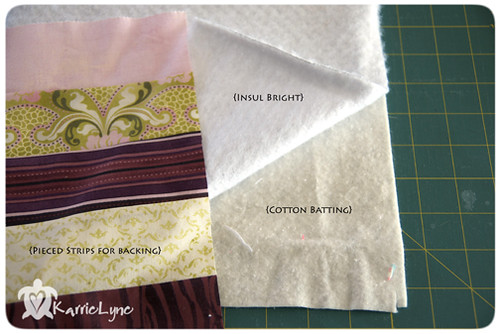
Now that you have the top done, you need to sandwich it. I use one layer of cotton batting, one layer of insul-bright, and for this, I strip pieced the back but you can do whatever you like for your backing. Just make sure it is bigger than your potholder top.
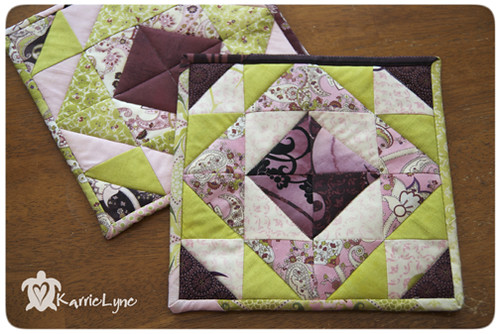
Next, just layer and quilt it as you please. Then trim it up to add your binding and you are done and have a cute little potholder on your hands! :) I'll be honest here. I hate putting binding on these little boogers the same way I do my quilts because it usually doesn't play nice since they are so small. I found THIS tutorial and I {heart} it a lot for these little babies!
After washing them, my potholders came out to be approximately 8.5", which is a little bigger than a normal potholder, but I like them a bit bigger in case I want to use them to set a hot pan on as well.
I hope my partner likes her potholders and I hope you enjoyed my first tutorial! :)
Remember, email me if you have any questions! :)
I'd love to see your project if you followed my tutorial too! :D
Much Love!!!




What a pretty potholder, thanks for posting the tutorial!
ReplyDeleteso cute!!!
ReplyDeleteThat is very cool and I love the strips sewn on both sides!! Love those potholders too!
ReplyDeleteGreat tutorial! Thanks. Will have to add this to my to do list. I am dire need of pot holders.
ReplyDeleteThat is sooo clever. Did you invent that strip method for making HSTs? It's genius.
ReplyDeletei like your brilliant tute...TFS
ReplyDeleteThank you for the great tutorial. I have never tried half squared triangles this way. I am definitely going to try it.
ReplyDeleteLOVE this potholder you made!! It is beautiful. Great job on the tutorial.
ReplyDeleteThanks so much for posting this! I've been wondering how to do this without buying a new ruler, but I just haven't taken the time/mental energy to settle down and figure it out.
ReplyDeleteAwesome tutorial! Now I can see the science behind the amazing potholders that I received today! I can't thank you enough! I love them and the towels , too! You are very talented!
ReplyDeletethank you for this wonderful tutorial. hugs
ReplyDeleteAnd thank you for keeping these tutorials available 3 years later when I was desperately trying to find a way of making a square in a square block without having to purchase yet another ruler! You're a star :)
ReplyDelete