photo blogbuttonhome_zpsbfee85f8.png  photo blogbuttonhome_zpsbfee85f8.png  photo blogbuttonhome_zpsbfee85f8.png  photo blogbuttonhome_zpsbfee85f8.png  photo blogbuttonhome_zps0b2ad4ae.png  photo blogbuttonhome_zpsbfee85f8.png  photo blogbuttonhome_zps0b2ad4ae.png  photo blogbuttonhome_zpsbfee85f8.png  photo blogbuttonhome_zpsbfee85f8.png

Tuesday, June 29, 2010

Tidbit Tuesday #9

When I first started quilting, the thing I hated the most, was binding. Mostly because I didn't understand how to do it properly. I didn't have all the amazing tutorials at my disposal as I do now so I would just zig zag stitch those things on. It makes me cringe too, I know! How could I?

Well, I actually don't mind binding anymore because I know that it will look nice when I'm done and the process is not stressful. (psst..I no longer zig zag it. I actually hand stitch it down now *smiles*)

I am not going to do a tutorial on this as there are so many good ones out there and it would just be a repeat, but I am going to give you some linkage to follow if you have troubles with doing your bindings. 

My most favourite binding tutorial is by Jaybird Quilts. Not just because she's like cool and stuff, but because she makes it make sense. With photos! Have a look HERE.  It's the process I follow every time now! 

In her tutorial she mentions bias binding. I've always cut my binding strips selvage to selvage and didn't even have a clue how to do it on the bias. I knew what it meant, I just wasn't sure how to go about it. When I searched for this, I ran across the "continuous bias binding" tutorials and they just made my eyes bug out and my brain hurt. To me, it seems like a lot of work and then I have to cut it with scissors? Uh. I use a rotary cutter for a reason. :D

I journeyed on and so glad I did. I found a simple tutorial that makes cutting biased binding a snap! I will admit that when I first saw it I was like, "no way is this gonna work". I almost didn't do it, mainly because what I had to cut binding for I couldn't mess up because I wasn't sure when I'd be able to replace it since it doesn't come out until August. After reading comments on her blog, though, I took a shot. I figured if it didn't work, it wouldn't still be posted...lol. 

So, if you want to cut your binding on the bias, please give this a go. It's a sweet trick! Click HERE.  Heather Mulder Peterson has a down-loadable PDF in this post just for you. 

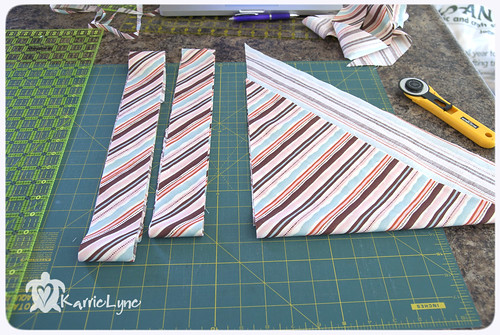
My fabric after cutting... (only I had more strips, but I didn't think about taking photos until I moved some already...doh!)
Tip #9 Strips
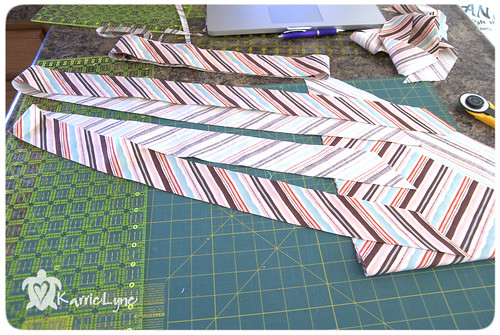
My strips showing how they look when you separate them...
Tip #9 Strips Cut
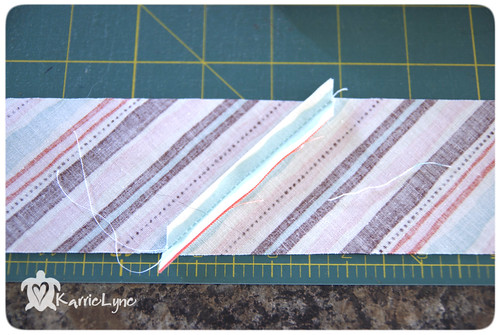
Sew them together...
Tip #9 Sew Tog
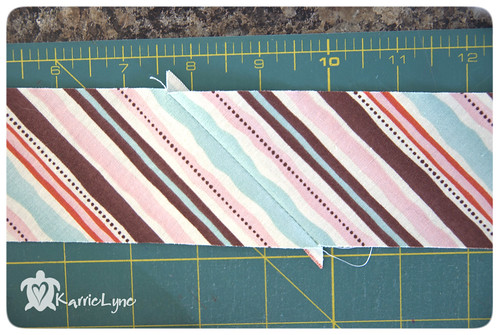
You get this... (pattern placement may not always be this perfect)
Tip #9 Sewn Front
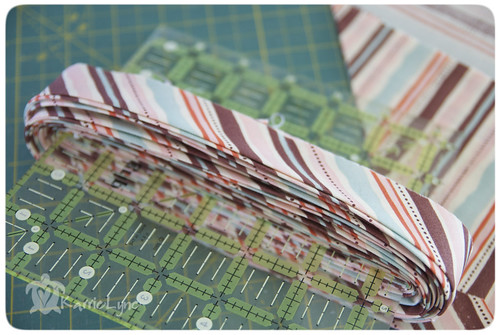
Then press in half and you have all this beautiful bias binding...
Tip #9 Wrapped binding

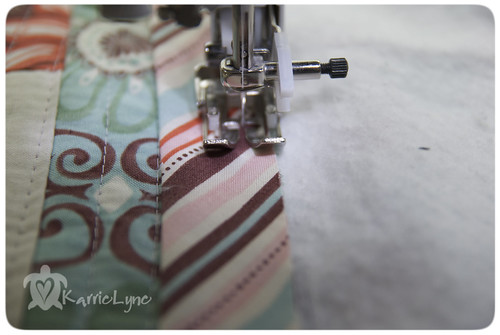
Something else I always do for binding that is a personal preference? I do not trim the extra off of my edges before I sew on the binding. I only trim it after the binding is on. I think this makes it much easier to sew on, with less bunching. Also, ALWAYS use a walking foot if you have one to sew this on...
Tip #9 Sewing on Binding

Edited to add sources for tacking the binding to the back

I realized after posting this, by an email received, that I didn't post any links or give any suggestions on now to complete the binding. Once you sew the binding onto the front of your quilt, as shown above, if you haven't already, cut off the extra batting and backing, then you will need to flip the binding over to the back of your quilt and hand stitch it down. Two really great photo led tutorials can be found HERE by Christina at The Sometimes Crafter and HERE by Elizabeth Hartman of Oh Fransson! ( I personally use Elizabeth's method).

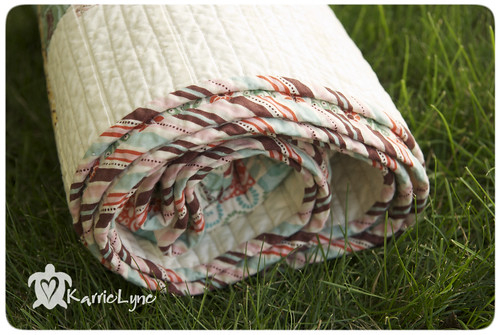
Why bias binding? Mostly because it will hold up over time much better, especially on those quilts that get used over and over. Also because you can take your fabrics with stripes and make them twist and turn...like such... 
Tip #9 Rolled Up

I know all of you have something to put binding on, cuz you know we all do, so have at it and let me know what you think. :)

Keep your eye out for the full reveal on the quilt shown. :)
Much Love!!!

Saturday, June 26, 2010

Not The Grass!!!!

My niece and nephew (2.5 and nearly 1 years old) were visiting this last week from Arizona and I went to spend the day with them today since they are leaving tomorrow to go back. 

They are growing up entirely too fast for my taste and since I don't get to see them very often, they change so much each time I see them. Maddie will actually give me hugs now and tells me she loves me. She used to be really shy since she didn't see me too much. She is just a doll. We call her DQ now... Drama Queen..hee hee. It's the age, I swear! 

Callaghan...he is my little smiley boy. He is just the happiest kid I've ever seen and I can make him giggle so easily. He just makes my heart happy! 

He has one little quirk about him though....he HATES the grass!!  We went swimming today and when we were about to leave his dad asked me if I knew about Cal and the grass. I'm like, "huh?". So he sets him in the grass and he shrieks! Not a little...but enough that everyone around us was staring at us. His dad just laughed and let him scream so I grabbed him up...lol. I've never seen anything like it. When we got back to the house I wanted to see if he'd do it again, only this time I wanted to get it on video. 

Notice how his dad is holding him and he's smiling, so he's not in a sour mood at all. Happy kid... until....

**Note: No children were hurt during the filming of this video...which was done on my new iPhone 4! Woo Hoo! :D

This video makes me laugh every time! I've never seen anything like it! Granted, he IS from Arizona and they don't really have grass so he is not exposed to it, but still. Silly boy!

I hope all of you are having a great weekend! I know I am! A great visit and I'm getting a few other things done that I will be able to share soon! :)

Much Love!!!

Tuesday, June 22, 2010

Tidbit Tuesday #8

It's Tuesday!! Well, for a little while longer anyway.  They do say, better late than never. :)

Todays "tidbit" is more of a "what NOT to do" than a tidbit, but still, quite useful and it may save some of you the aggravation I endured. 

A girl on my team at the office is having a baby in a few months and we are hosting a baby shower for her tomorrow. How could I pass up the opportunity to make a baby quilt, especially since she is having a little girl. 

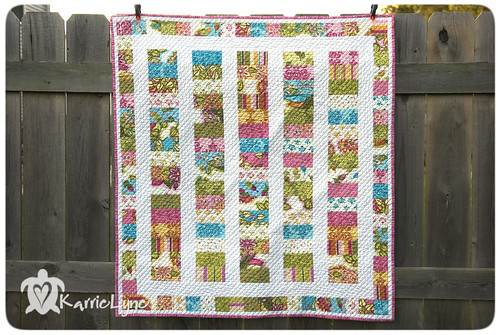
I knew right away, I wanted to use Soiree for Moda. I used 1/2 of a jelly roll (cut all the strips in half), strip pieced 5 strips then cut them 4.5" wide to make the coins 4" x 2" finished, 2" finished sashing and the border is made up of 2" finished squares (cut from same strips pieced pieces. Just cut 2.5"). Easy peasy. Right? Almost....

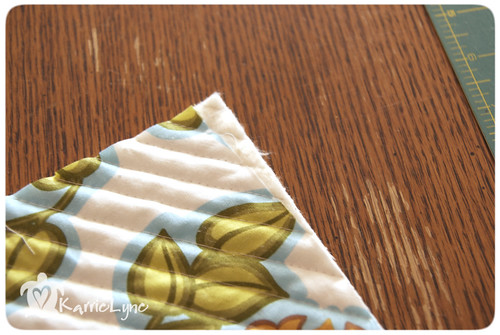
Mind you, it wasn't the actual assembly that was difficult. That WAS easy!! The issue came in when I put it together to quilt it. I knew the backing I had would be a snug fit but what I didn't realize is how much the quilt top can shift as you are quilting. Or at least for me.  I was chugging along and got to the last 4 or 5 lines of quilting and happened to flip the corner over and saw that my backing was about 2" too short and just in one corner.

I wanted to cry. I had to get it done since the shower is tomorrow and there was no way I could make this quilt again in time, but how could I fix this? 

I ended up trimming the edges all the way around to where it would still look cute and not ruin the look of the quilt but I still had this...
Tip #7 Too short
It was just under 1/2 of an inch so I hoped the binding would cover it....and it DID! Pshew! 

Here is how it turned out...flubbed up and all. :)
Tinker Coin Quilt
Do you see that outside white border that is about 1/2"? That should have been 2" just like the sashing. I still think it's cute though and if I never said anything, no one would have been the wiser. 

However, the morale of this story...errr....tip....is always always always make sure you have plenty of room on each side of your backing compared to where your quilt top lies. Even if you think you'll make it by an inch or so, you need more. Don't get caught in the same conundrum as I did. :) 

My second tip...also a what not to do....

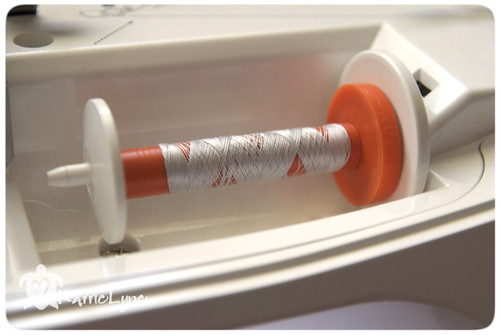
Make sure you have enough thread to quilt your quilt, especially when you are on a deadline. Not only to make sure you can finish it if you need to, but if you had to go get another spool, the colours may not be exactly the same. 

This spool had me awfully worried as I was nearing the end... lol
Tip #7 Thread

After all this stress, I sure hope she likes it. 

Much Love!!!

Sunday, June 20, 2010

I'm An Angel

No really! I am! =P

I am in the Pillow Talk Swap #3 (Yay!) and there was a request for angels to make pillows for someone who for some reason or another, wouldn't get one. I couldn't let that happen so of course I volunteered!

Miss Heather sent me a lovely person to make a pillow for and I had so much fun making it! I actually used all the bright colors that I won from TraceyJay! I love to pay it forward! :D

I hope you love the pillow as much as I do angel partner!! :) 

Angel Pillow on It's Way

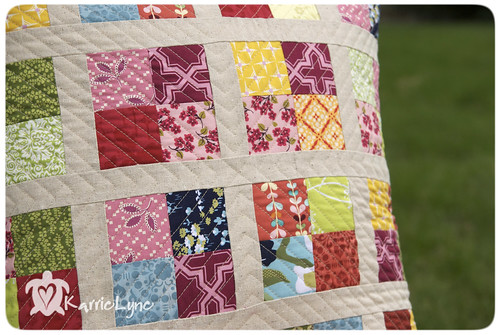
...and a close up of the quilting. Straight line! Did you guess?! LOL!
Angel Pillow close up quilting

Much Love!!!

Tuesday, June 15, 2010

Tidbit Tuesday #7

I am so excited to bring you all another tip! I've gotten such a positive feedback by doing these and I just love it!! 

This weeks tip is one I just learned of. When I tell you what it is, you can think I'm off my rocker and just pulling your leg. It's ok. It's exactly what I thought until I tried it. 

Lemme 'splain. :) 

This past Saturday I went over to Sandi's house for a sew in. This was my first time there and the only person I "knew" was Sandi. Like always, when meeting new people, you never know what to expect but I met an amazing group of women who are very talented, each in their own way. Besides being surrounded by talent I was surrounded by laughter. I don't remember the last time I laughed so much. I'd like to blame Pat for that. They call her Crazy Pat. Don't worry, it's a term of endearment. :) I don't know how she does it really. You can say one thing and immediately, straight off the cuff, she says something so funny you're in tears. Don't get her started on birds starting gardens...haha! She also gives everyone a nick name. So far I think mine is "Girl". It could be worse...lol! 

I had been sewing and gotten to the point of needing to iron so I found the ironing room where Pat and Sandi were chit chatting. Sandi tells me there are two irons with boards and each station has a spray bottle with water and vodka in it. *eyes widen*. I chuckled and said something like "yeah right". Pat chimes in and says, "no really! It' the best stuff". (ok don't quote me on those words, but something along those lines). I looked right at her and I said, "I know I'm the new girl but come on. I'm not that gullible!". (meanwhile I'm thinking, oh yes I am but not this time...lol). 

tip #7 skyy

It just so happens they were NOT trying to pull the wool over my eyes. Vodka and water in place of starch to iron your quilt blocks. It makes them just the right amount of crisp! I love Best Press, but this concoction is much cheaper and I actually like it better!

I know. I know. You are all making that same funny face just like I did thinking...no way! Yes way. You have to try it! Apparently even costume designers use this formula during costume changes. They can't wash them so they spray this stuff on them and it removes the odor. Hmm...better than Febreze? :) 

Ok, you want to know how to mix this stuff. According to Sandi, because this is her tip, you mix it 1 part Vodka and 3 parts water. If you have a 16 oz spray bottle, you will mix 1/2 cup of Vodka and then fill the rest of it with water. Shake well. Spray spray. Iron. Voila! **Note: I never did ask Sandi if one brand is better than another, but I used Skyy because it's what I had on hand and it works for me. Sandi, feel free to chime in if you want to :) **

Directly from Sandi. This is good stuff!!
"As far as I'm concerned, the best brand of vodka is the cheapest. I look looow on the shelf for a big bottle at a crazy cheap price. You mentioned Febreze - yes, it actually works just as good, if not better than Febreze, and it's a lot cheaper. Also, you would like your spray to be scented, you can add a drop or two of essential oil (lavender, lemongrass, rose, etc.) to the vodka, shake it well to emulsify, then add the water and shake again. I've tried it and it does not mark the fabric. "

You're probably thinking that if you use Vodka that your quilts will smell like it too. I promise you won't smell like a boozer when your done!! :) 

If you try this, let us know how you like it! :)

Much Love!!!

Thursday, June 10, 2010

Lot's To Share!

Lot's to share today!! Waaa hoooo!! :) 

I don't usually consider myself lucky, well, not when it comes to winning things. That is, until recently!!

A good blogger friend of mine, Traceyjay Quilts, had posted her 100th post and she was doing a giveaway to celebrate it. She had lined up a bunch of different fabrics and said the first person to tell me 10 of the collections, wins it! She had posted it quite a while before I had happened upon it but as I was looking at the fabrics, I started saying the lines in my head. I was pretty excited since I am fairly new to all of this modern world of fabric. I started making a list. When I was done I think I had 12 or 13 and sent her the email for kicks and giggles. Wouldn't you know....I got an email back from her telling me I won??!!! Thank you Tracey, for such a great giveaway and those yummy fabrics!! I'm pretty sure they are going in dresdens!! However, I need to know the lines I missed so I can get more...LOL :)
Tracey Cakes

Another giveaway that I entered was over at TulaPink.com. Amazing designer and a sweetie to boot! She has 6 lines that she has designed for Moda and she has been hosting a giveaway of a Jelly Roll in each of those lines. So, every Friday, she'd draw a name and announce the winner. Every Friday I was happy for the winner but a wee bit disappointed it wasn't me...lol. Then on June 4th I was going through my blog roll and came to hers. I had totally forgotten it was Friday. I though, "hmm..I wonder what Tula is up to today" and clicked her link. 

Here's how it went down:

Link clicked.
I saw my name and thought "huh?"....
Saw the words "winner" and "Full Moon Forest" in the same sentance...
I nearly peed!!! 
I think I even screamed while I was dancing in my living room. 
My kid comes out of her room and asks me if I'm ok. 
I nod, because I still can't speak...
She rolls her eyes and goes back in her room.
I check the site again and hit refresh to make sure I wasn't seeing things...
Yep...my name. But there has to be more than one KarrieLyne, right? (duh..no way...lol)
I clicked on the hyperlink to be sure it went to my site. 
Yep. I squealed again!! :D 
Then I typed a ridiculously dorky comment saying thank you and "please don't tell Julie"...LOL.  You see, Julie is THE biggest Tula Pink fan E. V. E. R. I love Julie to pieces but I think I said that because I just wanted one little piece of FMF, but in all reality, I'd hand it over to her in a heartbeat if she asked me. :)

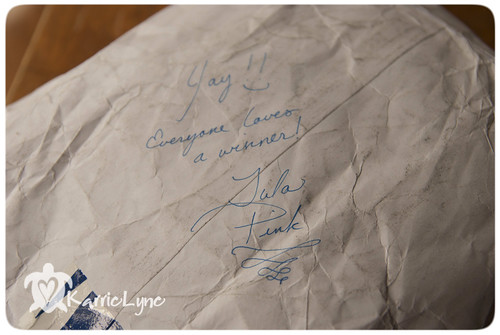
I got my package today!! I squealed when I saw the Tula Pink Label and then I turned it around and saw this! Awwwww..... :) 
Awwwww

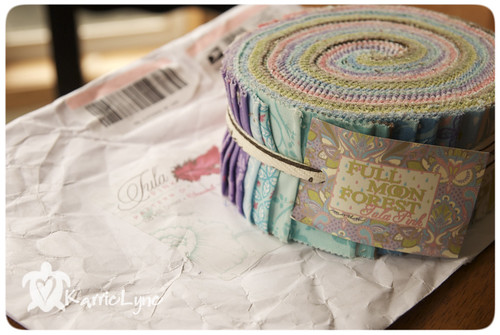
Isn't it grand!? I think I will just sit here and hold it and stare at it for a while. :) 
Full Moon Forest Winnter

Thank you Miss Tula. Really! You are so generous! I {heart} it. A Lot! ;)

Last thing...two sneak peeks of the quilt I'm working on for the ALQS4 .... 

This is the back....
ALQS4 Sneaky Peeky Back

And this is the front.....
ALQS4 Sneaky Peeky Front

How are yours coming along? Hm? :) 

Much Love!!!

Tuesday, June 8, 2010

Tidbit Tuesday #6

Eeeeps!! I usually try to have this posted the night before and schedule the post for early morning and I totally forgot!! Oops! 

Please excuse the photos. It was a really dreary day here today with all the rain and such. 

This is just a simple tip that I learned long ago and anyone can use it, even if you don't sew! If you have an iron, this will be for you! 

Ever do applique with freezer paper or fusible webbing? Ever get some of that sticky mess on your iron and wonder how you're going to get it off with out having to spend $10 for iron cleaner? Or do you just have a dirty iron? Well here ya go! 

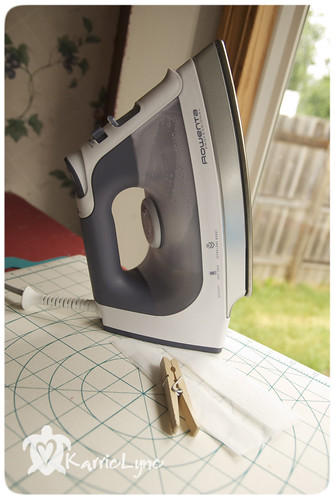
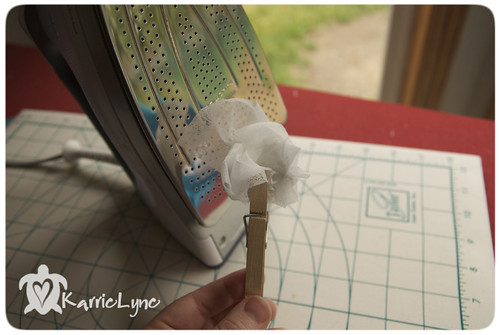
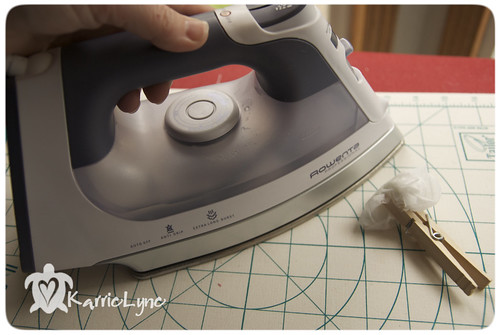
Gather your supplies: Dirty iron (mine is new so it's not too dirty), a dryer sheet, and a clothes pin. Turn ON your iron, but no steam.
Tip 6 Supplies
 
Smoosh up the dryer sheet and clip it with the clothes pin (or something of the like). This is so you don't burn your fingers!
Tip 6 Smoosh

Now scrub your hot iron with it! Get in all those nooks and crannies. If the dryer sheet gets too dirty, let it cool for a minute and just re-smoosh it and clip it again to a clean spot and repeat.
Tip 6 Wipe Clean

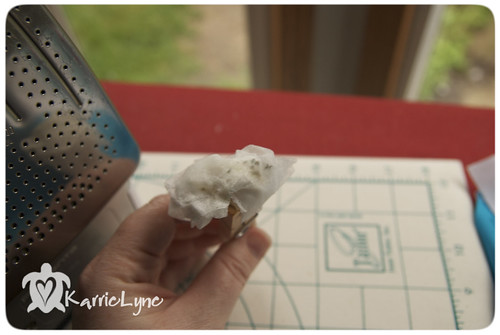
Once it's all clean, run your iron over your ironing board or even a towel to wipe off the dryer sheet stuff on your iron. As you were cleaning you should have noticed a liquidy substance on your iron from the dryer sheet. This is what you want to wipe off on the towel. It glides nice now, huh? :D
Tip 6 Wipe Off

See!? It gets the gunk off! Mine was not too dirty because I just bought it but I think it works pretty slick!
Tip 6 Dirty

Give it a go and let me know! Wow, I'm a poet and didn't even know it! Booooo I know! LOL 

Remember, if you have a tip you'd like me to share here, shoot me an email! (addy is in my profile)
Much Love!!!

Monday, June 7, 2010

Flying By The Seat Of My Pants

Mail does not come on Sundays, but it sure did for me yesterday!!! 

Lemme explain...

I was sitting on my couch (instead of cleaning my house) and I got an email titled Modified Tradition. I was worried and excited in the same moment because that is a swap that I'm in. When I opened the email I immediately became all giddy! My swap partner, the one that was making me my quilt, said she only lived about 30 miles away from me and she wondered if we could meet so she could give it to me!

How could I not say yes? I was truly excited to meet a fellow quilter that lived so close! So we ended up meeting somewhere in the middle at Starbucks and gabbed for almost 3 hours!! You never know when you meet someone new how it will go but I can say without a doubt, I am so glad we met. 

Sandi of Piecemeal Quilts is so sweet and she is an amazing quilter!! Just look what she made for me....yes...all for me!! :) The title of this post is also the name of this quilt due to the "flying geese" and the "seats" in the tufted tweets fabric! I just love it!!
Modify Tradition Swap Quilt
Isn't it gorgeous!!?? It is so much fun to receive things in the mail when you're not expecting them, but to actually receive them in person is sooo much better! Not only is she an amazing quilter, she is so fun to talk to! We talked about quilting, and books, even our favourite movies (giggles)! My son was with me and on the way home I thanked him for being so good and you know what he said? He said, "The time went really fast mom!" I replied, "why is that?". He says, "Mom, she was really fun!". Awwww....I love that kid! He truly did have a good time. 

That's not all. She even invited me to sew with her "crew"...lol. I'm a complete stranger and I was invited to spend time with her and her friends and family to quilt and just have a good time once a month. I can't wait until Saturday to meet everyone!

Sandi, thank you again for such a beautfiul quilt and your friendship! See you Saturday!! :D 

Much Love!!!

Sunday, June 6, 2010

Bee Splendid Sign Ups!

*** Sign Ups are CLOSED*** 

Hello and welcome to the Bee Splendid quilting bee sign ups!! 

As promised, here are the details and specifics. I need 15 people for a complete bee, that will be 16 including myself. If I get enough people to sign up, I will coordinate two. If there are not 15 people interested, we will see what we can work out. :) 

Not sure exactly what a "bee" is? A bee is a group of participants where each month one participant is the "host". As a host you will select a block that you want everyone in the bee to make for you. Then you will choose the fabrics you want your blocks made in, divide and send the fabrics to each of the other participants so they can make your block. Once they are done, they send it back to you for you to have a complete quilt top!! This is great for those blocks that you really love, but maybe you don't want to make all the blocks yourself.  That doesn't mean it has to be that way, as you can choose whatever you want. Just be sure that the block you choose, you wouldn't mind making yourself. 

This site has a lot of great information on quilting bees too. --> Quilting Bee Blocks

 Ok, here is what I was thinking:
  • This bee will last for 16 months. Each participant will be assigned a month. Please indicate on the below form if you have a preference or if there is a month you do not want.  We will skip December since it is usually a busy month for us all.
  • When it is your month to host, you will advise if you want one or two blocks to be made by the other bee members. 
  • Once you decide how many blocks you want us all to make, and which block you want us to make,  you will need to send enough fabric to each participant to make those blocks for you and indicate if you want your scraps back or if the bee members can keep them. 
  • As the bee Host you will pay postage to send the fabrics.
  • As the participants, you will pay the cost to mail the blocks back to the host. 
  • Deadlines and such will be set up once the group is formed.
  • I have created a Flickr group where we will have all communication for this Bee.
  • I would prefer participants that have active flickr accounts and/or blogs. Only because this is a long commitment and I want to make sure everyone is included and all blocks for each person are received. I want to make sure we have active sewers participating. :)
I am also thinking that we could start in July. Any volunteers for July would be great!! :)

If you want to join, please fill out the below form and we'll get this party started!! :)

Bee Splendid quilting bee sign ups form. 

Much Love!!!

Friday, June 4, 2010

Would Ya?

I was thinking. Dangerous. I know. Still, I was thinking.....

....of starting a bee. A quilting bee, that is. :)

I was leaning towards a modern bee, but you will get to choose your own block and send your own fabric, so I'm not so sure it has to be modern since it will be YOUR quilt. You should be able to choose what ever you want, but in the same regard, you will have to be willing to make what the others want too. :)

What do you think? Interested?

Yes? Super!! Leave me a comment so I can see if there would be enough interest.

This is not a sign up, so no commitments yet...I'm just trying to see if there would be interest. If there is enough (at least 15 people) I will have sign ups on Sunday, June 6th!

Please let me know also, if you are in the states or international. :)

Much Love!!!
Thursday, June 3, 2010

How I Missed You

You don't always realize how much you missed something until you get it back.

I felt that today when I was finally able to get back on my bike and go riding again. It seems like it's been forever. It's not always easy to go. Winter makes it difficult and then there is the issue of just having time to go because the rug rats have to be taxied everywhere. I used to be able to go nearly every day in the warm weather. I'm hoping to get back to that. 

It's amazing how many things you forget when you've been away from something.....
  • I forgot my music. I think I was so excited to go that I just left with out it. Bad idea. 
  • I forgot that it's a good idea to take Kleenex. I won't go into details with that one. You're welcome :)
  • I forgot what bugs tasted like. 
  • I forgot that even though I wore sun glasses, sand in your eyes feels super good. Not. 
  • I forgot just how much I love hills. =/
  • I forgot how amazingly close cars will drive next to you, even when there is no oncoming traffic for them to move away from you. Jerks. 
Now with all of that said, it sounds like I'm complaining or it gives the impression of why on earth would I want to do it.

The things I remembered far out weigh the things I forgot.....
  • I remembered the wind in my face
  • I remembered the rush I feel when gliding down a big hill (praying I don't spin out...lol)
  • I remembered the quiet time. Me time. Time alone with my thoughts. 
  • I remembered the freedom.
  • I remembered that my favourite time to ride is during the hours just before sunset. It's calm (mostly), the sun isn't blazing, and the sky is just beautiful. 
  • I remembered that no matter how tired I am after a good ride, I still feel great! Even with wobbly legs...lol! 
It's good to be back in the saddle again. Yeah, that pretty much sums it up! :D

Much Love!!!

Tuesday, June 1, 2010

Tidbit Tuesday #5

It's Tuesday!!!! :D

Tip #5 Straight Line Quilting

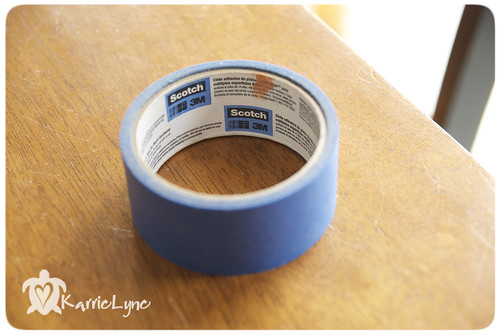
Painters tape? Are we painting? No way Jose!! But...go grab your roll and let's get started. :)

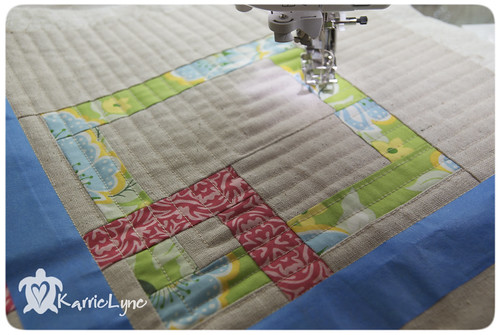
I've gotten a lot of comments and questions on my quilting lately (thank you!!) so I thought I'd give a tidbit of how I begin with my straight line quilting and hopefully answer a few of your questions!! 

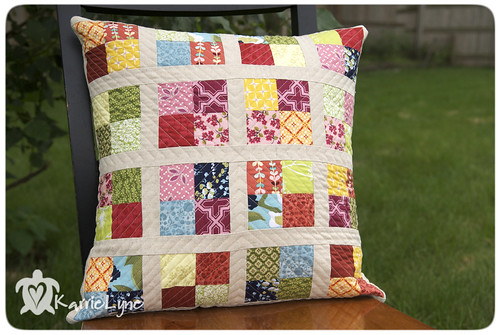
I'm going to be using my Pillow Talk Swap Pillow for the example. It's something fairly small and easy to handle for a practice piece. I would definitely recommend starting on something small, just to get the feel for it. 

To start off, you want to sandwich your quilt, be it mini for a pillow or a full sized quilt. Then pin it, or whatever process you follow, to keep it basted together.

You will want to determine how you will straight line quilt your quilt. Do you want to just travel end to end? Side to side? Or in some sort of pattern?

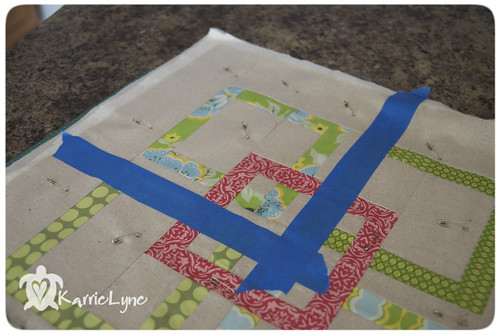
For this piece, with my daughters help, I chose to do "L" shaped lines in each of the quadrants of the quilt.

Find the center of your quilt going vertical and horizontal. (For this piece I used a quilting ruler that was long enough to go end to end. For a larger quilt. I will usually lay the quilt out on the floor and take a piece of yarn and pin it corner to corner of the quilt to establish that straight diagonal line. If you are just quilting vertical or horizontal, where you start doesn't really matter, but going from the inside out seems to work the best.) 

Place the painters tape on the OUTSIDE of that line where you will NOT be quilting.The placement of the tape helps make that first line straight. If you don't have this line straight, none of your others lines will be either. Why painters tape? It won't leave sticky residue on your quilt top, it's fairly easy to use, sometimes more than once, and it's cost effective. I personally do not like to draw on my quilt because I've had trouble getting lines out afterwards. (Any suggestions there would be greatly appreciated!)
Tip #5 Straight Line Quilting

**Note** Before you begin sewing, if your machine allows it, change your needle stop position so when  you stop sewing, the needle stops in the down position. This will prevent your quilt from shifting out of place. 

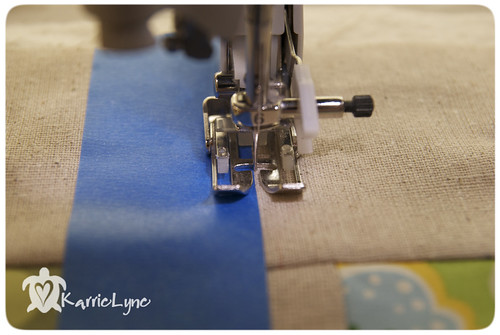
**Note #2** Use a walking foot if you have one. You won't be sorry you did! :)

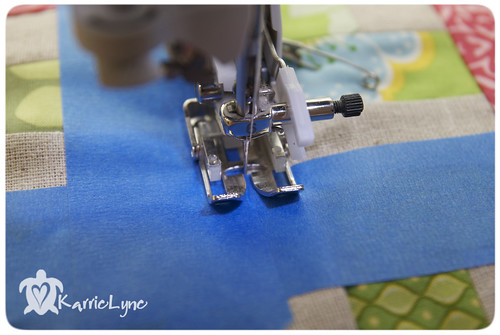
Then quilt right NEXT to that taped line. Be careful not to sew on the tape as it's a mess to remove if it is sewn through, although not impossible, so don't worry if you do. 
Tip #5 Straight Line Quilting
When you get to the corner, stop in the needle down position, lift your presser foot and turn  your fabric. Continue to sew along your taped line. 
Tip #5 Straight Line Quilting
After each row, you will keep going back to the same starting point, only you will move down the fabric as you create your lines. I use my presser foot edge as a guide to move along to keep my lines straight and I will adjust my needle position (left, center, right) to determine the width of my lines.  

Also, keep your eye on the line you will need to turn at and make sure you stop before it. Where will depend on how you space your lines. If you space them 1/2", then you will stop a 1/2" before the line you need to turn at. 

Before you know it, you will have an entire quadrant done and all pretty. :) 
Tip #5 Straight Line Quilting

You will repeat this process for each quadrant using those first two lines you had sewn as center lines, so you only have to place one piece of tape in each quadrant after that. The last quadrant, you won't use the tape at all. :)

I hope this all makes sense. That I didn't give too much information or maybe not enough. Please feel free to ask any questions. I'd be more than happy to answer them and help out! Just make sure you leave your email addy with your comment so I can reply back to you :)

Much Love!!!
Real Time Web Analytics