


Guess What?! It's Tuesday and you know what that means!! :D
We all LOOOOVVEEE our seam ripper, right? *ducks for cover*...hahaha! Ok, so maybe not love it, but it does save us from catastrophes sometimes! Today's tidbit is about how I rip my seams. Um...no... I don't mean the seams in my pants either! =P
First off...grab that fabric that needs to be fixed, meaning the pieces you have to rip. Get Jack too. Who's Jack? Jack The Ripper of course!! ;)
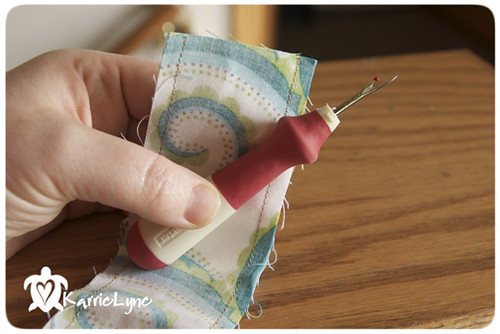
Next, you will hold your fabric flat between your fingers and put Jack to work! Start by taking the sharp tip and sliding it under the second stitch from the left. (If you are a lefty, I assume you would start from your right side). Repeat this for every third or fourth stitch until you reach the end of what you need to rip out. How close together you clip your threads will depend on how loose or tight your stitches are, but this is a nice guide to start with.
**Note: I know this photo does not show me starting at the left hand side, but I wanted to get a shot of how Jack should situate himself for you.**
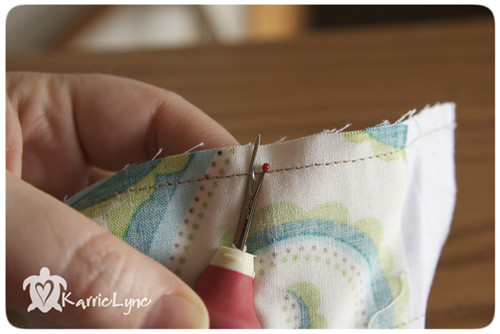
Once Jack has completed his task for you, your seam should look a bit like this...
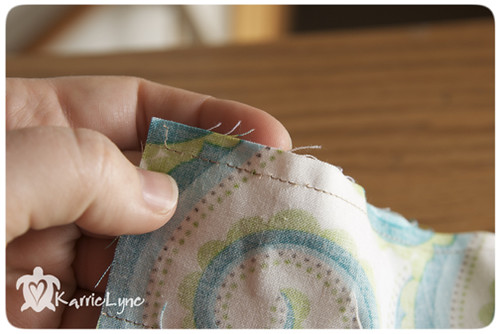
Here comes the fun part!! Flip over your piece, and with Jack's help, pull up the thread from the end you started ripping from, just to get a hold of that thread. Now pull gently. It should come up in one long thread for you!!

Then just separate your pieces and your seam is gone, baby, gone! :)
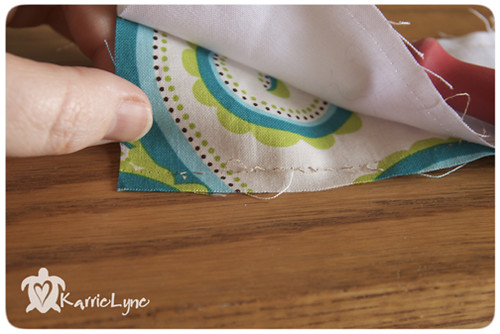
The downside to this is picking out all those tiny thread bits, but the upside is that your fabric will be MUCH less likely to distort and stretch doing it this way!!
It kinda makes you wanna go rip a seam, doesn't it? LOL!
I hope you found this helpful!! Remember, if you have a tidbit of your own, Email me and I'll feature it here! :)
Much Love!!!

Oh gees, I really hate this part of sewing but we all have been there done that!! Love your tid bits!
ReplyDeleteYou know... I was just thinking to myself, "I wonder if I'm doing this correctly OR if someone knows a better way". Seriously!! I have self-taught myself a lot and wonder about simple things like this. Some people have shown me easier ways to do things and I'm like "why couldn't I figure that out". However, it's just because I haven't been shown any other ways. SO, THANK YOU!! This is simple but I appreciate it.
ReplyDelete"Jack" - - - I love it! And that really is a sensible way to use a seam ripper - thanks for the tip!! I'm going to share it with my sewing group tonight!!
ReplyDeleteOne thing I like about visiting with my mom is she helps me rip out my seams. :) I hate Jack the Ripper, he sucks!
ReplyDeleteDepending on the fabric, I use my lint roller to pick up all the little threads. If I think the fabric will bias or end up a mess, I do it by hand, but otherwise, I roll the lint roller on one side and then the other to pick up the threads. I keep one in my sewing toolbox so I can clean up my lap after sewing also!
ReplyDeleteI use a lint roller too. It works great for this and lots of other things.
DeleteI'm a lint roller aficionado as well. They are the handiest little gadgets. One drawback, or so I thought, was that the refills I bought didn't fit my roller so I was using a butter knife as a roller until Hubbs saw me and fixed me up with a piece of PVC pipe the correct size and a tie wrap so it couldn't slide off the end. Don't despair if you find yourself with the wrong size, pipe is likely in your garage !~!
DeleteThanks for doing this. I began doing it this way within the past year (not sure why) but wondered if anyone else did. No I know I'm "doing it right". Plus I had a good giggle today, and will think of you each time I rip now!! Thanks!!
ReplyDeleteI learned that tip awhile back, & it's so neat. I use packing tape to pick up threads. It's cheaper & stickier than a lint roller. I pat it on the stitches. It's also great when you have threads on your design wall, work area, etc Cut a 12" or so piece & hold onto the 2 ends & drag it along what you're cleaning. Threads stick to it like magic. I keep a long piece attached to my desk & hanging down so I can grab it when I need it. I just found your blog & will be subscribing. It's great. .
ReplyDelete